Gluten free- no eat hamentashen!

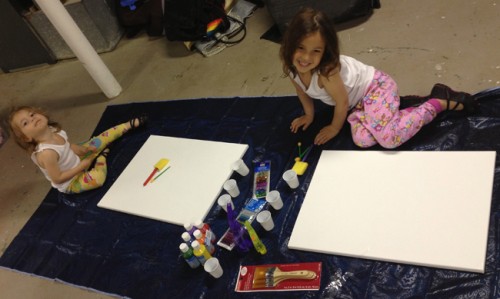
Yesterday I decided I wanted to bake hamentashen with my kids. Hamentashen are a traditional triangle cookie eaten on the jewish holiday of Purim.
Yay me. Mom of the year.
Only one problem.
I don’t bake.
No particular reason why, I just don’t. (Probably has something to do with the clean-up… And sugar, which we try to not use by the cup full.)
Anyhooo, someone recently sent me a link to an etsy shop that sells tiny polymer clay fake foods and inspiration hit.
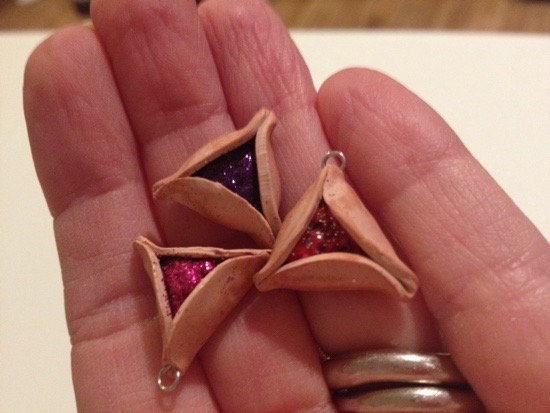
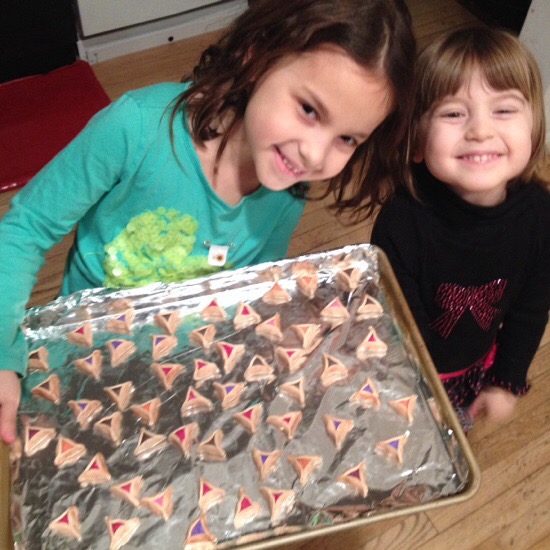
I present:
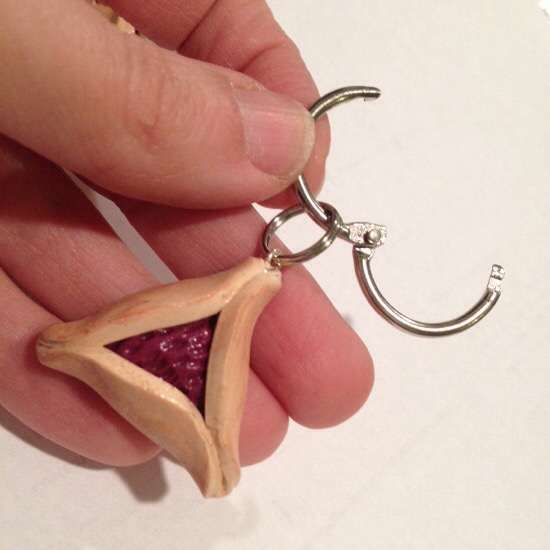
NO EAT HAMENTASHEN KEYCHAINS!

20150225-095451.jpg
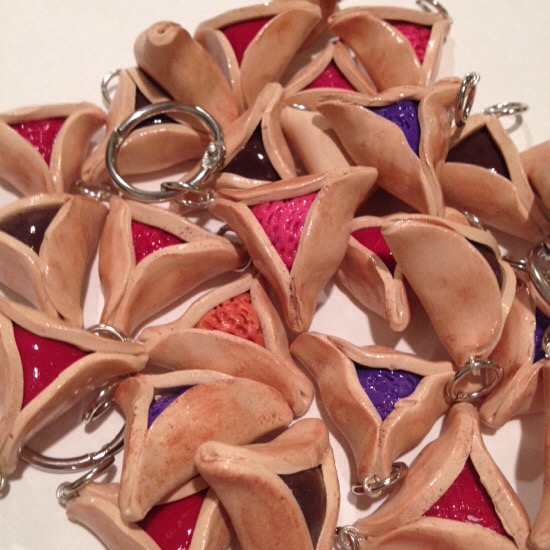
(Like the fruitcake on the goyim, they can never be too hard and they last forever!)
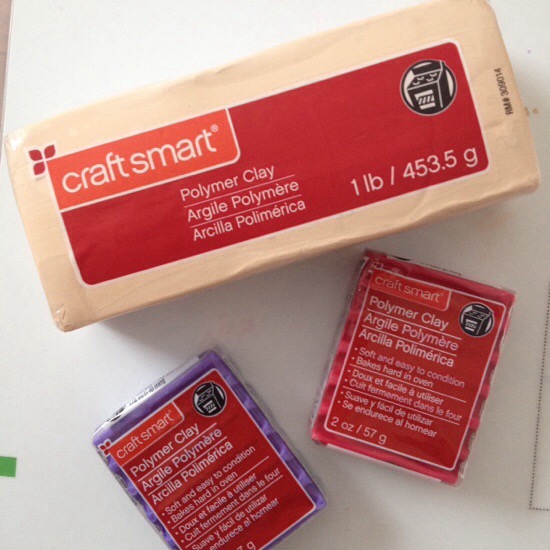
Ingredients:
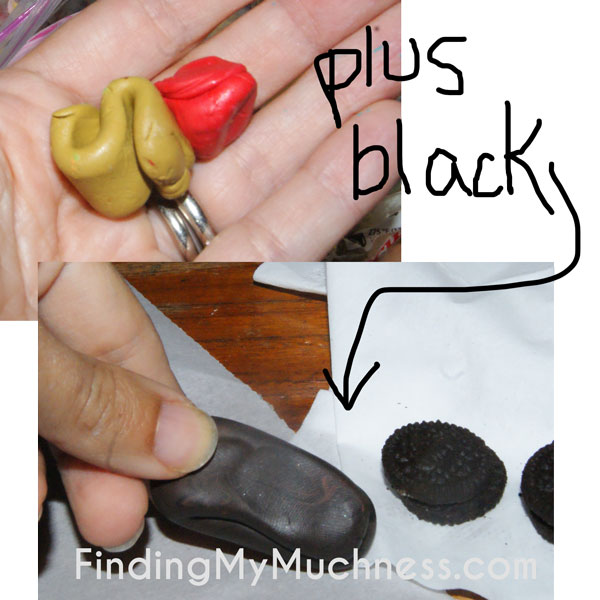
1- large block of beige polymer oven bake clay. (Also known as “Caucasian skin to the doll making population)
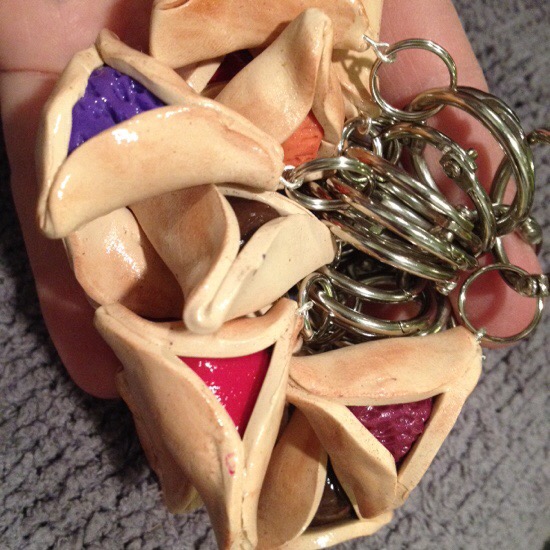
2- small block of red, purple orange, brown polymer clay. Choose whatever colors will work for your “filling” of choice

20150225-102803.jpg
3- brown piece of chalk
4- rolling pin
5- 1.5″ or so round cookie cutter/glass/Prozac bottle
6- aluminum foil
7- cookie sheet
8- jewelry parts
-I loop (I think that’s what they’re called)
-Jump ring
-Key ring

Directions:
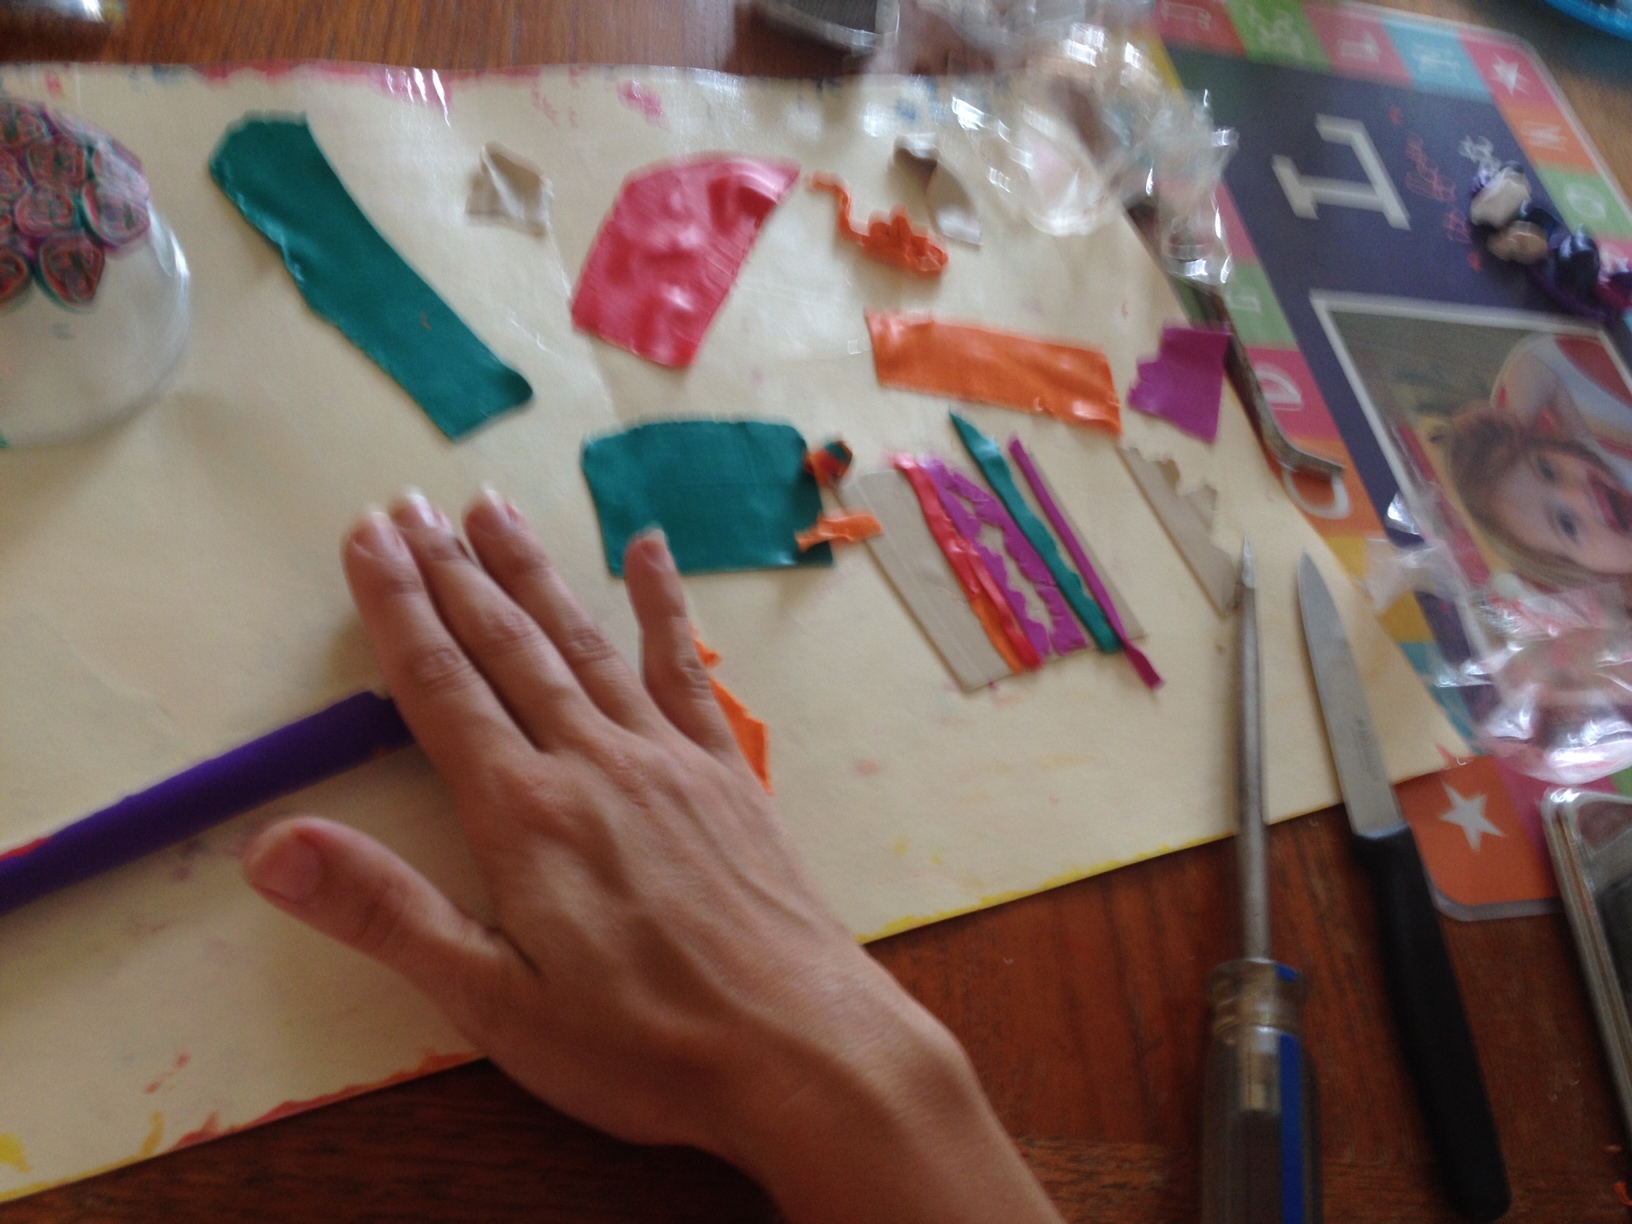
1- roll the skin clay thin but not too thin.

20150225-101125.jpg
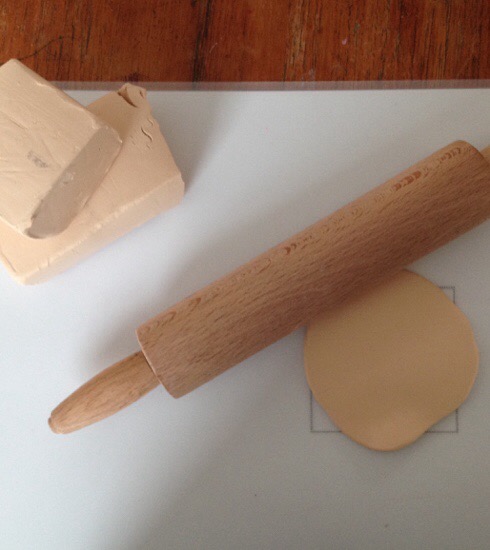
2- use the cookie cutter to cut circles.

20150225-101206.jpg
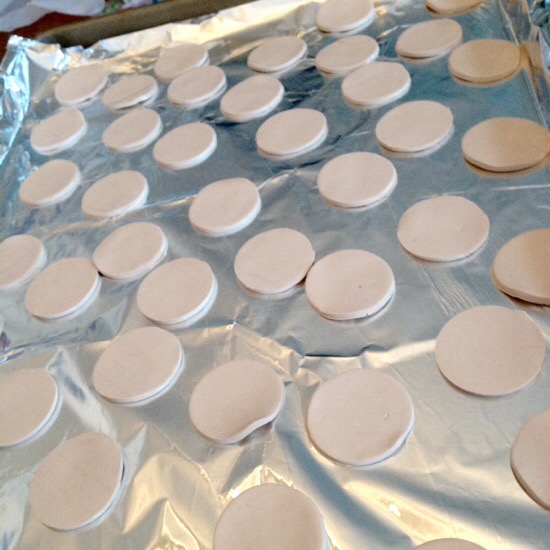
Lay them on foil on a cookie sheet.
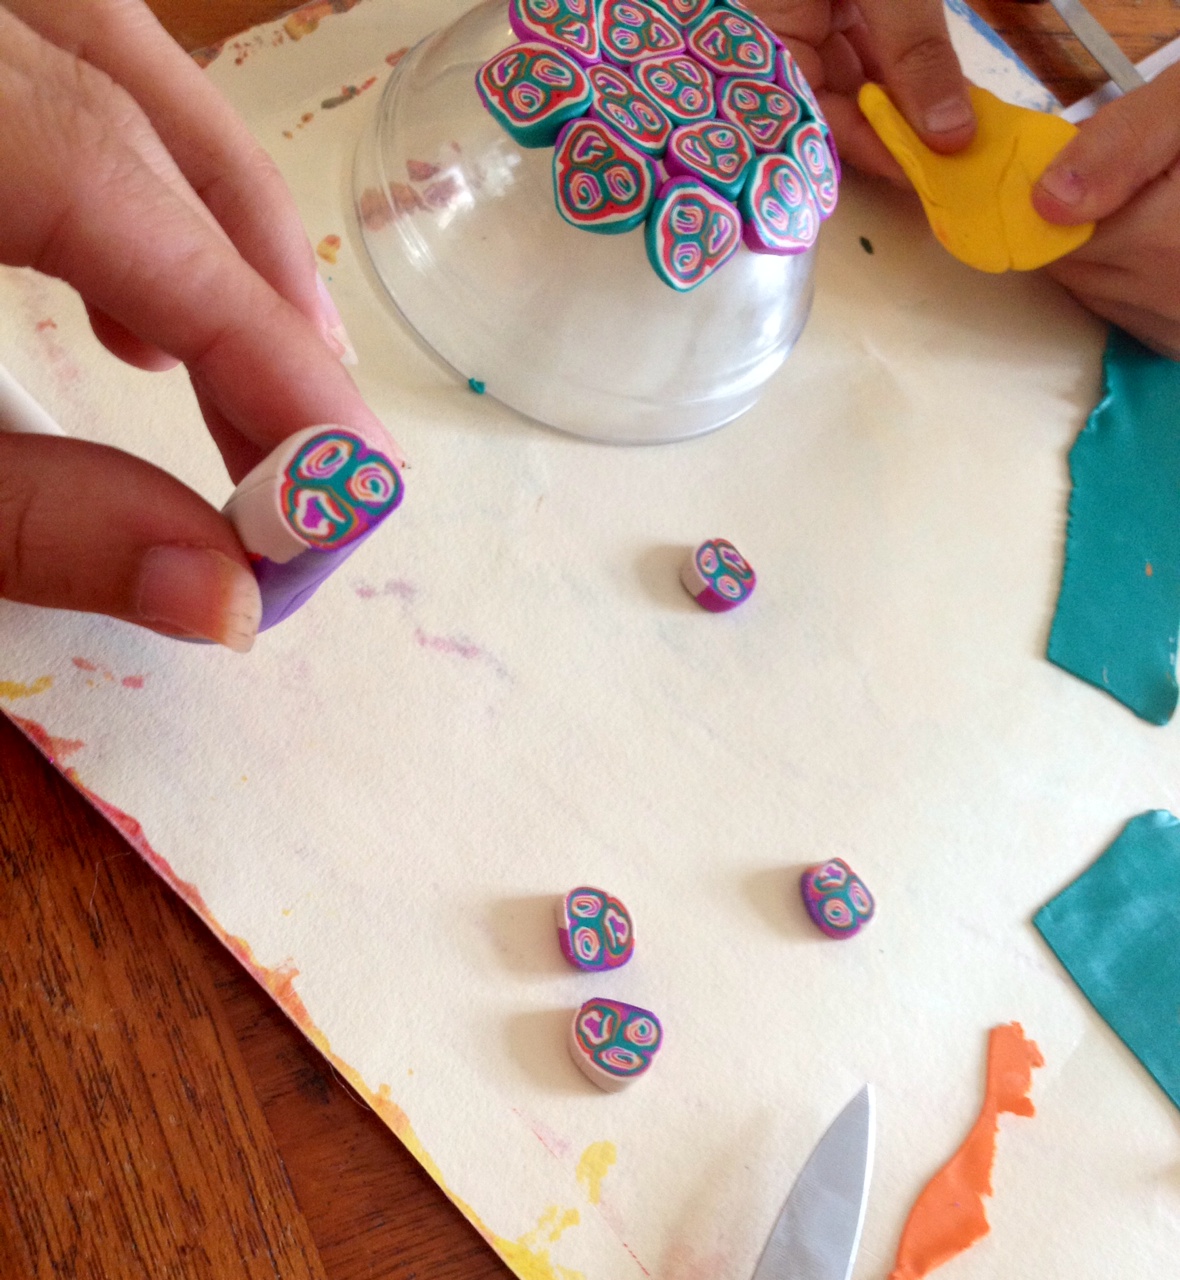
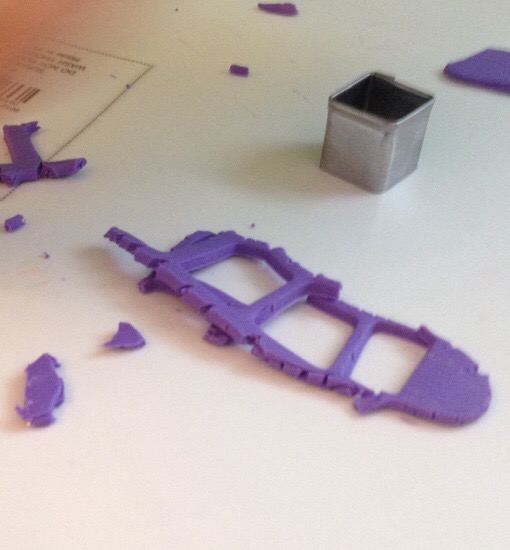
3- roll the jelly colors and make equal sized little marbles. We used a different cookie cutter to get them sized correctly.

20150225-101342.jpg
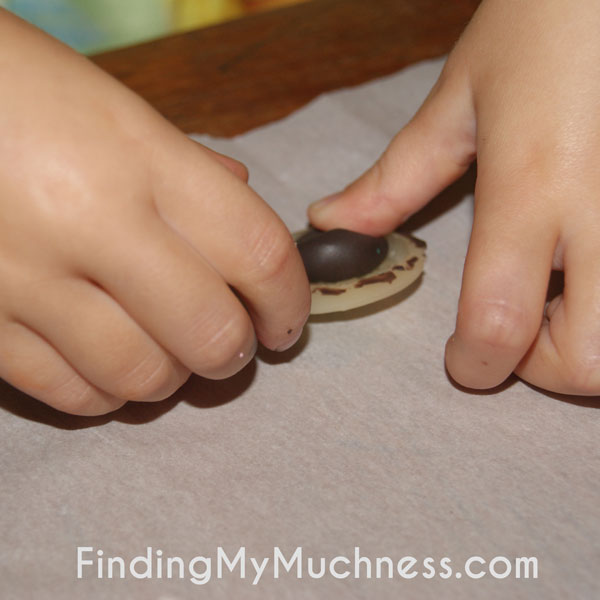
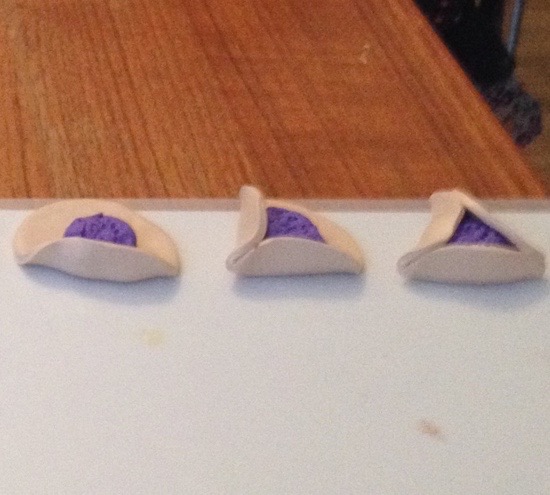
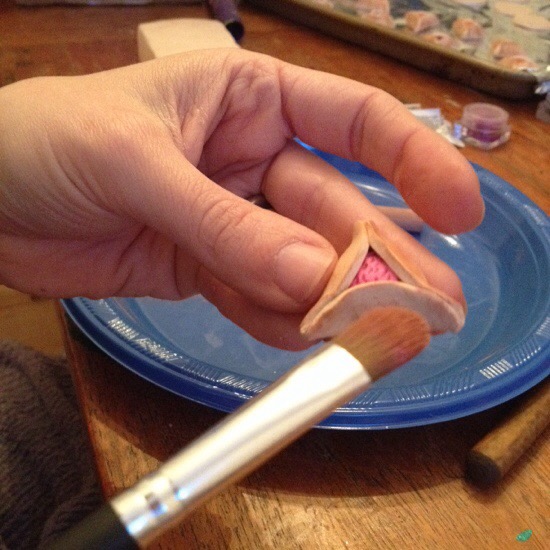
4- form the jelly into a fat lil triangle and center it in the flesh colored circle.

20150225-101556.jpg
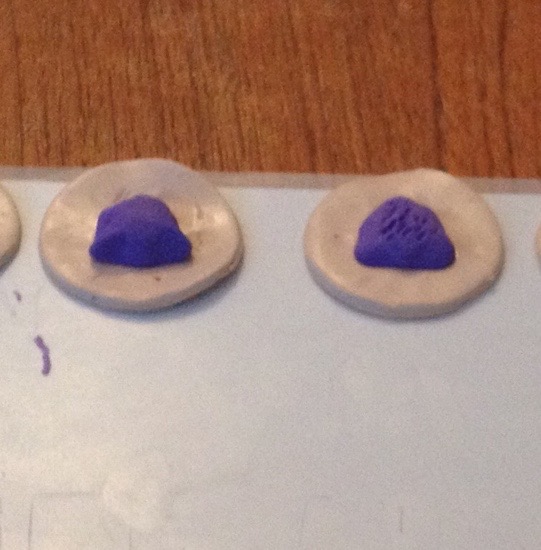
Tap it with a toothpick to add some jelly texture.
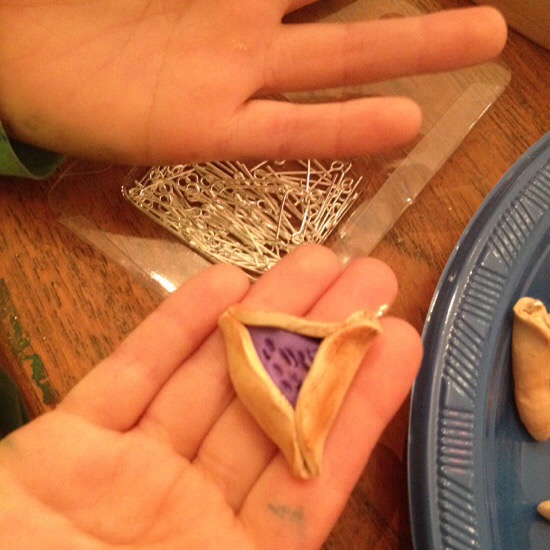
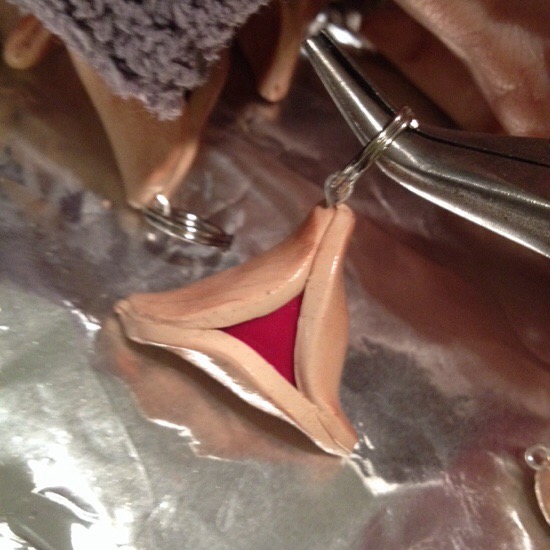
5- fold up the three sides and pinch the corners.

20150225-101739.jpg
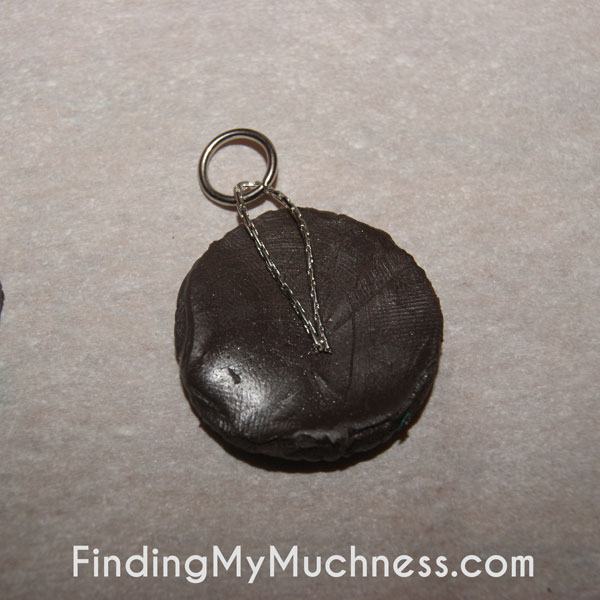
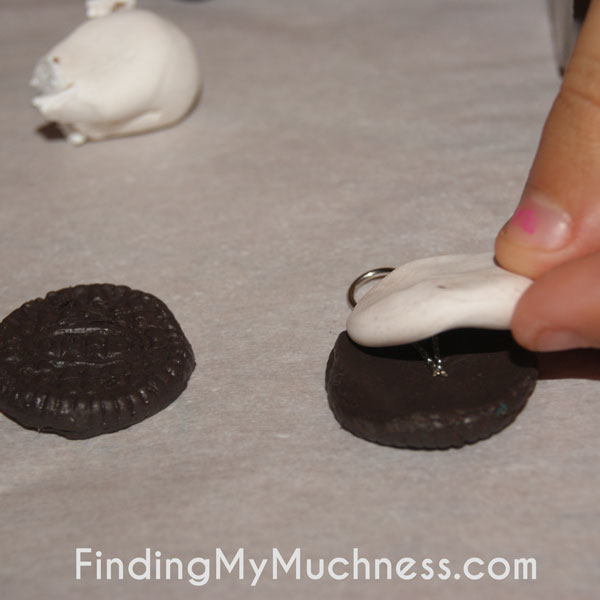
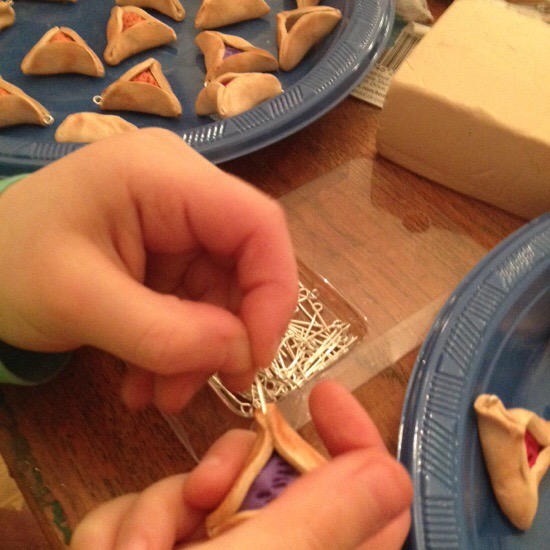
6- insert the I-loops into the tops.

20150225-101830.jpg

20150225-101841.jpg
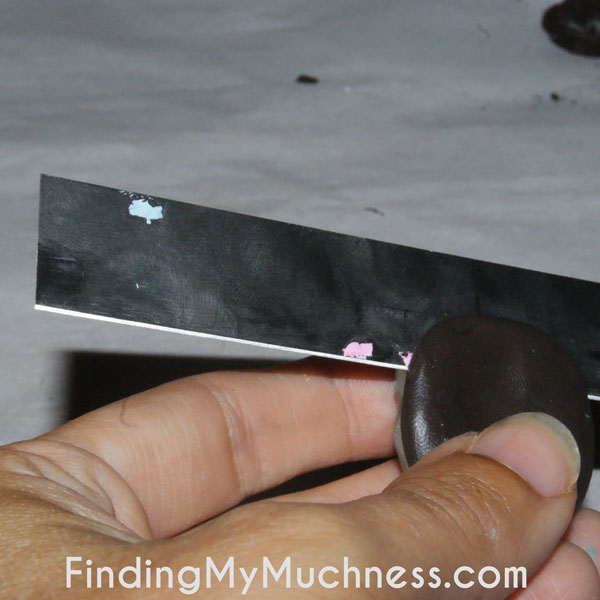
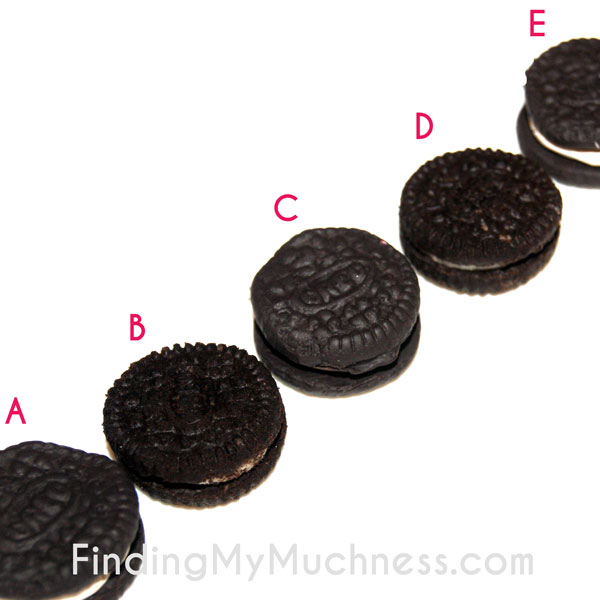
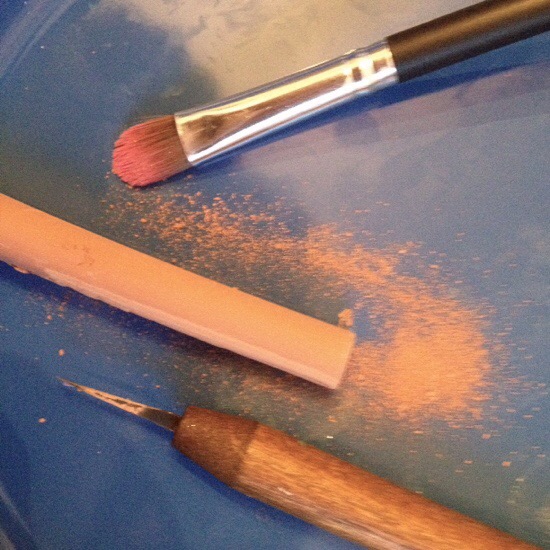
7- scrape the chalk into dust and use an old paintbrush or makeup brush to dust an uneven layer of golden baked goodness on your hamentashen.

20150225-102009.jpg

20150225-102026.jpg
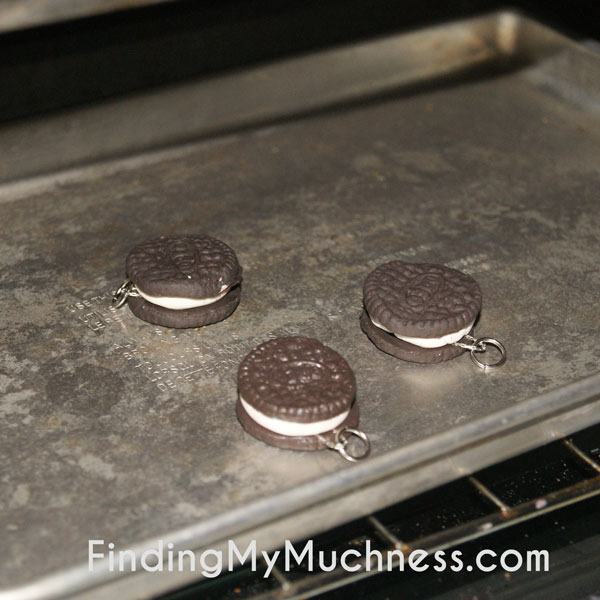
8- bake according to packaging instructions- about 275 for about 15 minutes.

20150225-102127.jpg

20150225-102147.jpg
9- (not shown) after they cool, spray them with an aerosol gloss sealer.
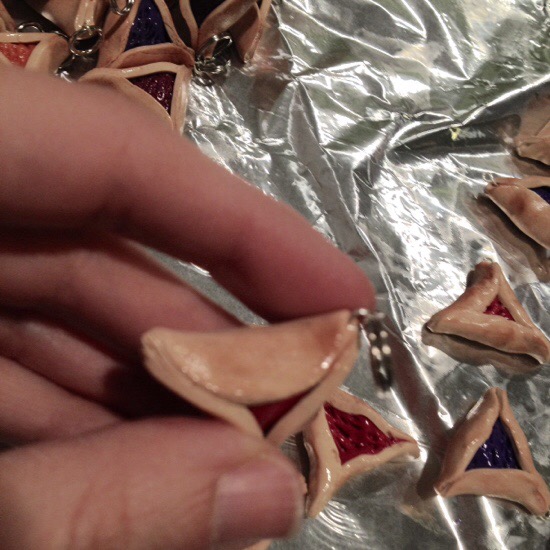
20150225-102247.jpg
…..oh, shiny!
10- apply jump ring + key ring

20150225-102347.jpg

20150225-102357.jpg

KEYCHAINS for the whole class!!

20150225-102919.jpg
11-remind your kids who the coolest mom in town is! (They need constant reminders. I’m certain by the time they are teenagers they’ll totally believe me, right?!?!

PS- last week I made teeny tiny ones that went on necklaces. Same process, smaller cookie cutter.

20150225-103945.jpg

Oreo Charms, Muchness Craft Time!

Two days ago Molly told me that on Monday after school she wanted to make charms. “Quick-n-easy” charms she said, as though this was something we’d done before. (we haven’t) and I immediately thought of  a great little video I saw on YouTube when I was binge watching polymer clay tutorials a few weeks back.

So we made them! Quick-n-easy… and a whole lotta fun too!

Step 1: 

Buy mini oreos. (big one’s’ll work too but those’ll be some mighty large charms- maybe a key chain??)

1

Step 2:

Find a nice, cleanly molded cookie. A lot of them have crumbles or broken edges. Dust away the crumbs and pull apart your oreo. Eat the cream and not as pretty half. Cover the pretty half in clear nail polish.
(You’ll notice mine is covered in color-changing teal nail polish. I’m really bad at following directions.)

2

Step 3:

Cover the dried, pretty half of an oreo with glue gun glue. Do this on a piece of parchment paper so it doesn’t stick to the table.

3 4

Step 4:

When the glue is warm and solid but before it cools fully, pop the cookie out of the mold. If you wait too long the cookie will stick and if you do it too soon you’ll burn your fingers or distort the mold.

5

6 7

Step 5:

Make oreo colored clay. (mine is a mix of black + red + this weird mustard color that was mixed scraps left over from a different project.)

8

Step 6:

Make a ball and shove it into all the nooks and crannies (I know, that is a Thomas’ English Muffin reference. It’s like I’m making a carb salad.) Then cut the excess and carefully remove the clay cookie from the mold.

9 10

Step 7:

Do that twice.

Step 8:

Look through your random jewelry findings box and select parts that would be appropriate for a charm. If you don’t have such a box, just find a precious piece of heirloom jewelry somewhere in your house and disassemble it for parts. Sandwich jewelry findings between layers.

11

Step 9:

Roll some white clay to make the stuffing. Flatten your ball. Make a sandwich.

12

Step 10:

Bake it.

13

Step 11:

Line them up with a bunch of real oreos and make people guess which are which. ….and GO!

15

Step 12:

Blog about it.

Muchness Craft Time!

It has been SO long since I’ve shared a craft here. I’ll bet so many of you don’t even know I do crafts. I do. I totally do crafts. Sometimes, I even write horrible poetry about the crafts I do. Because, why not?

Before I share this craft with you I just want to say for the record that when Molly turned 4 I made her an awesome Disco themed party and totally planned to blog all about it and share the pictures of the disco balls the kids made. It was total Muchness. I never shared the pics. She’s six and a half.

OK. That’s been weighing on me. Now that I got it out of my system, maybe I’ll share it… eventually.

Moving right along….

I cleaned out my garage and basement! It started as part of the curriculum of my 8 week Finding Your Muchness After Babyloss program… sort of a “clearing the clutter” part of the program,  but quickly escalated to an all-out call-your-uncle-and-beg-him-to-help-you-get-the-shit-out-of-your-house event.

It culminated in this beautiful sight:

Nothing like the feeling of dumping 500 lbs. of trash in one fell swoop.

But during the clear out I found my stash of FIMO clay from back in my college days!

I loved that stuff. I used it to sculpt some masterpieces…. with which to smoke from.

photo 4

(Nicotine products only. What?!?!?!?  —seriously- everyone thought I was a pot head because I…well, I’m not sure why – any ideas? But I totally wasn’t. I thought it was stupid to use drugs in order to act “cool” or”weird”… I was totally those things already! Score! As an adult, I know better. )

Anyhoooo, Molly wanted to do a project and she and Liat were tired of totally ruining my patio while I recorded the horror in parental pride.

So I pulled out my fimo and the pasta maker that went with it and we got to work:

photo 3


photo copy

Then, Molly had the brilliant idea of filming us doing it! …but sadly, the mic on the camera wasn’t working… which in one way was good because it saved me the headache of having to edit the whole video for you. I just slapped it up on The YouTube as is, seeing as it was beyond repair anyway.

So, look at the pretty finished bowl!!

photo 1-1 photo 3-1

It’s missing a “tooth” at the top, but we think that just adds character.

Following this project, Molly asked me to use an entire $45 gift card she received for her birthday to buy an assortment of FIMO clay for her to make more stuff with.

I gladly obliged. So much better that than more Hello Kitty crap to fill my house. Though, she could probably make her own little Hello Kitty Figurine to match the little Kero Keroppi one I made sometime before the turn of the century. photo 5

Of course, hers won’t have smoking paraphernalia shoved up its butt.

Weekend Muchness Project. Paint will set your MUCHNESS free…

When Molly was three we bought a copy of the movie Annie. The kids watched it, as kids do, over and over and over and over again. Molly know the songs backwards and forwards and sung them under her breathe or in whispered hums in the back of the car. If anyone acknowledged her singing, she immediately stopped.

Nine or 10 months later a local group was putting on a production of Annie and I decided to take Molly. She was excited to be going somewhere special with me but didn’t really know what to expect. She perched on my lap with her back straight to get the best look and when Annie came out, boldly and clearly singing the opening lyrics of “Tomorrow” Molly spun around in my lap and, eyes wide, exclaimed “She has an AMAZING voice!” – those words, out of a four year olds mouth, with that much passion- I loved it.

From that day on, Molly would belt out tomorrow at the top of her lungs from the backseat of the car. Or, in the shower, or living room. It was like she’d suddenly been granted permission to use her voice. If only as adults we just needed that little bit of reassurance, right? A few weeks ago, I saw a YouTube video about this 5 year old painting prodigy, Aelita Andre. The beautifully artistic video of her gracefully yet playfully painting in her studio made her appear etherial and angelic.


I think what was so compelling to me about it was that she was just doing what she wanted to do. No rules, no worries about using too much paint or making a mess or getting it wrong or staying in the lines…. the kind of freedom that only a child can capture without trying. So this weekend, I showed Molly and Liat this video and asked if they wanted to do it too. Like the singing, I knew that seeing someone her age express herself so freely would inspire Molly, who has a tendency towards shyness and has been known to freak out if she colors outside the lines. They were psyched. I printed out my Michaels 50% off Memorial Day coupons and we took a family trip to the craft store. before Then we went down to the basement and got busy! Here’s a “before” pic and video of the action. I loved making this video- It made me laugh out loud doing a “knock-off” of the very serious vid above.

Truth? As the girls painted, it was hard to stop myself from offering guidance or directions. I wanted to say “Try it this way” or “Don’t mix those colors together” but I didn’t. I just let them go for it. I put out the paint and I put out the glitter and I let them figure it out. It was so tremendously relaxing and so amazing watching them just explore the paint, the colors and their creative freedom. I wanna do this. Maybe together with some friends, some wine, and some music, this would be a totally amazing way to tap into a Muchness that has been feeling stifled for far too long…. Who’s in? 🙂

Muchtastic ABC Chart – DIY – (And Day 22 of My Headshot Challenge! :) )

So here’s how it began, back in 2011,

I was in the dollar store, that place is like a 7th heaven.

I’m always finding stuff that others might see as trash,

For me it looks like tiles to redo my backsplash!

Sitting on a shelf looking really quite distressed

were these wooden cubes with photos, I was really not impressed.

But then I saw the sticker, it was 3 frames for one dollar!

“you cant just leave them here!” I heard my brain a’hollar

So I took a set of three, and put it in my cart,

but I couldn’t just stop there, had to listen to my heart.

So I took another set, then another and one more

And when I turned around, I had cleaned out the whole store!

So I brought my purchase home, and stacked them by the treadmill,

Where that sat, and sat , and sat.

(Clearly, the threadmill got no use either. But anyway…)

And then one day it hit me, just clear out of the blue

I would make an ABC chart that sparkled and was cute!

Glitter paper I selected that everyone would want

and by computer I designed it, it’s all about the font!

I printed out the letters, backwards and to size.

then spray mounted them to cardstock, and I can tell no lies-

that cutting it was tedious, I had to use a blade,

but in the end I love  it, though my fingertips were frayed.

The frames I put together with a staple gun and tape.

it held it all together and I’m pretty sure it’s safe.

I laid out all the colors and arranged them out just right,

did I mention when I did this it was always past midnight?

But finally it was complete, I will admit I’m proud.

Sharing it on my website is the closest to a crowd.

That I can show and ask “You like?” and hope to get some comments,

(I have nothing to rhyme with “comments” but am leaving it there anyway, hint hint.)

My kids they love it and they point and sing the ABC’s

And in the daytime all the glitter brings me to my knees. 🙂

So thanks for reading all about this project I completed.

If you wanna, I’d be happy, just to know it’s tweeted!


Easter arrived. 30 something years plus one week late.

Yesterday, I went with the girls and Elie to an Easter egg hunt at my friends house. Having grown up in an orthodox Jewish neighborhood, and going to an orthodox Jewish school my whole life, you can understand why I was well into my teens before I ever really had any good friends that were not orthodox jewish friends, or even, not Jewish friends at all. But as an adult, I get to make my own decisions and a big one for me is welcoming and appreciating and absorbing the diversity that life has to offer. And yesterday, that diversity took the form of an Easter egg hunt. I was an Easter egg hunt virgin. The closest to egg painting I’ve got is looking longingly at the egg tie-dye kits in the supermarket and wondering if they make the egg inedible.
We had a great time and it was nice to spend the day with friends and meet some new ones.

20120416-083412.jpg

20120416-083436.jpg

20120416-083509.jpg


In related news, I often wonder if there is something pathological to the fact that I love to dress these girls alike.

20120416-085906.jpg
But then my eyes remind me how stinkin cute they are and how excited Molly gets to wear the same thing as Liat and how much easier it is to get them dressed when Molly is excited to wear the same thing as Liat and then I wrap all the way back around to how stinkin cute they look and tell that annoying little voice in my head to kiss my ass.

May The Muchness Be with You

A few weeks ago was my 7 year old nephews birthday party!!! My sister is going all kookie with this Star Wars theme. Apparently, he’s obsessed.

About a month before, she asked me to make the invitation. um hmmm:

Two weeks later, she called me up to ask me to figure out how the kids can make their own light sabers. So, I went with her to the art store, got some acrylic sheets,  some fancy double stick tape, and some flashlights and we figured out how a room full of 7 years olds can make light sabers:

And then, it occurred to me this morning I don’t have a gift for the kid. I thought about running to Toys R Us and getting a Star Wars themed Lego set, but everyone’s gonna do that and I like to think myself a little more creative than “everyone”. So, I decided to stop thinking about him and procrastinate till the last minute and go instead to Christmas Tree Shops and see what kinda pink, sparkly Valentines Day crap they had for sale that week. It was disappointing. I must’ve been a little late to the party. Everything was pastel and covered with bunnies.

But anyway.

As I strolled the aisles talking myself out of buying every random knick-knack I never knew I couldn’t live without, I came to the Picture Frame aisle. Now, I always troll the picture frame aisle and think “Oh, I could spray paint that and glue some rhinestones on it and make it super cute….. one day. I’m not in the mood to spend $4 and add more clutter to my basement today.”

And then inspiration hit and I decided to buy my nephew a picture frame and mini photo album.

Behold:

I mean, what 7 year old boy would not be thrilled with this???

Well, I brought myself down to the basement (AKA: MUCHNESS COMMAND CENTER) and commenced, the Muchification!

 The Album

Grab Star Wars images from internet:

print onto iron-on paper and get moving!

The Frame

Spraypaint: (I just happened to have some black chalkboard paint lying around the house. Who doesn’t??)

Decoupage the art:

Yes. I framed the frame with a little sticky backed glitter foam. YES, I know he’s a boy. He’s cool like that. 🙂

The Bonus

Midway through printing my iron-on, my ink started to fade. That paper is expensive! and so is the ink! I didn’t wanna just trash it. Hmmmmm…

Muchy Problem Solving!

I cut off the bottom, rounded the edges and put it into the home-made card!

Presto! The most magnificently muchtastic Star Wars custom made birthday gift EVER!

PS- FYI,  I totally made fun of my sister for going over-the-top for this shindig. Molly’s 4th birthday is in two weeks. I could not help myself. It is going to be a disco extravaganza. So sue me.

DIY MUCHIFICATION VIA GLITTERFICATION!!

I recently discovered a whole host of blog posts from crafty folks about how to muchify (my word, not theirs) stuff with glitter and mod podge.

Like clothes:

or bags:

or other bags:

or lampshades:

Or Sexy shoes:

or supercool sneaks:

Click on any of those pics to go to the tutorials but the technique is basically the same. Mix glitter and mod-podge 1:1. Paint it where you want it.  INSTANT MUCHNESS!!!

I CAN’T WAIT TO TRY THIS!!!!!! I HAVE A MILLION IDEAS ALREADY!!!!