
I’ve been doing a lot of crafty stuff lately.
On my long to do list is sharing them with you because frankly, they’re cool and original and they make me happy to make so they’ll increase my happy to share. So here’s one:
A few posts back I mentioned how I was painting on my front lawn and one of my oldest friends in the world whom I’d lost touch with randomly walked by.
She invited me to her daughters upcoming bat mitzvah. When we met her daughter was wearing a t-shirt that said “sparkle is my favorite color”, so ya know, my people.
I thought about what’s a good thing to give a 12 year old girl that she’ll really appreciate (besides cash) and decided that something sophisticated and unique and personalized would be what I’d want and since I basically have the same tastes as a 12 year old, I got to work.
Since I don’t know her kid at all, I based my idea on the small bit of knowledge I did know about her, and that came from the design of the invitation:
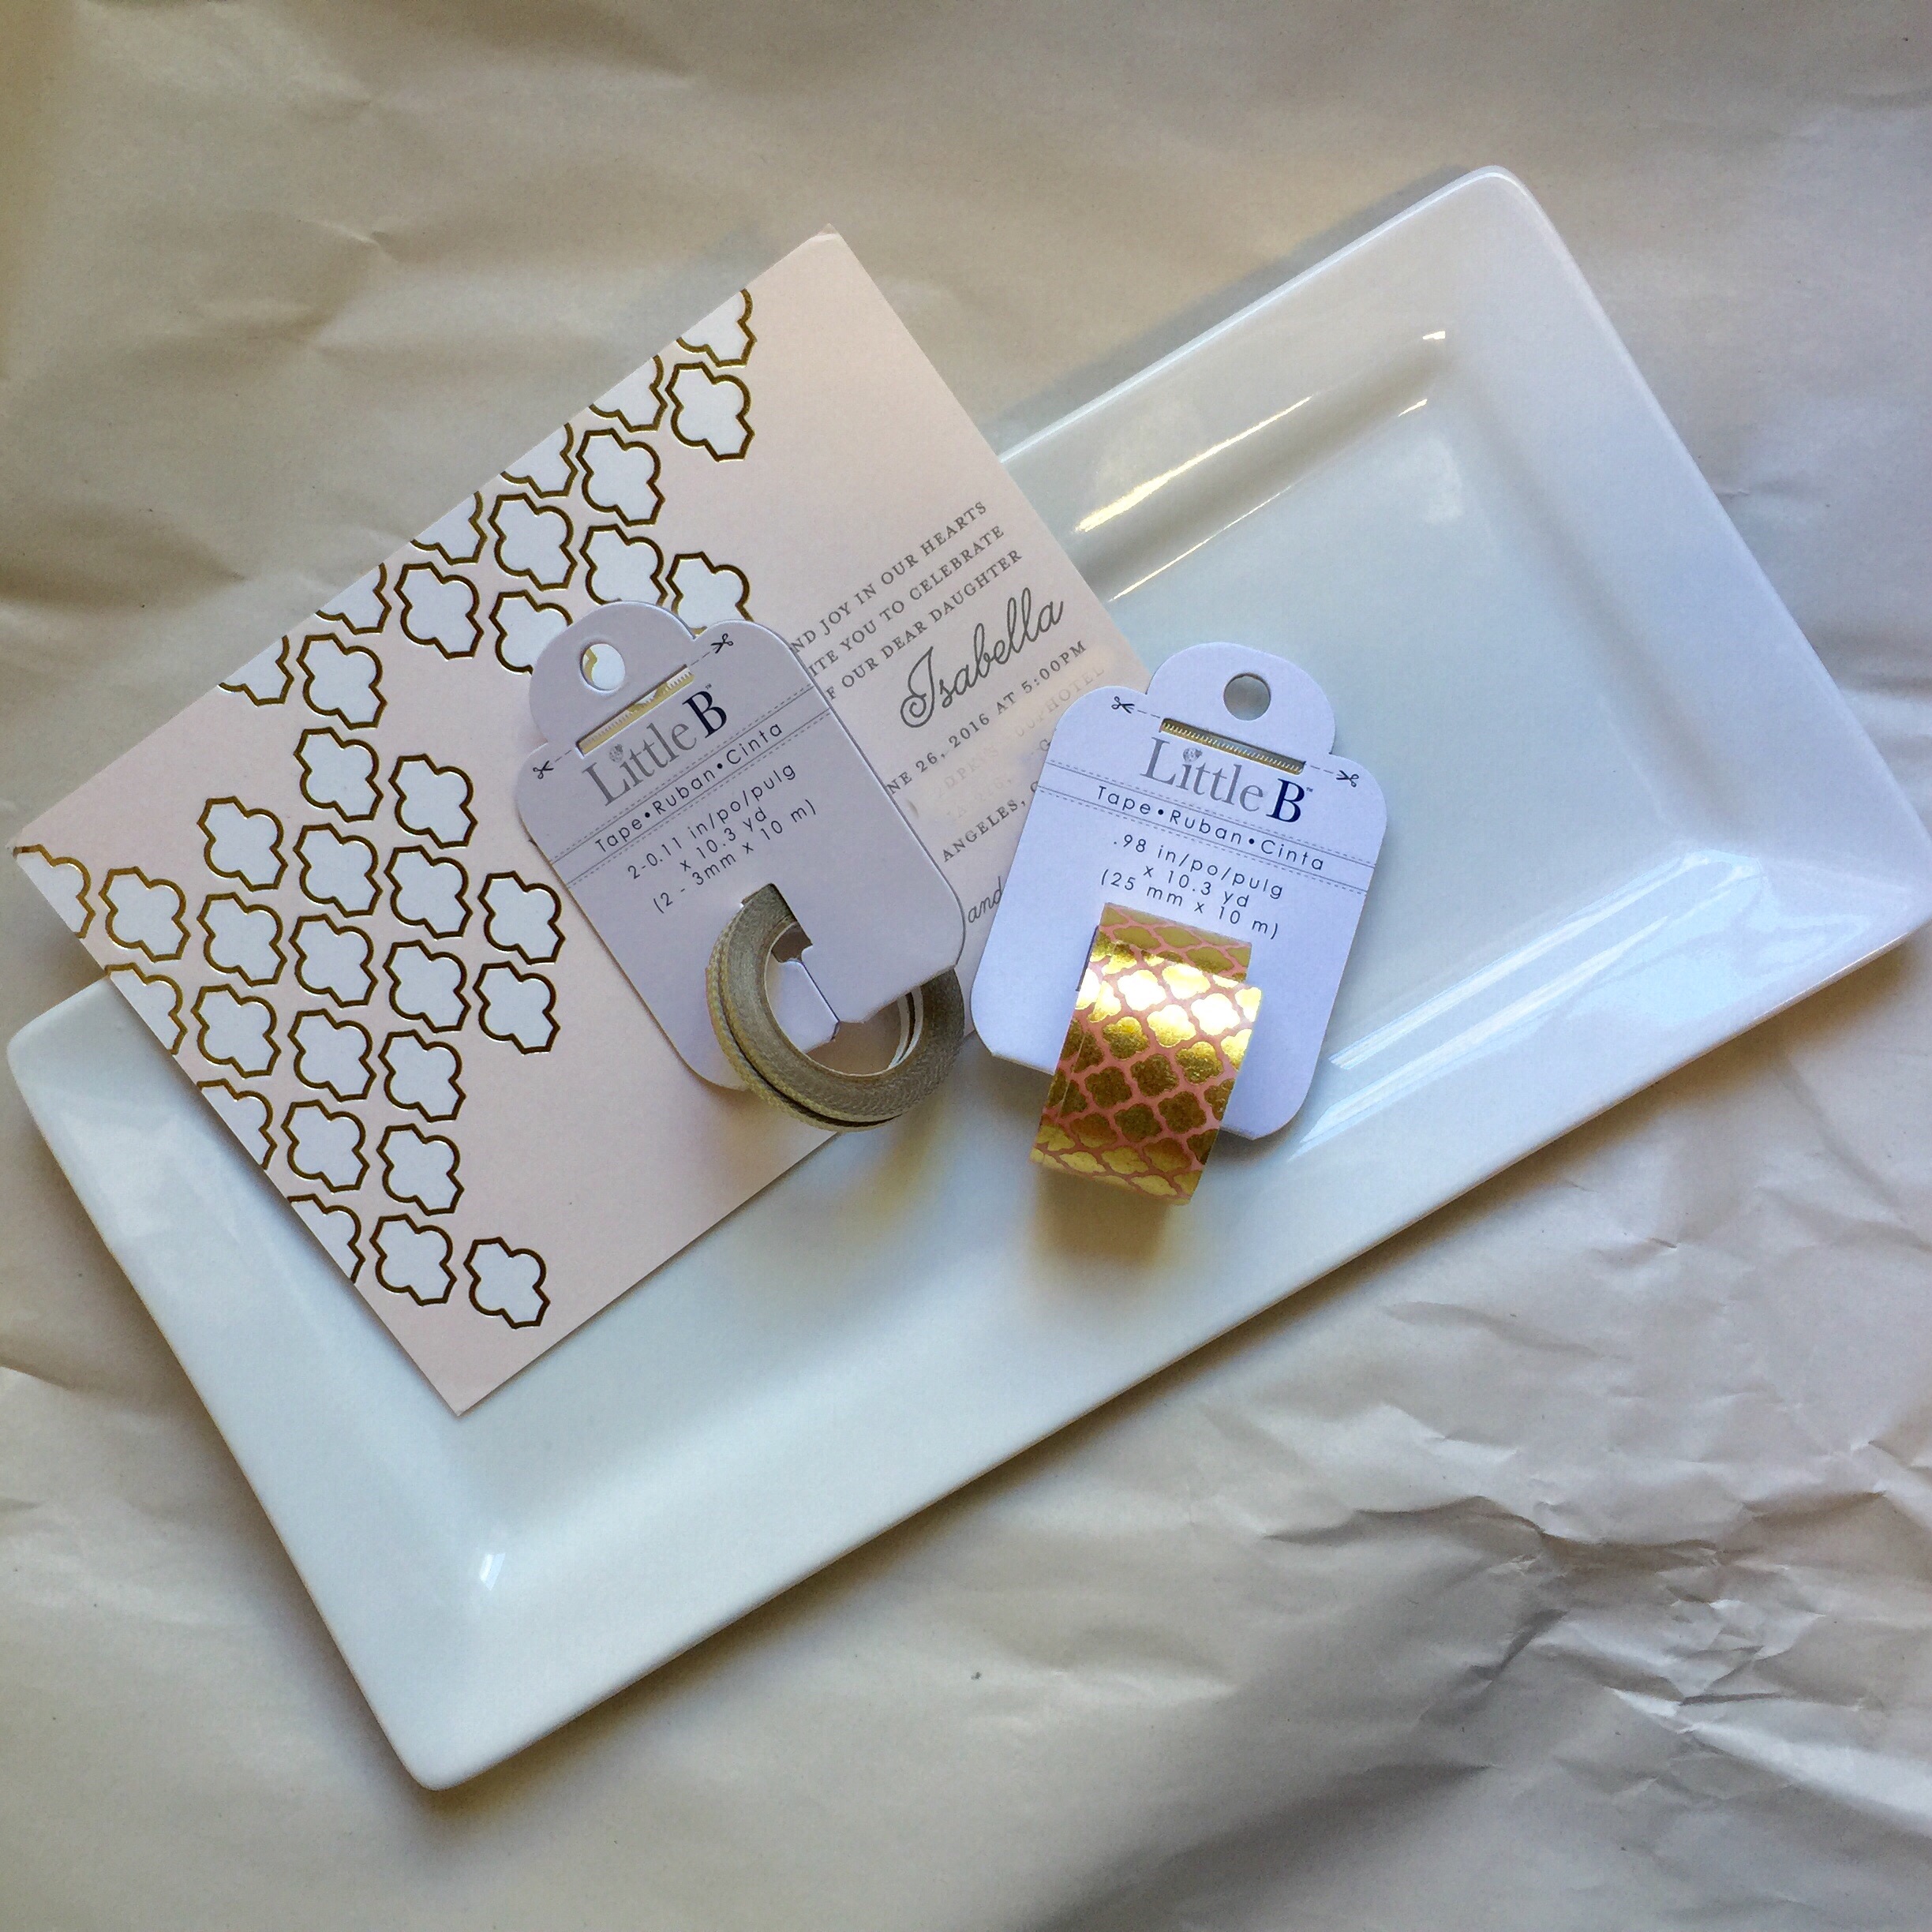 Shockingly enough, I already owned washi tape in similar colors and with a similar pattern to match her invitation.
I also happened to have a lovely yet simple white ceramic candle/trinket tray, still wrapped from a gift I’d rec’d but didn’t really have a great spot for.
Excellent. Let’s get started.
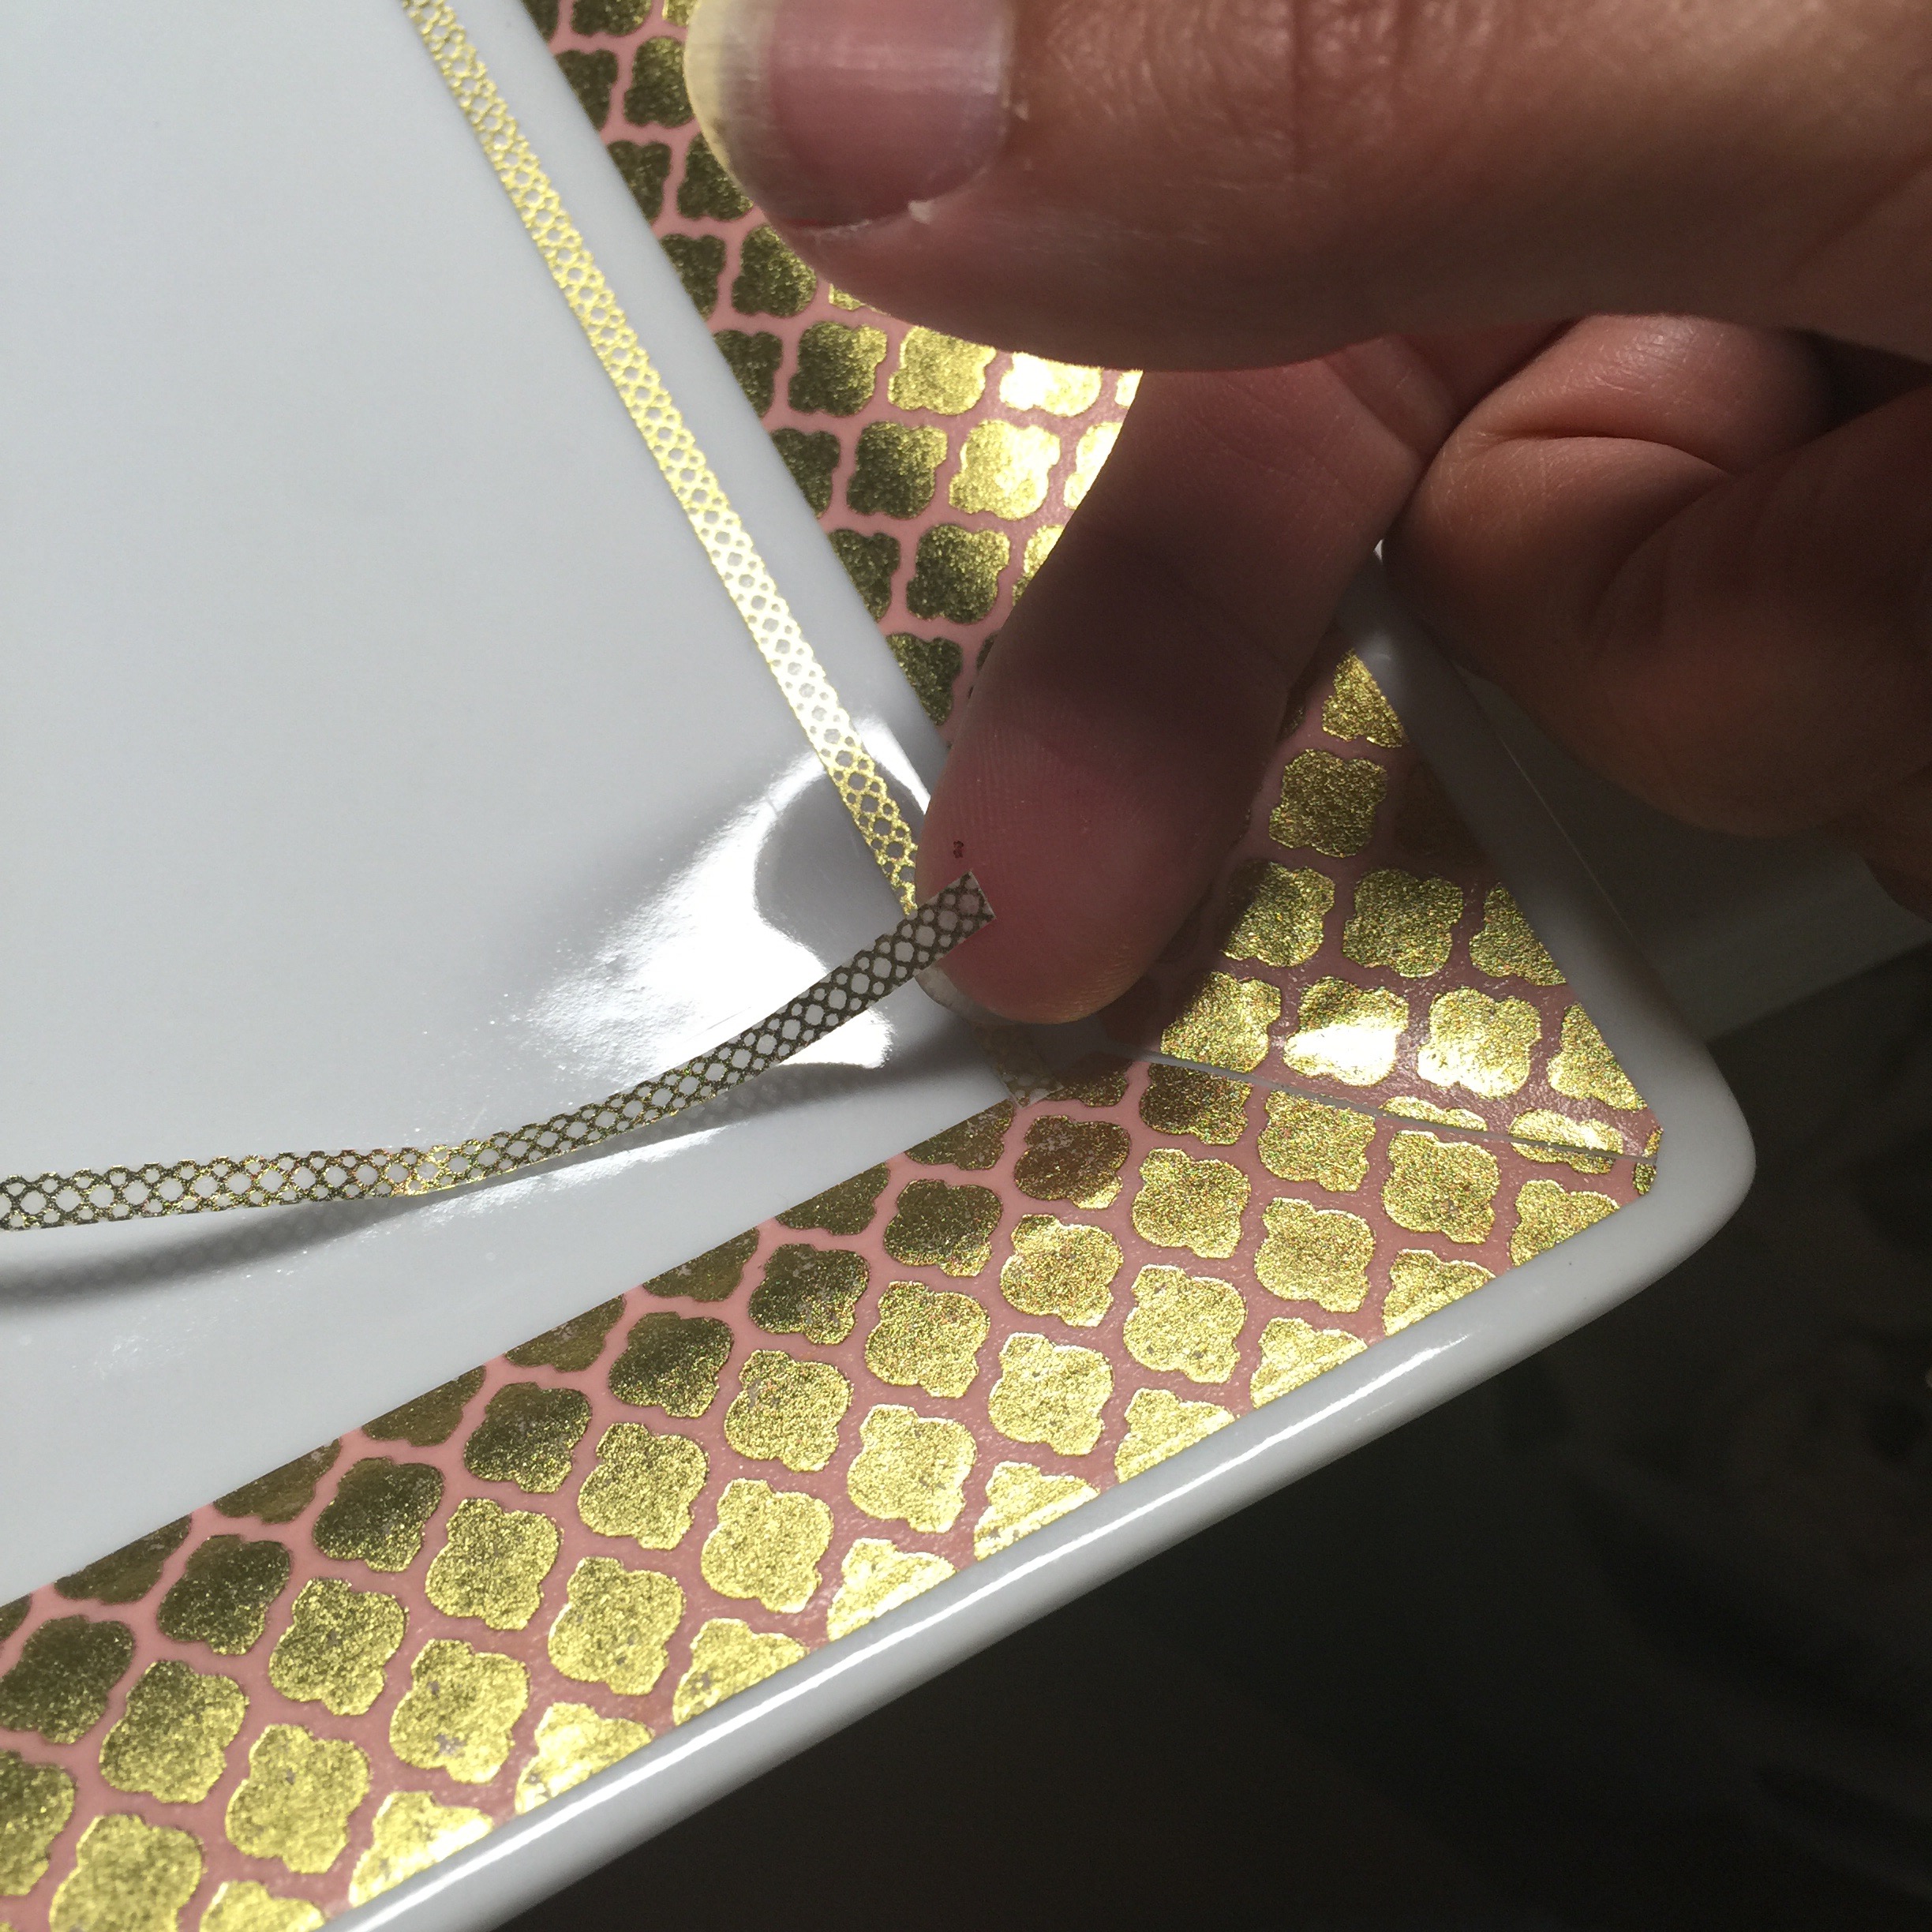
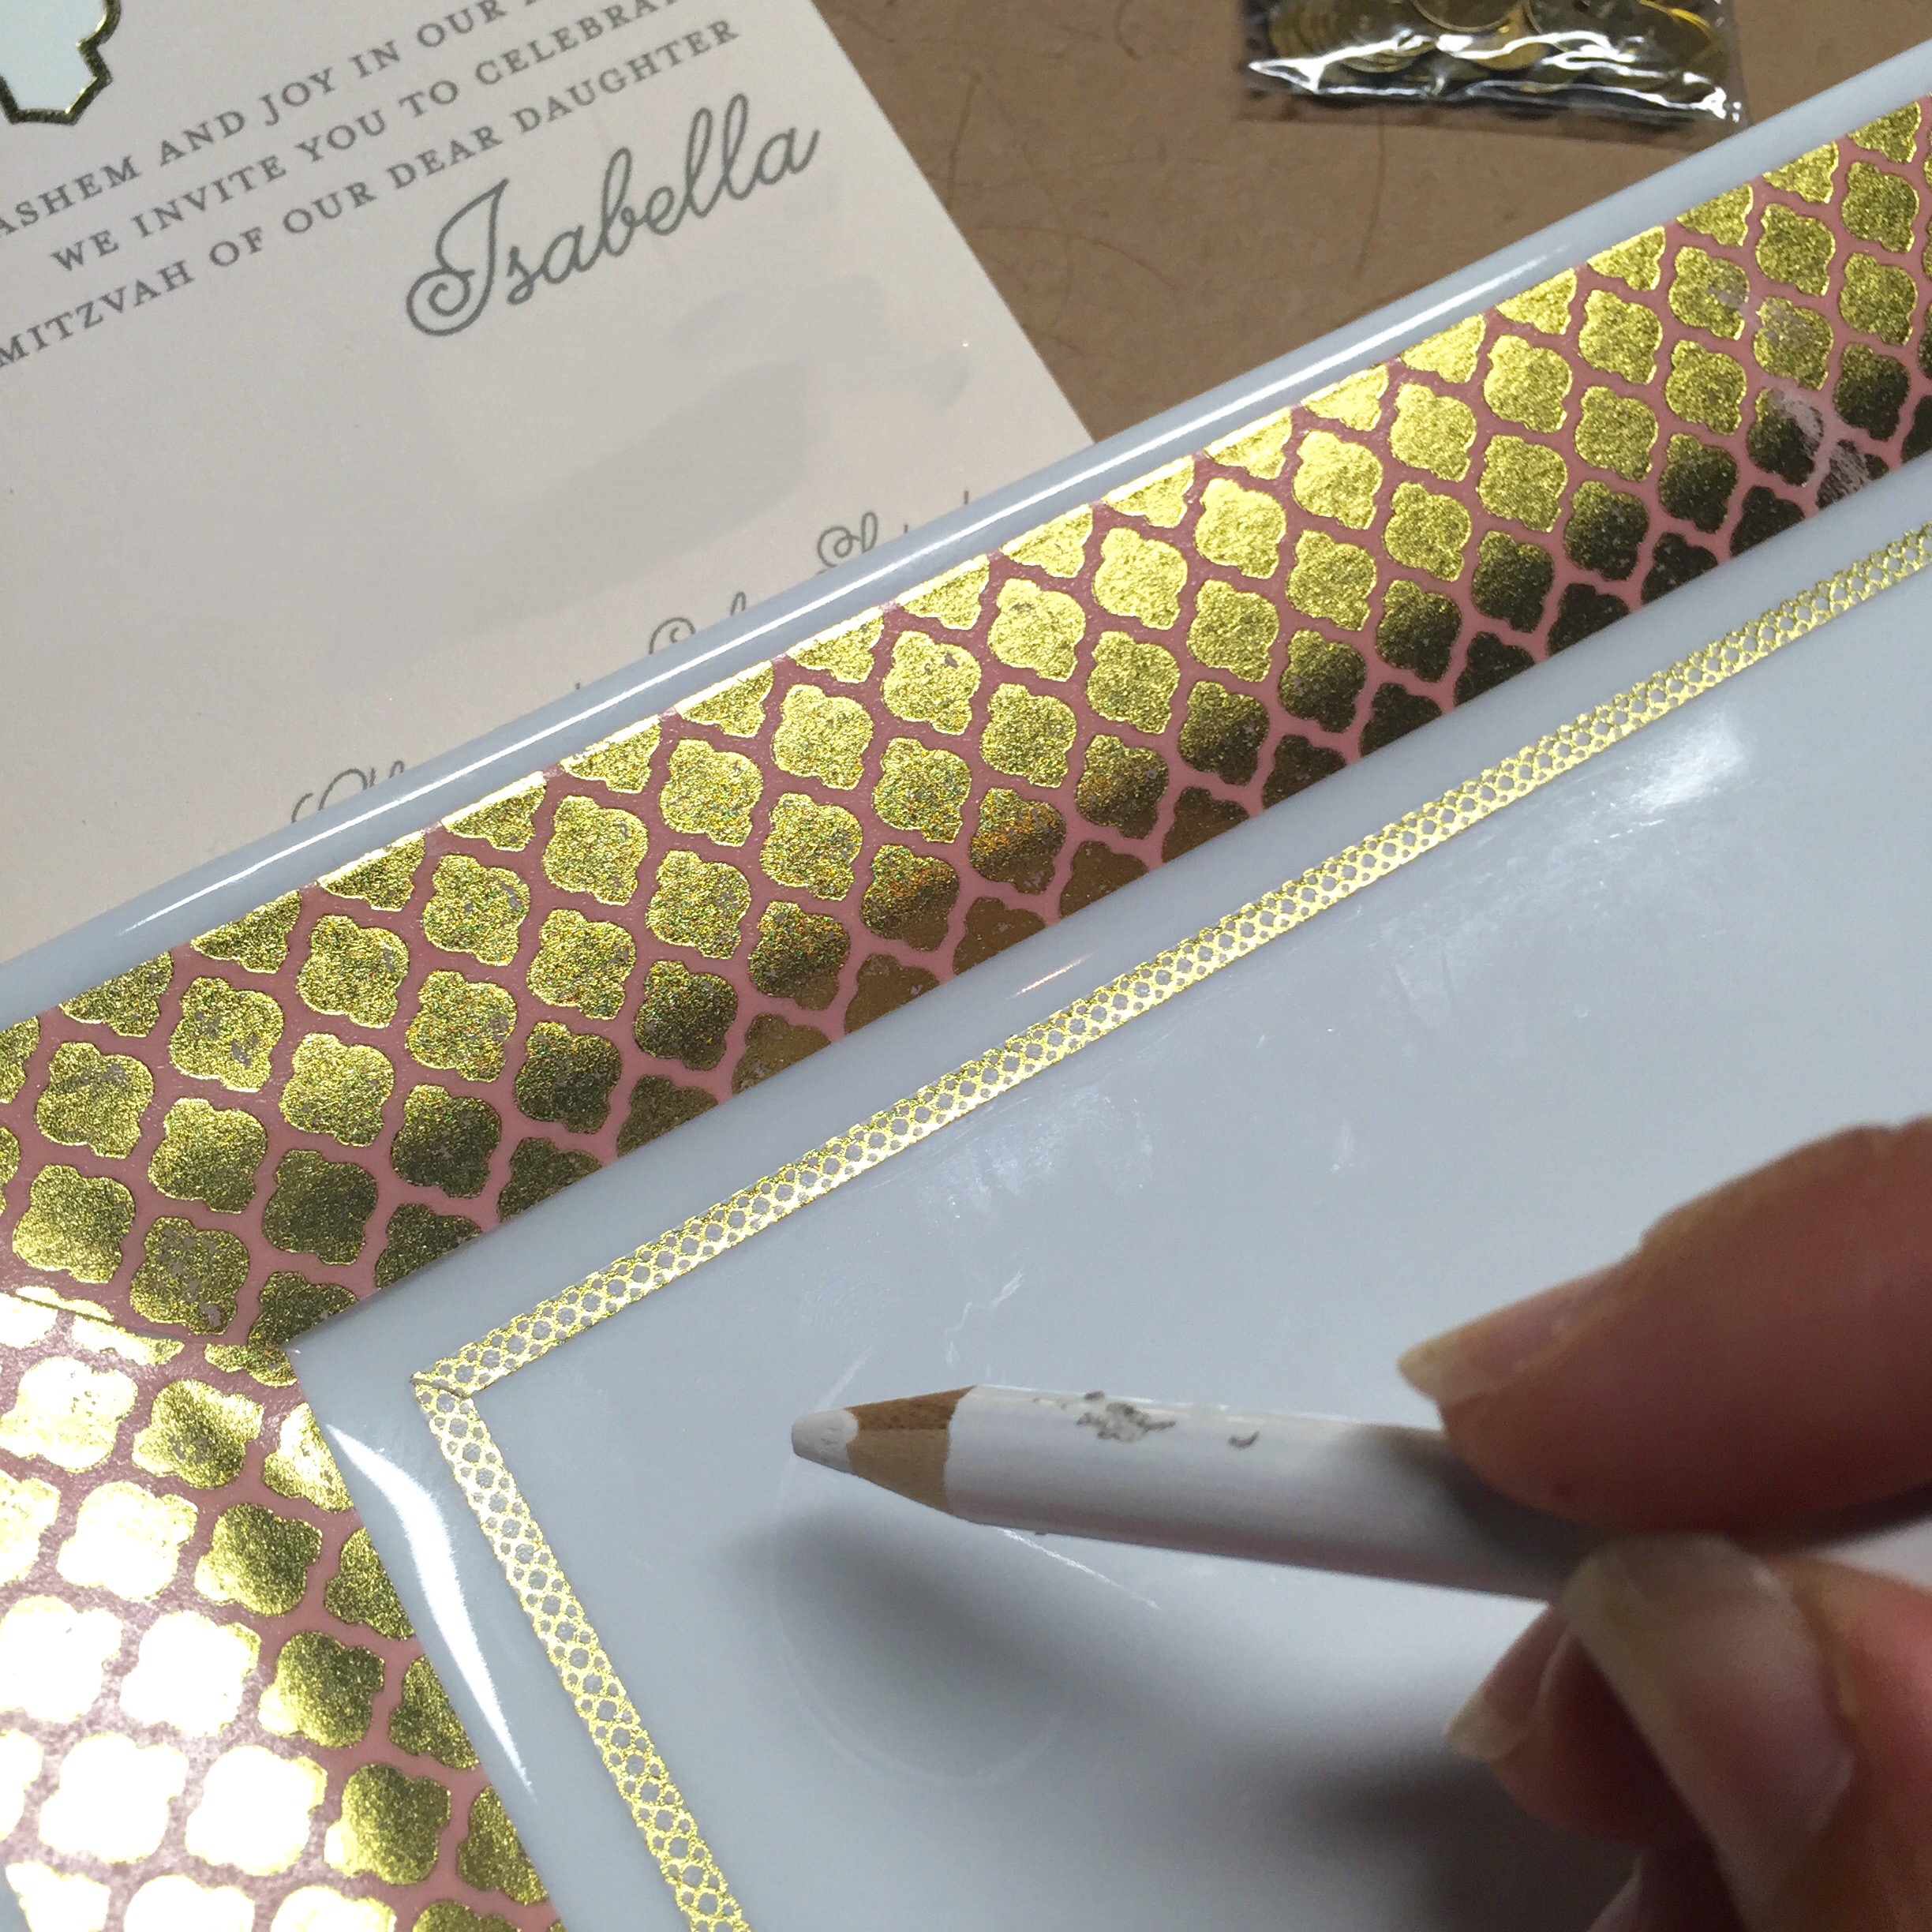
First, I laid the wide washi tape around the four sides. After that I laid the skinny washi tape about 1/4 in from the first washi tape. Sorta a layered look.
Some technical notes:
I made sure to leave a reasonable sized border of plate on the outside edge of the wide tape. This helped the the tape conform to the curves of the plate without having to work too hard.
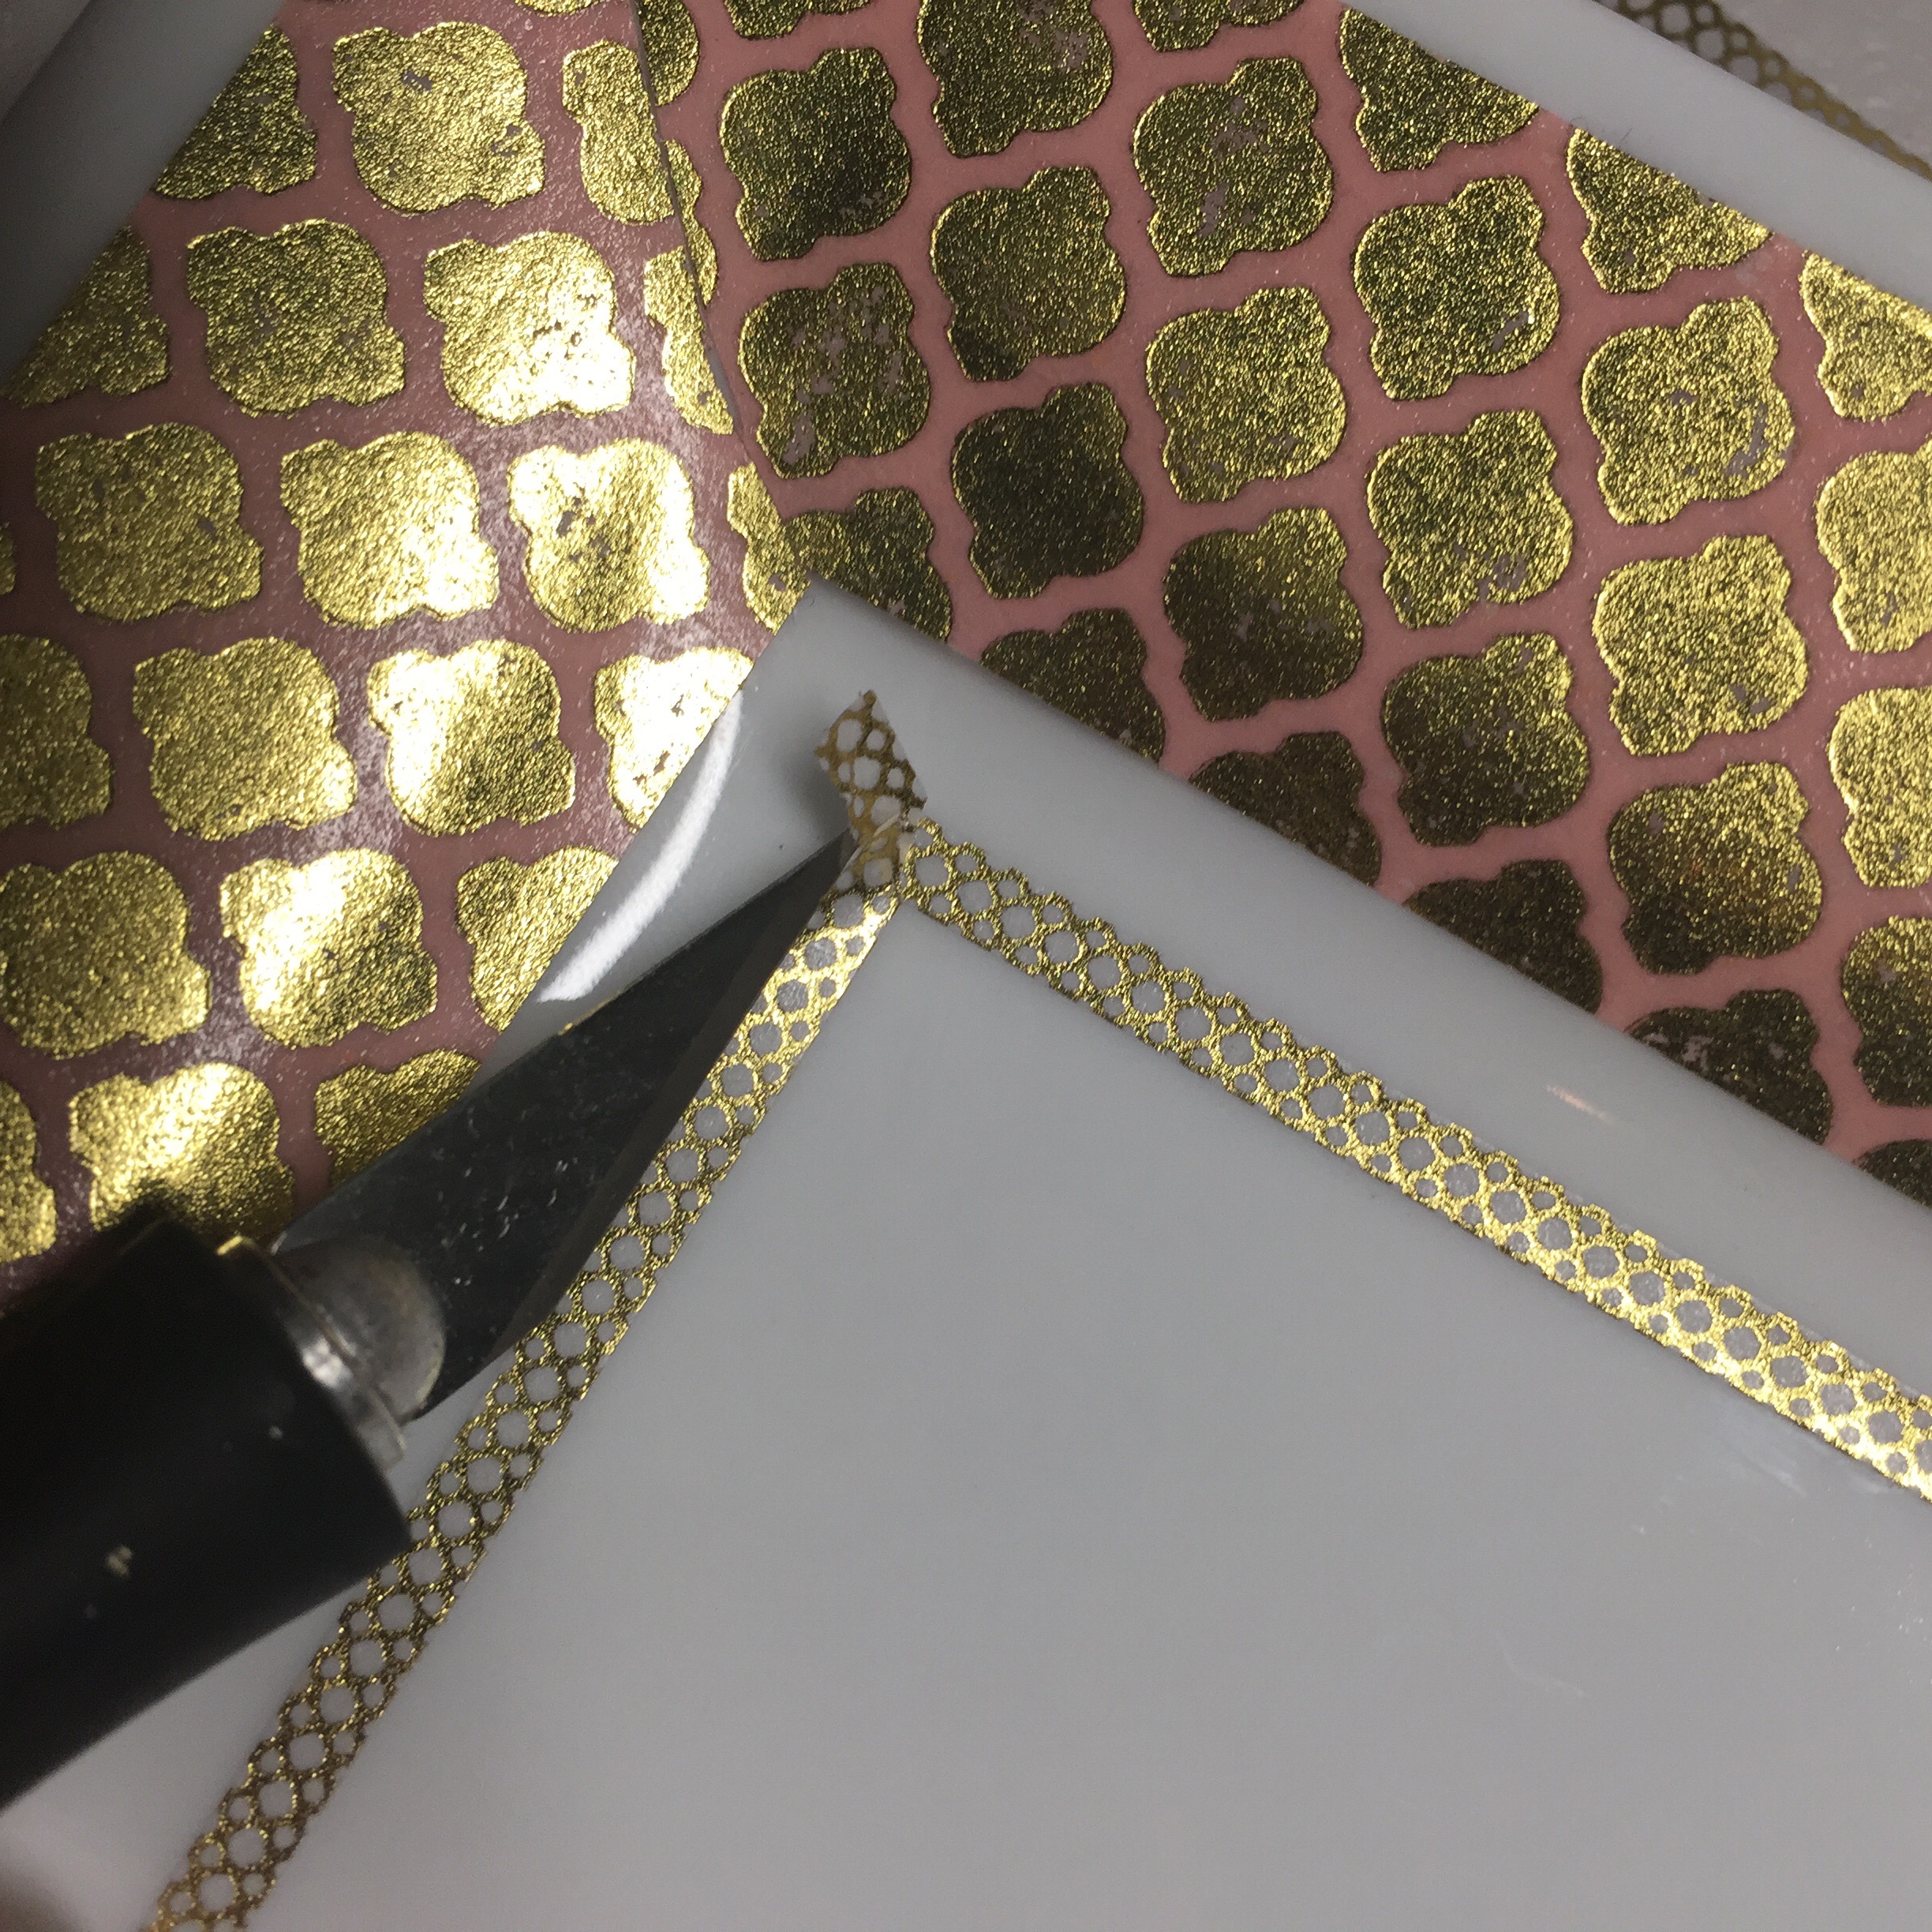
I created those mitred corners really easily. I laid the tape edge to edge in each direction and then just sliced through both layers from corner to corner.
Here’s a pic of me doing it w the skinny tape:
What was unexpectedly cool was how much the tape looked like it was part of the ceramic, especially the tape with the white background.
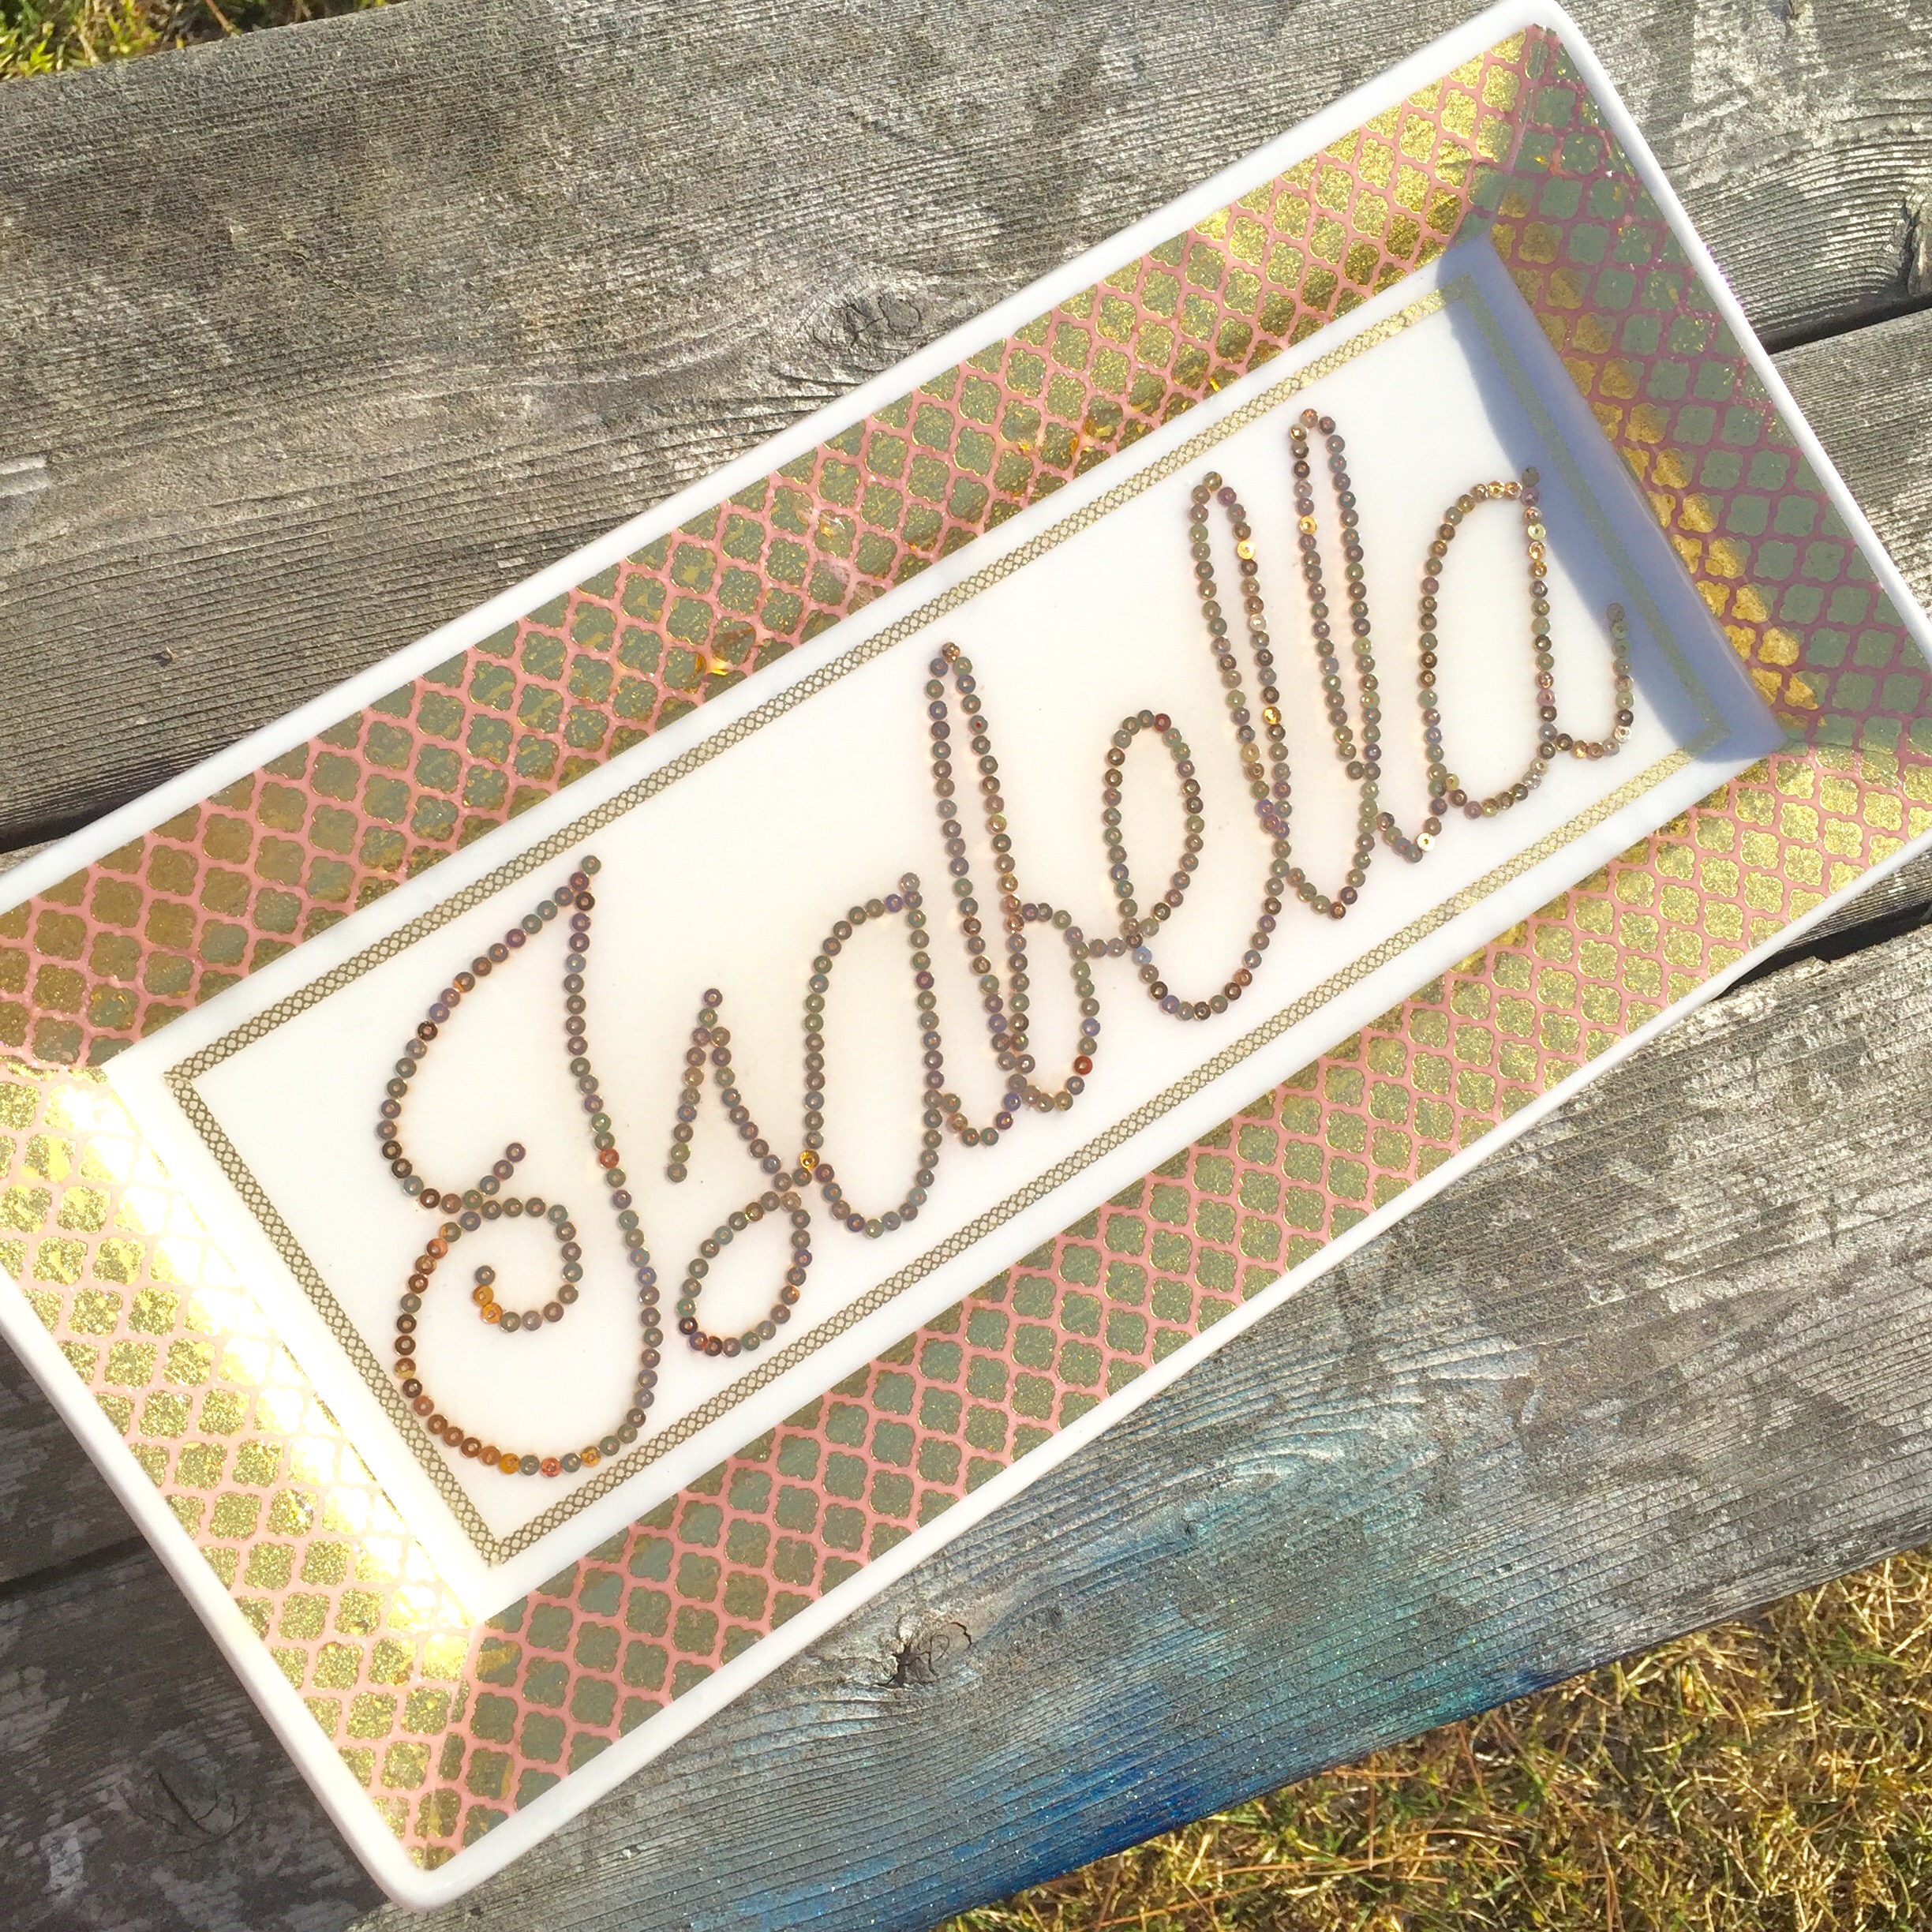
Ok. After getting my washi frame in place I got to work on the name.
At first I’d wanted to use Swarovski crystals to write it but I also knew I wanted to seal the whole thing for durability and sealer on top of swarovskis is a disaster.
I was going through my “muchification drawer” (a real thing) looking for gold glitter paper. I was gonna print her name backwards, glue it to the back of the paper and then carefully exacto out the name and glue it in place. But, as luck would have it, while rifling through the muchification drawer I came upon the perfect solution: itty bitty little gold sequins with subtle pink accents.
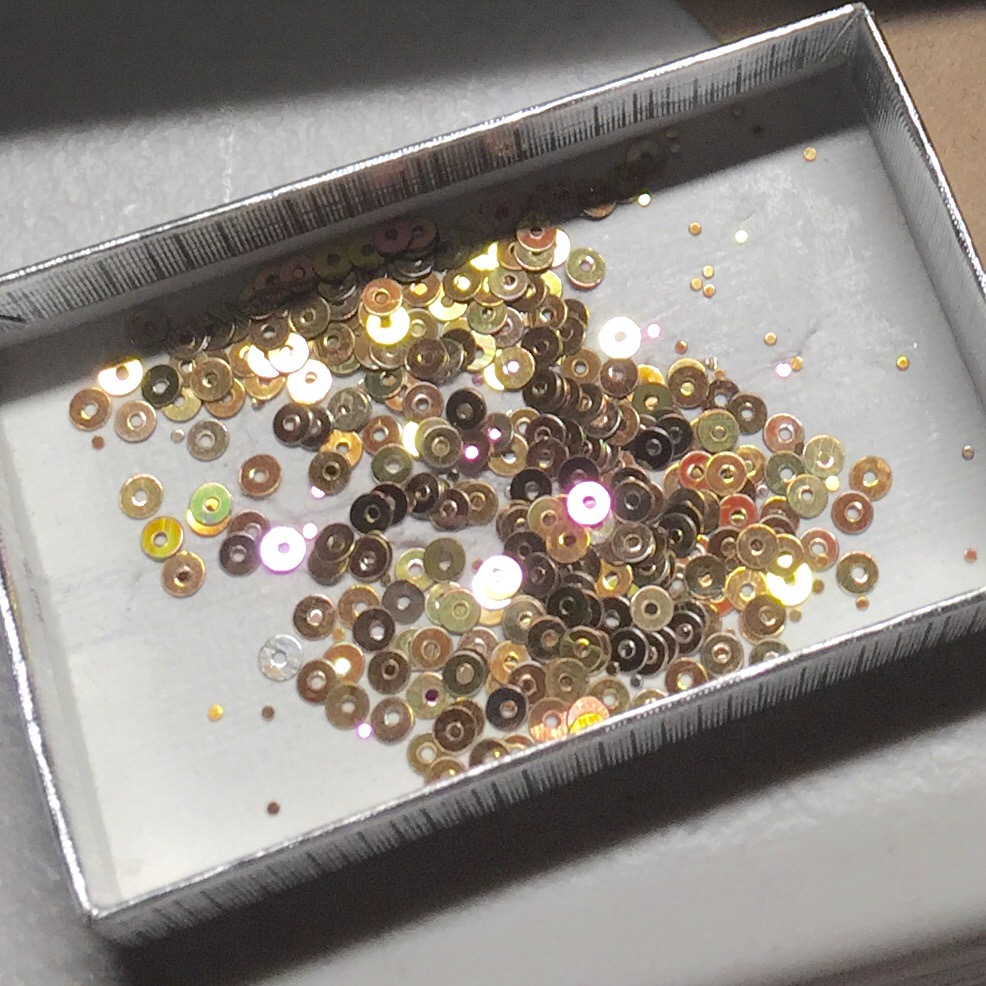
Because seriously, who doesn’t have that just hanging out at the bottom of a drawer somewhere, right?
So, I got to work.
I used a white pickup pencil because I had it within arms reach and i could rub it off. I free-handed her name in the same style font as it’s written on the invitation.
Then I used jewelry epoxy to carefully glue the sequins in place.
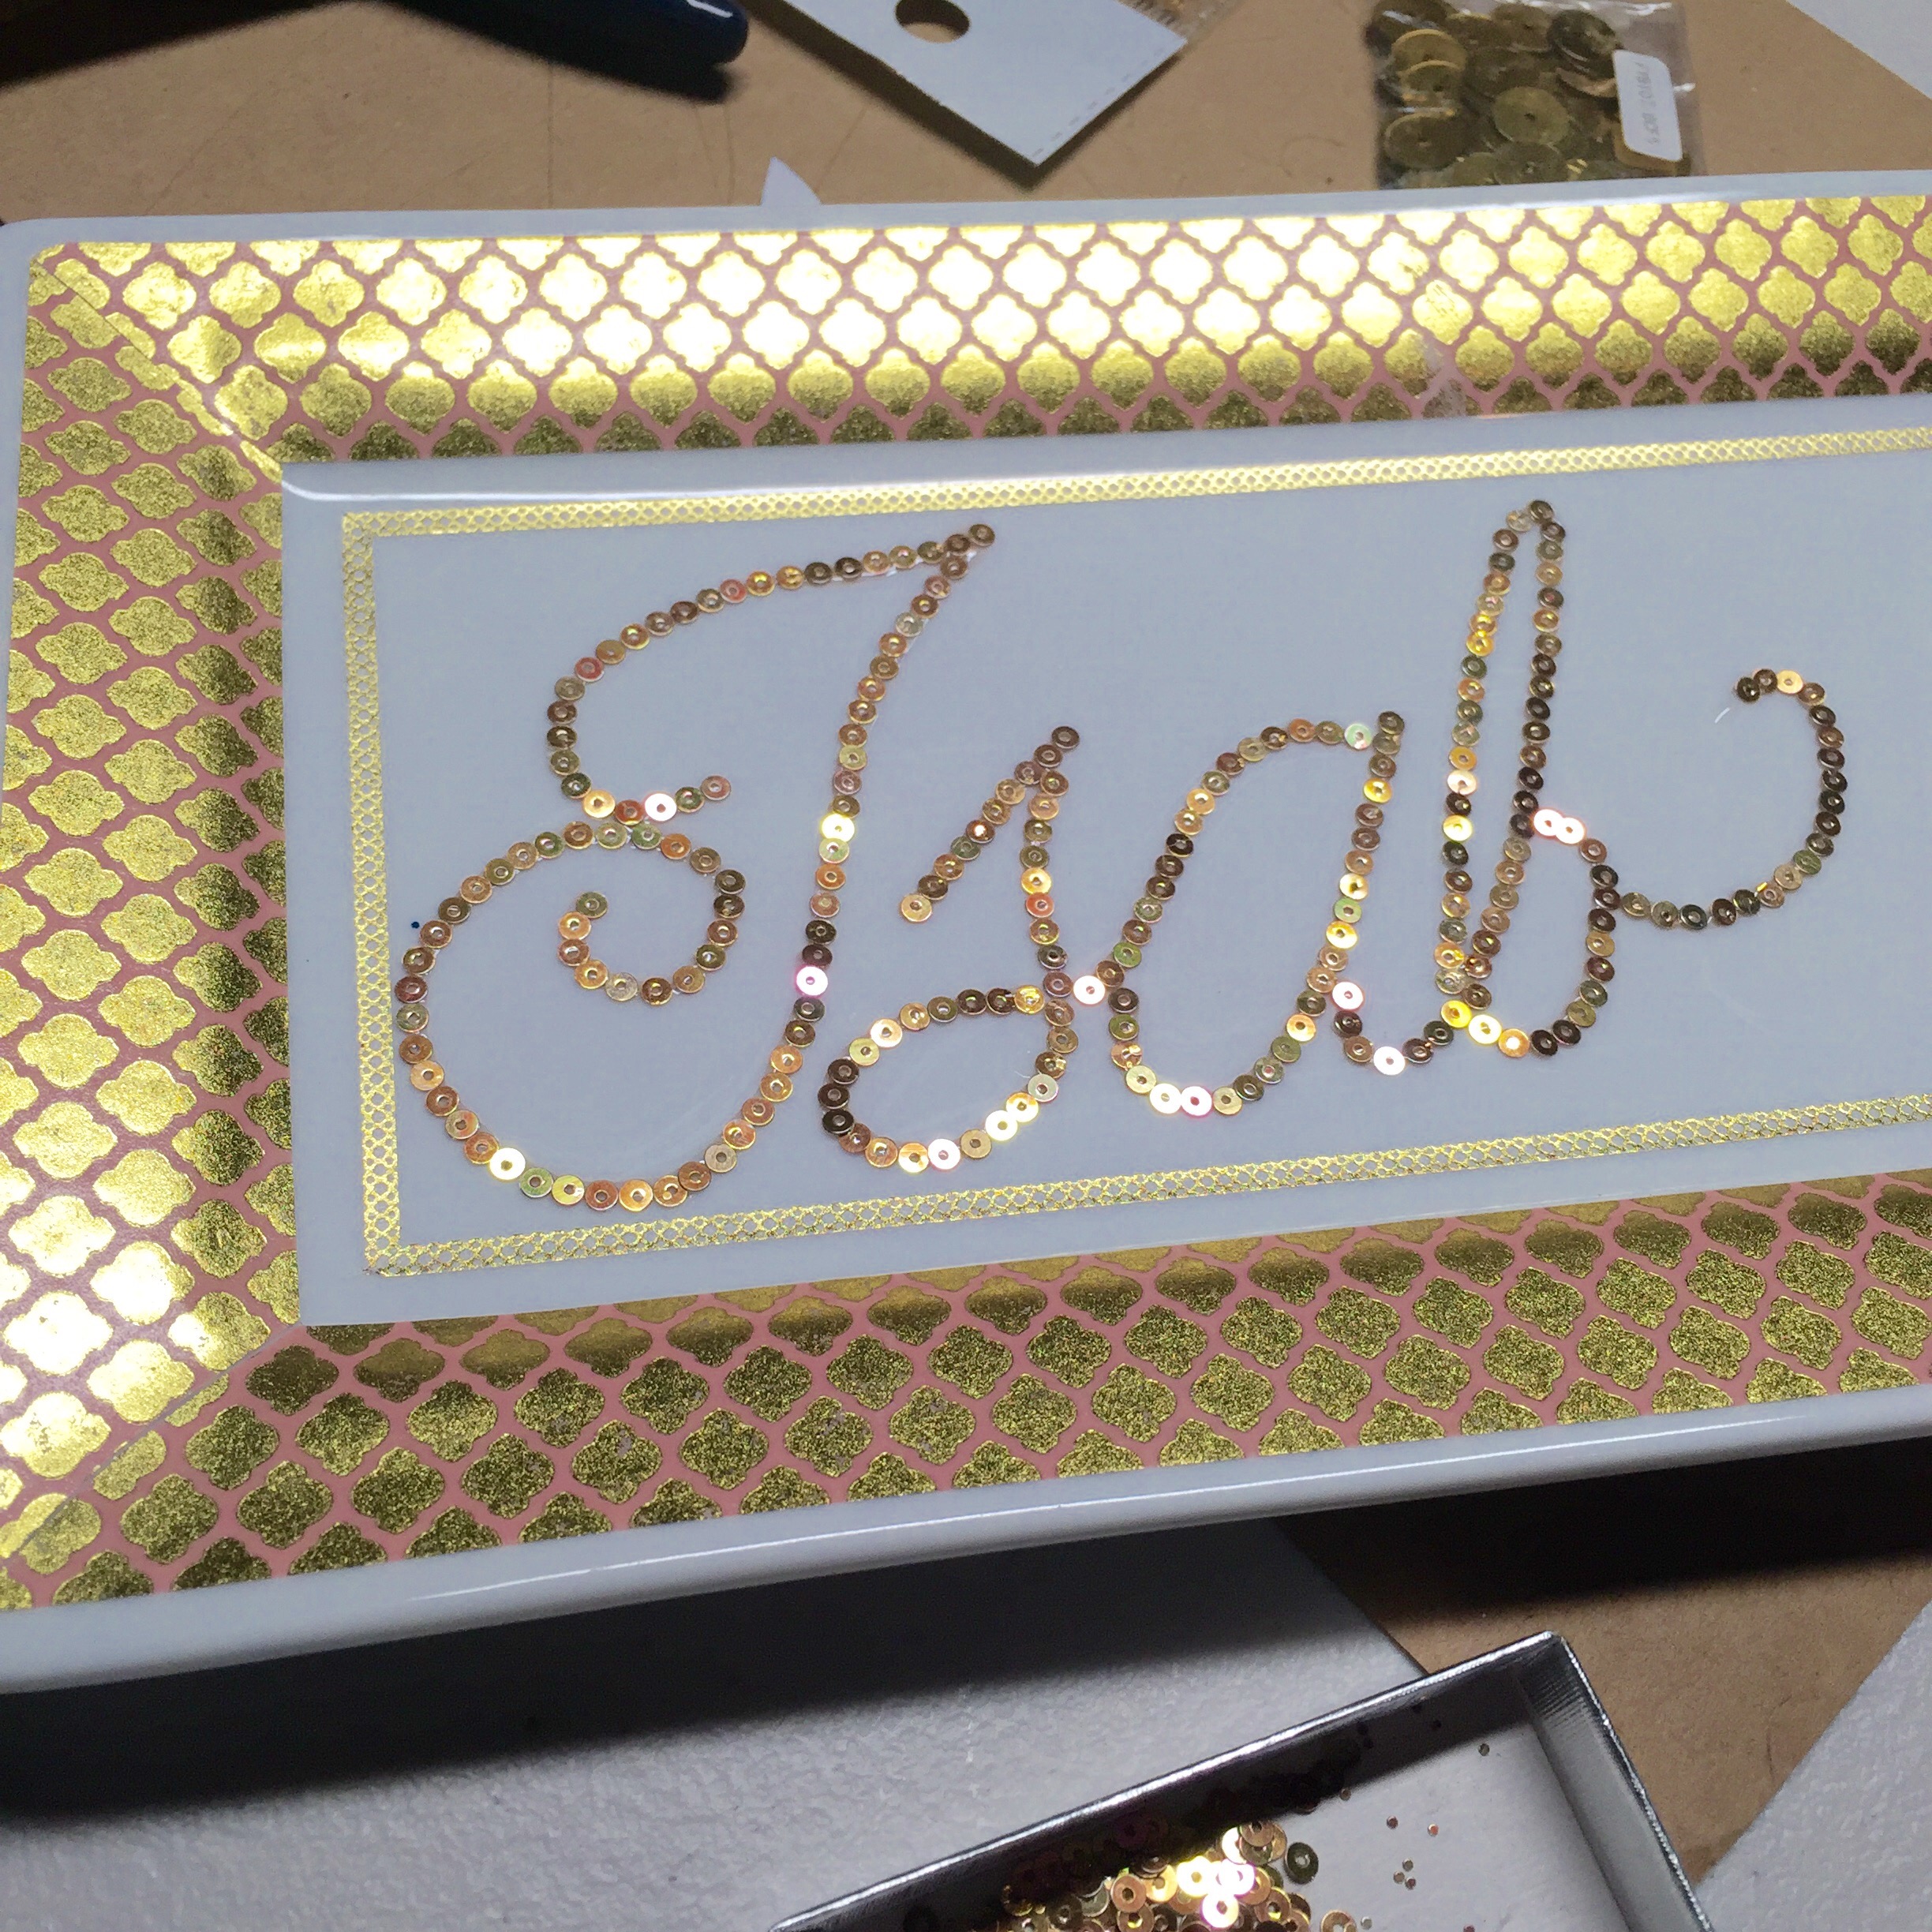
That thing was sparkleriffic, let me tell you!
After the sequin glue dried I pulled out the elmers glue and a foam brush to reinforce and seal the washi tape to the plate.
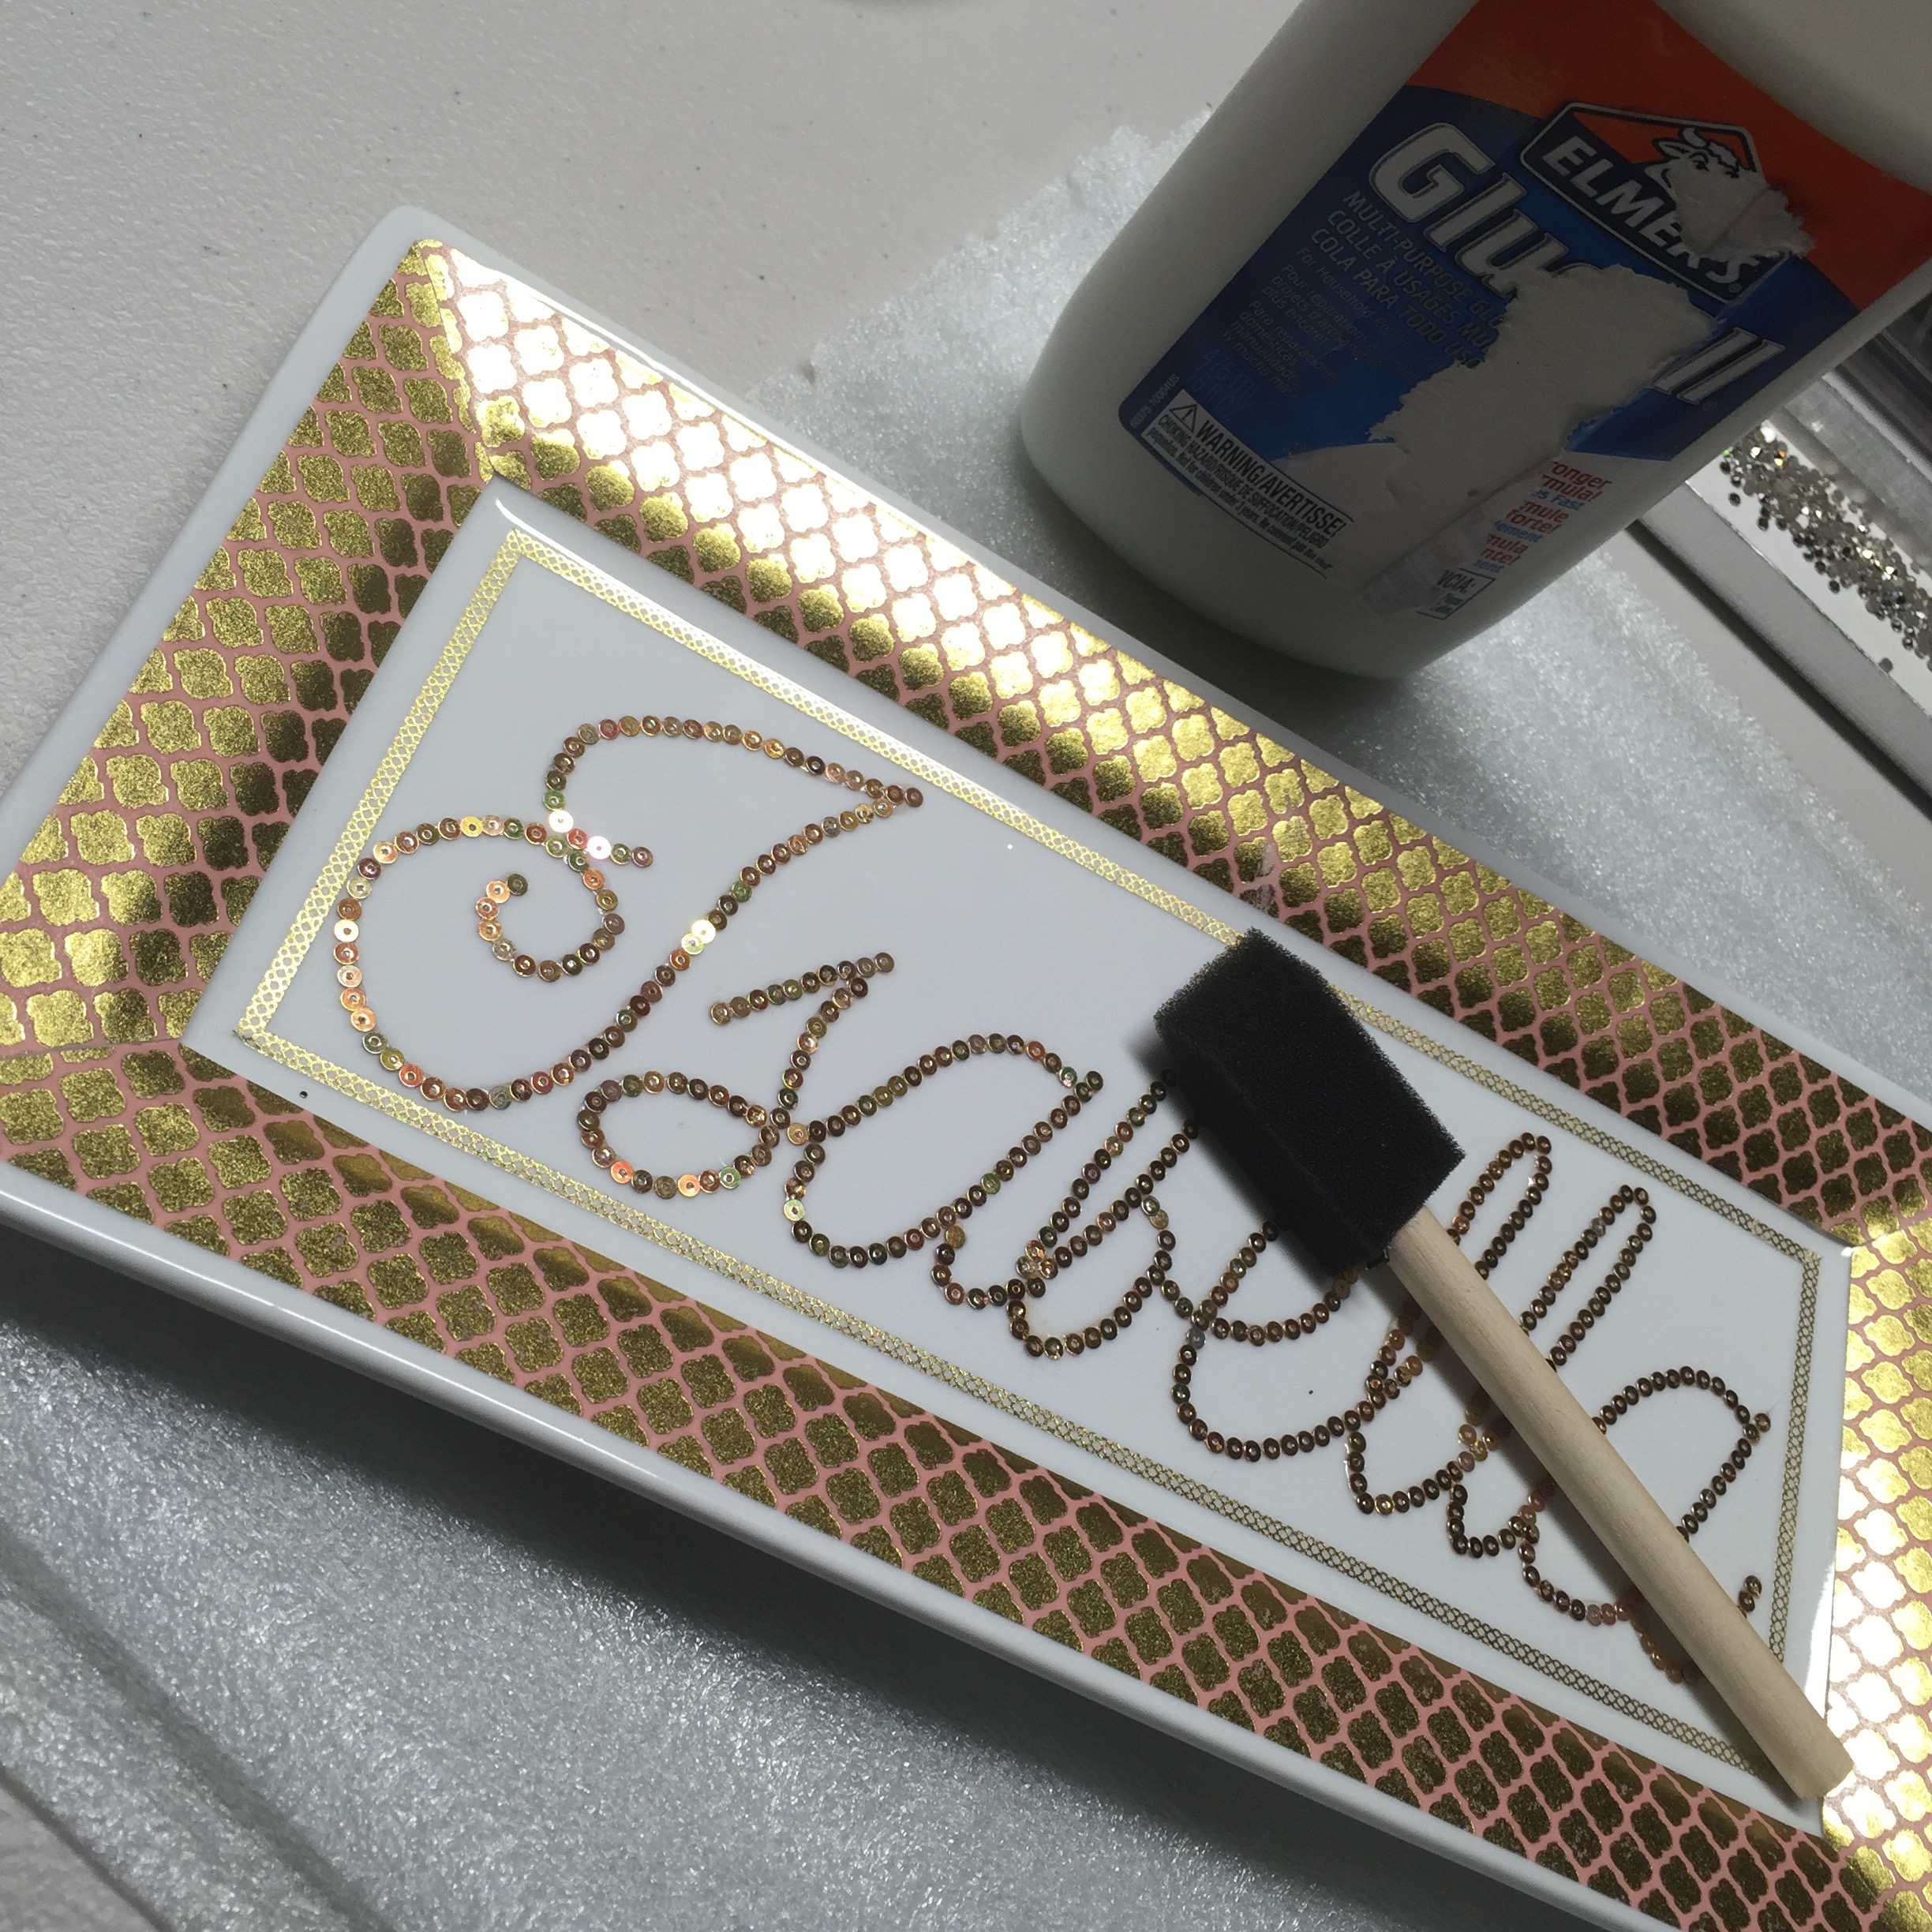 Truthfully, I probably shoulda done that step before the sequins but I was impatient to start the sparkle. I just made sure not to get the glue on the sequins so it didn’t dull their shine. The glue goes on white but it dries clear. I also used a tweezer to pull up the edges of tape to glue underneath as the corners had started to pull away from the ceramic around the curves. You can sorta see it near the mitred corner in this pic:
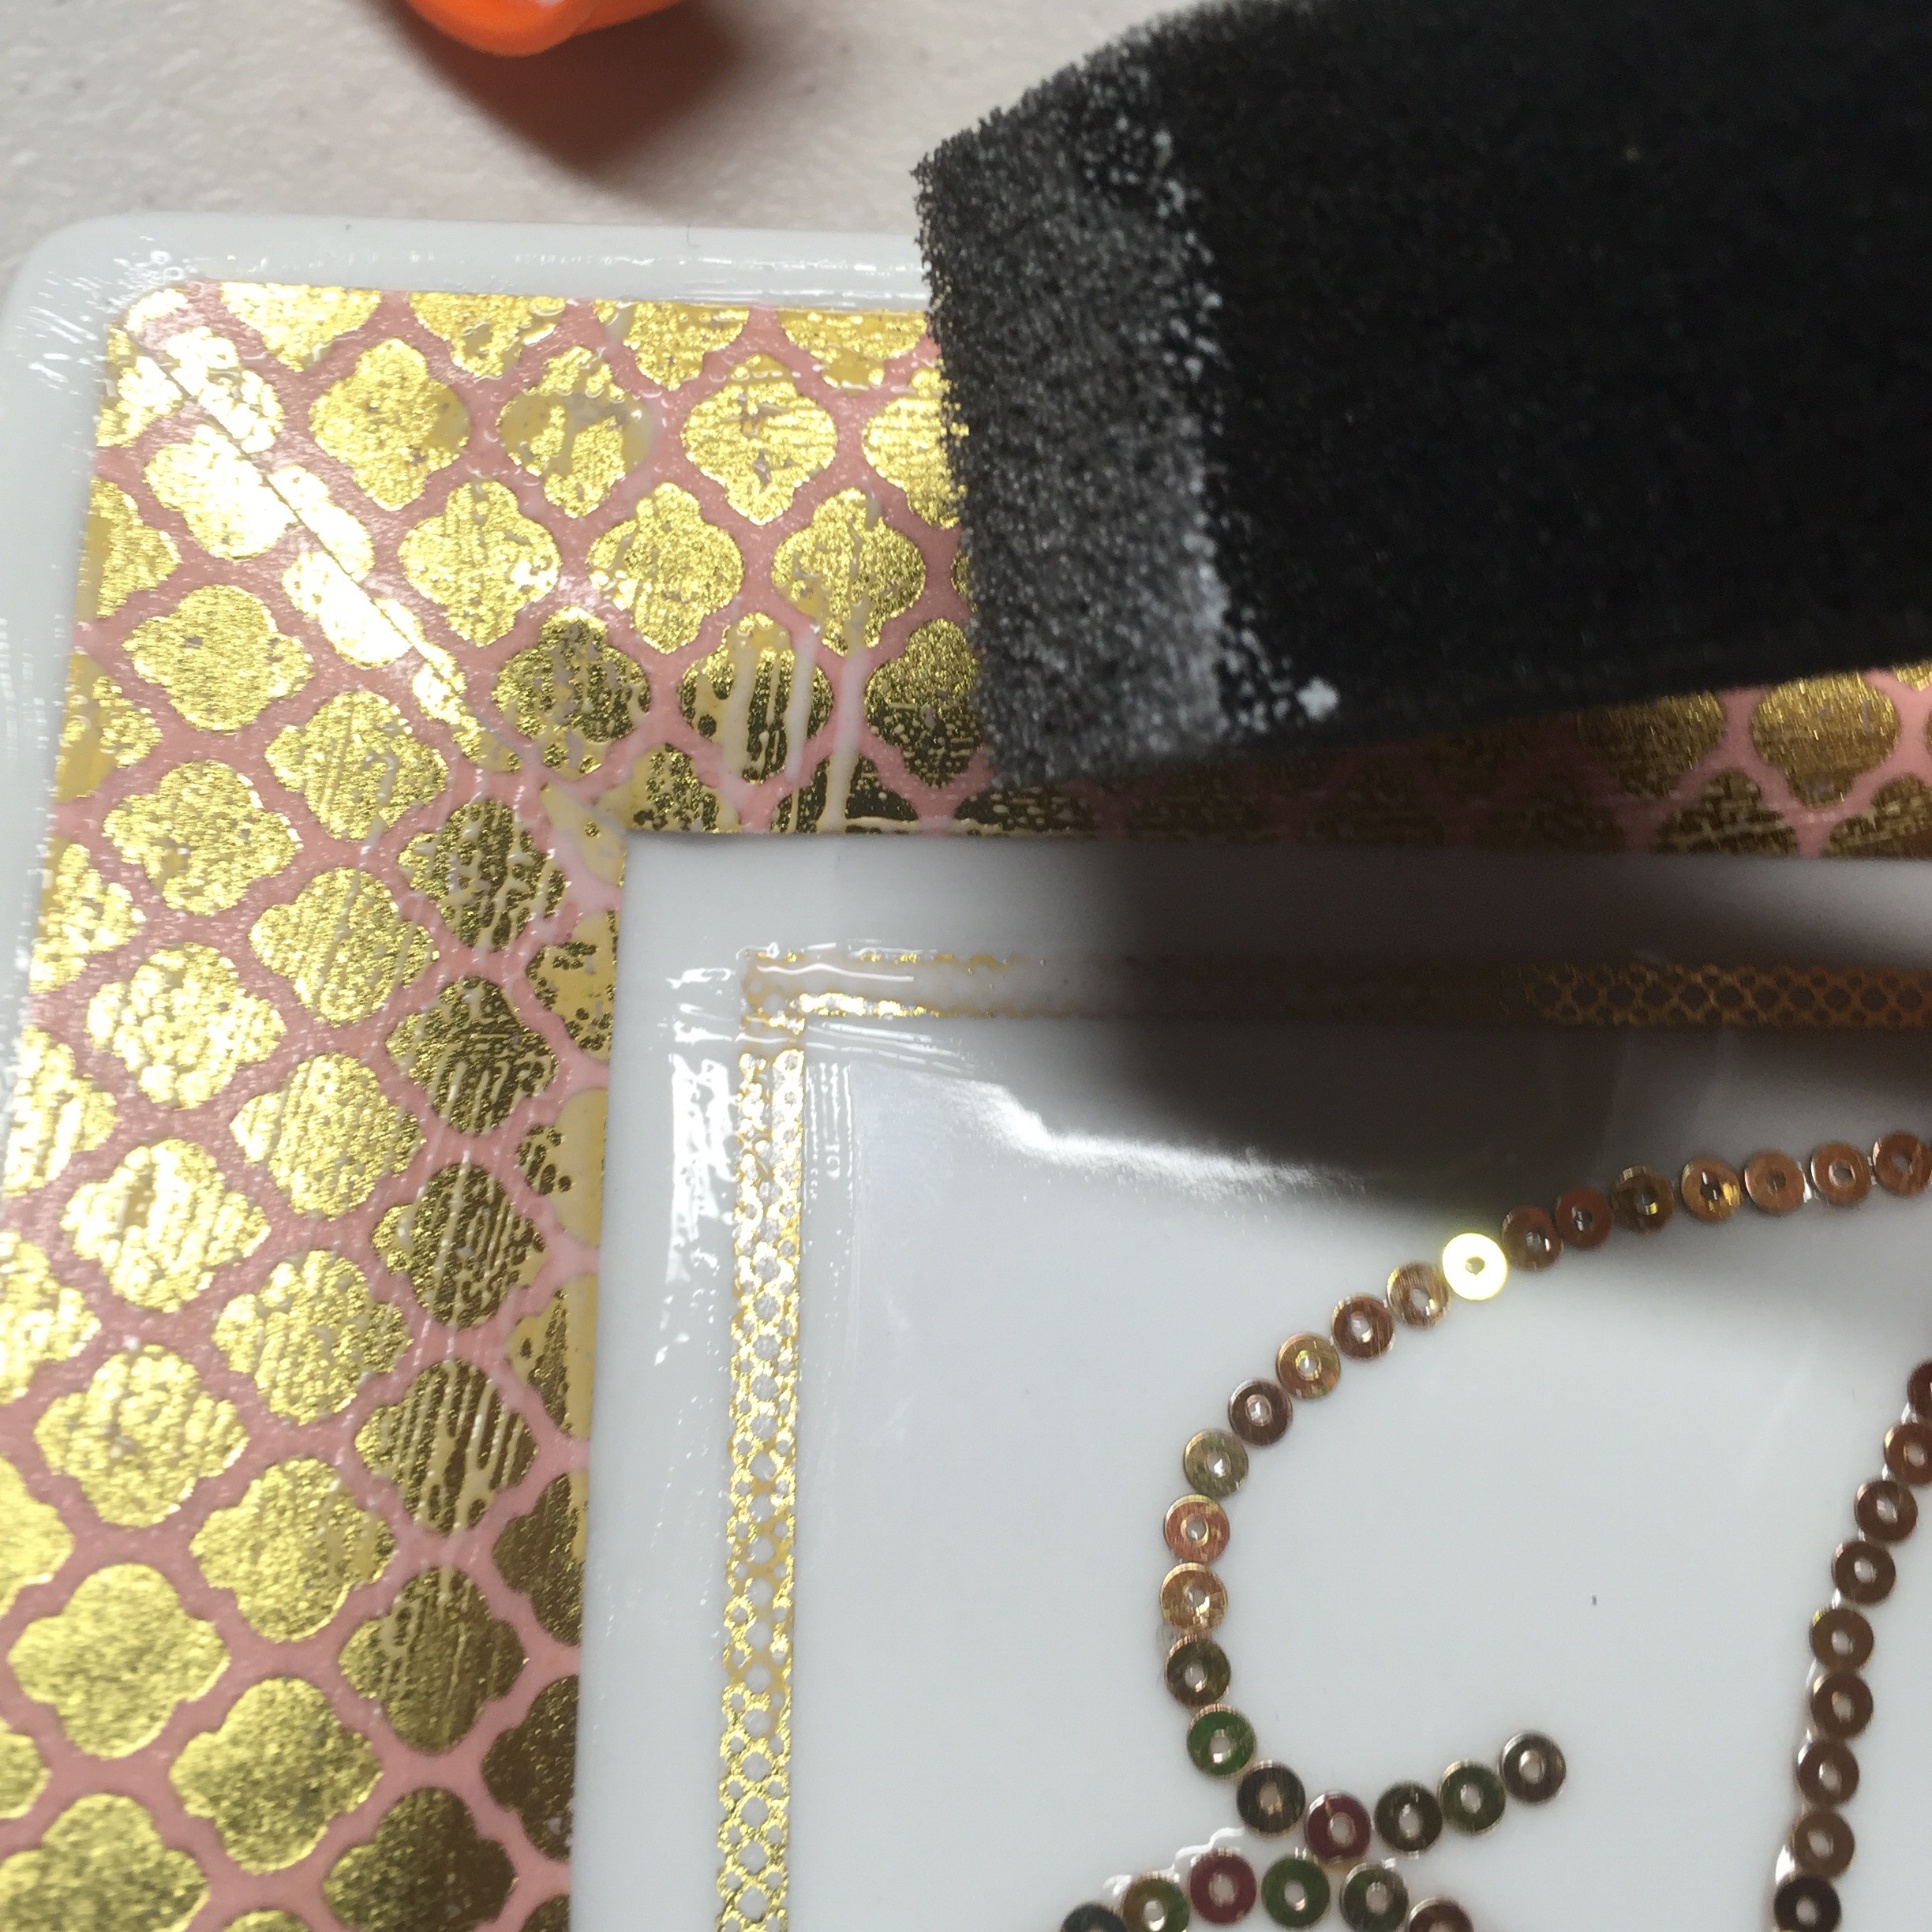
When that was all good and dry I was ready for the last step- the most exciting step besides the glitterfication. The pour-on epoxy sealer!
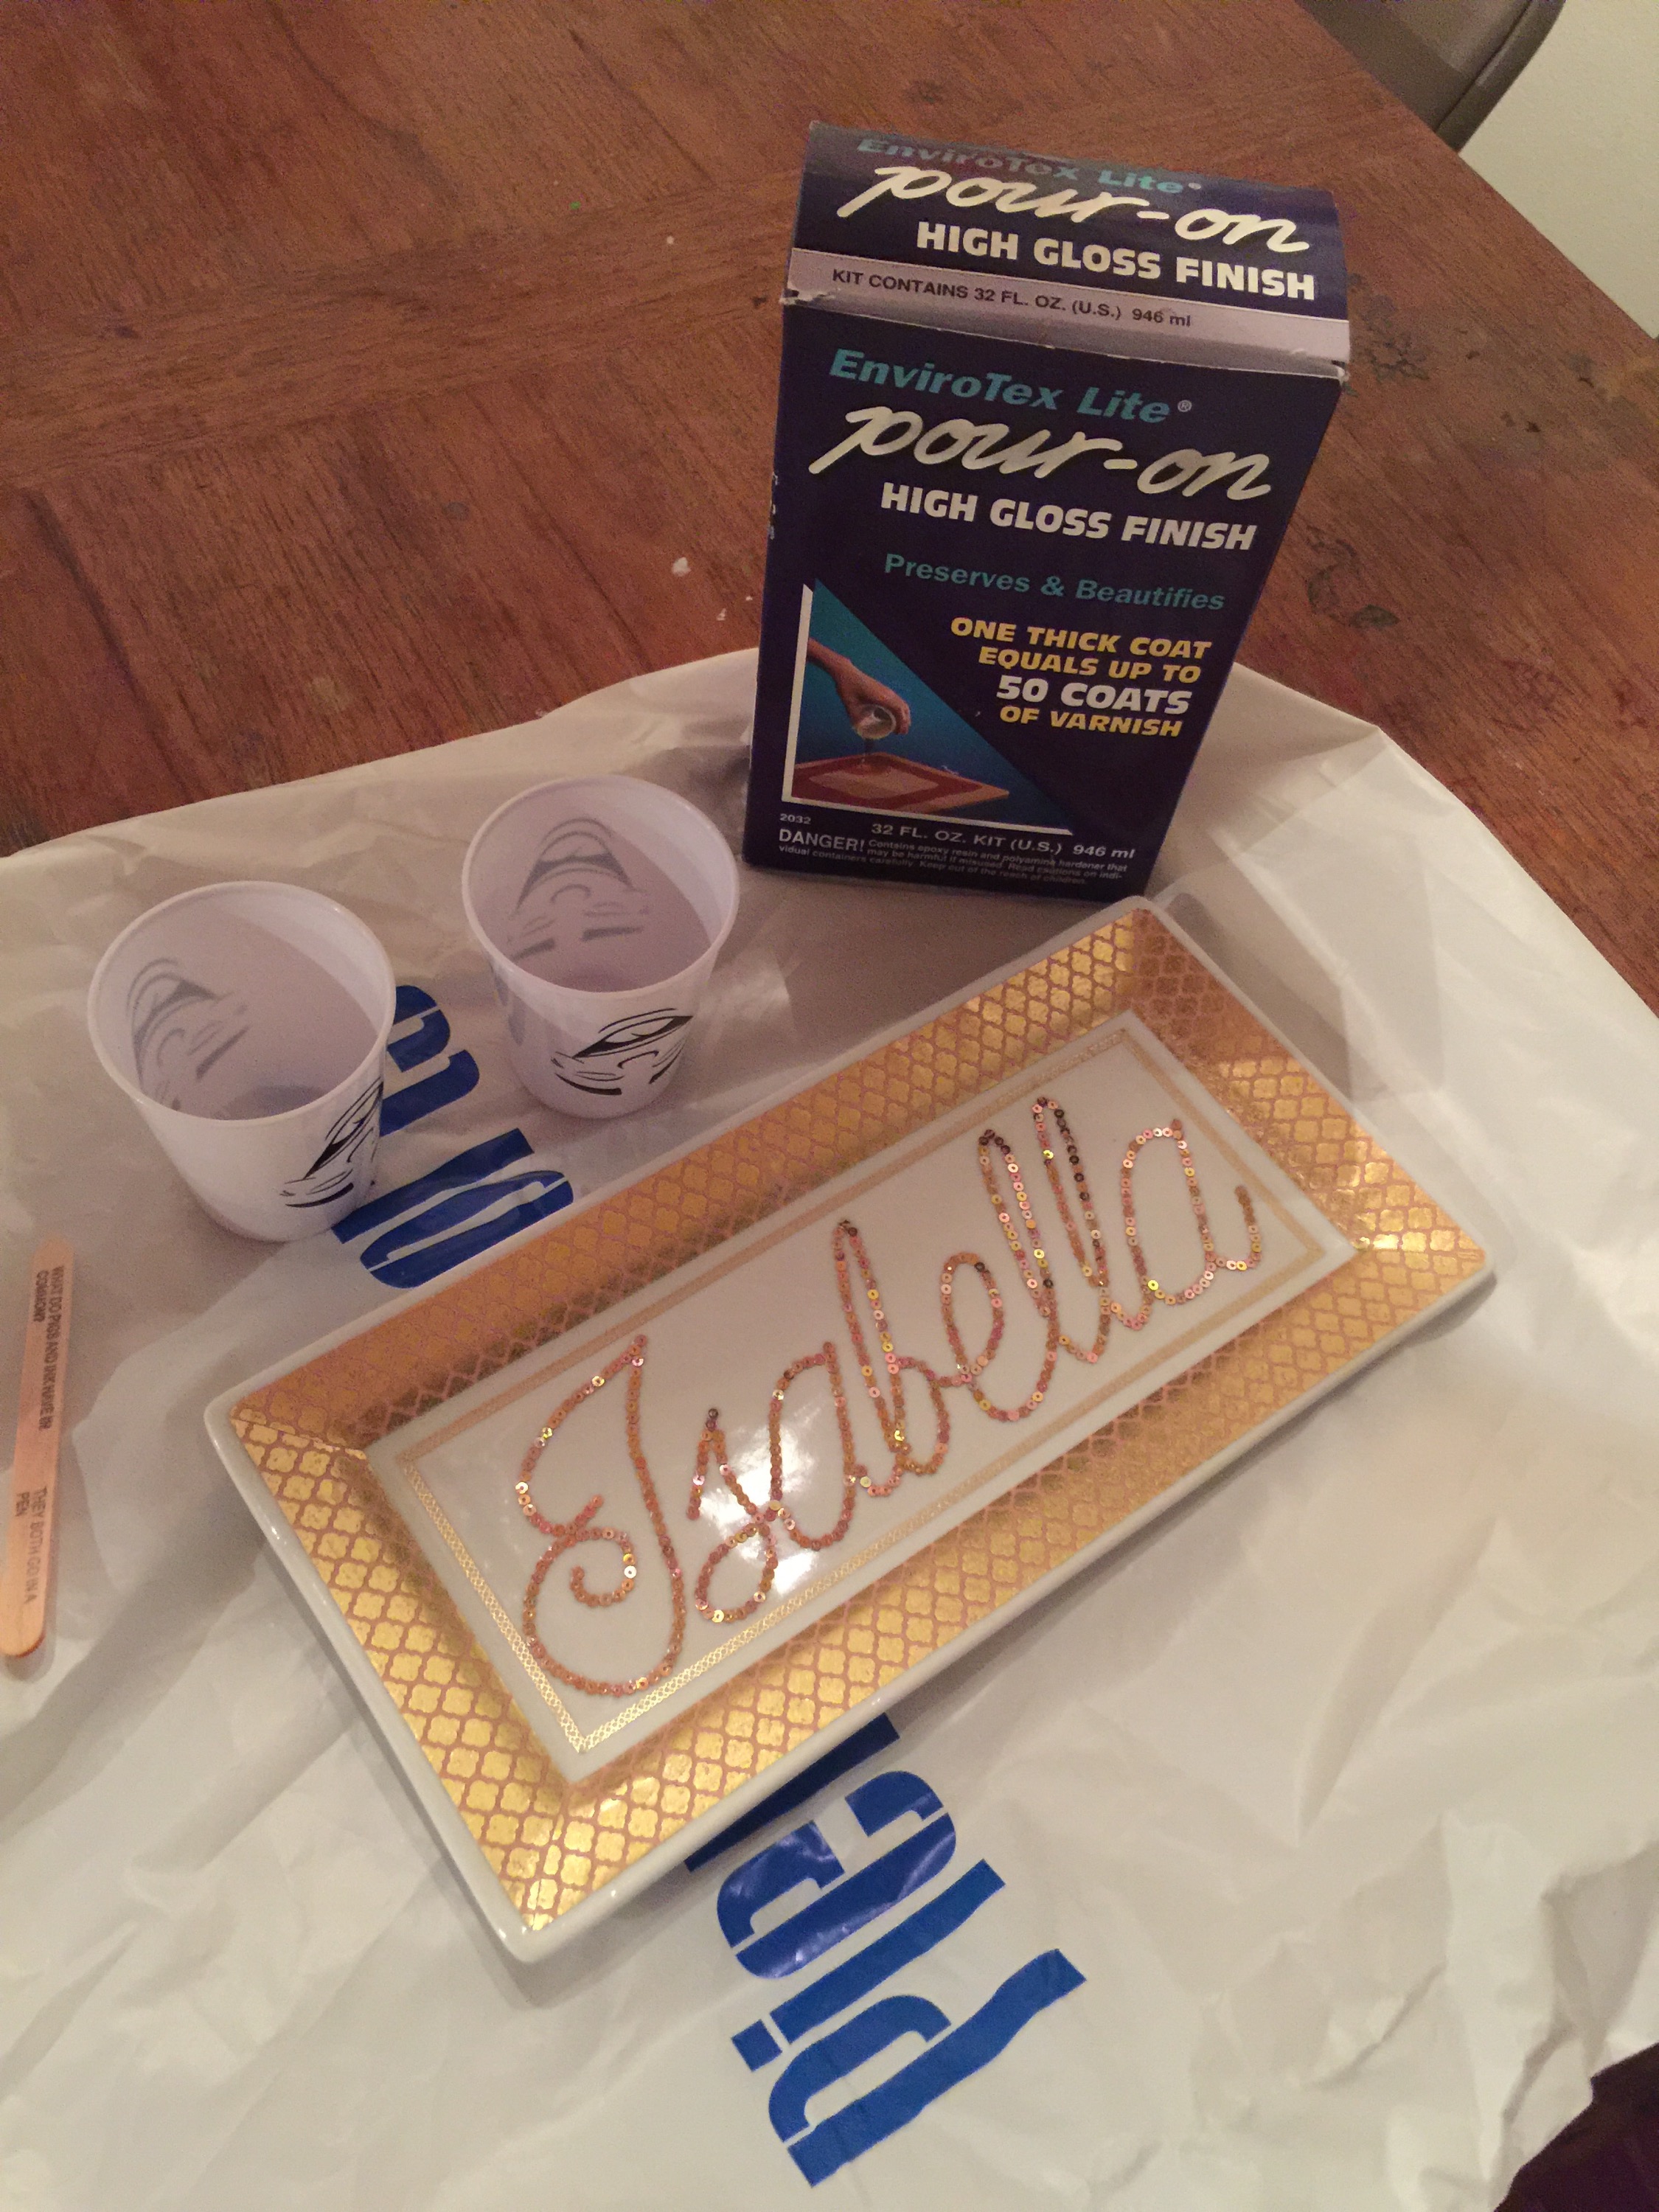
This stuff is the best thing ever- it makes everything it touches look like glass. It’s just brilliant and you can use it a bazzilion creative ways.
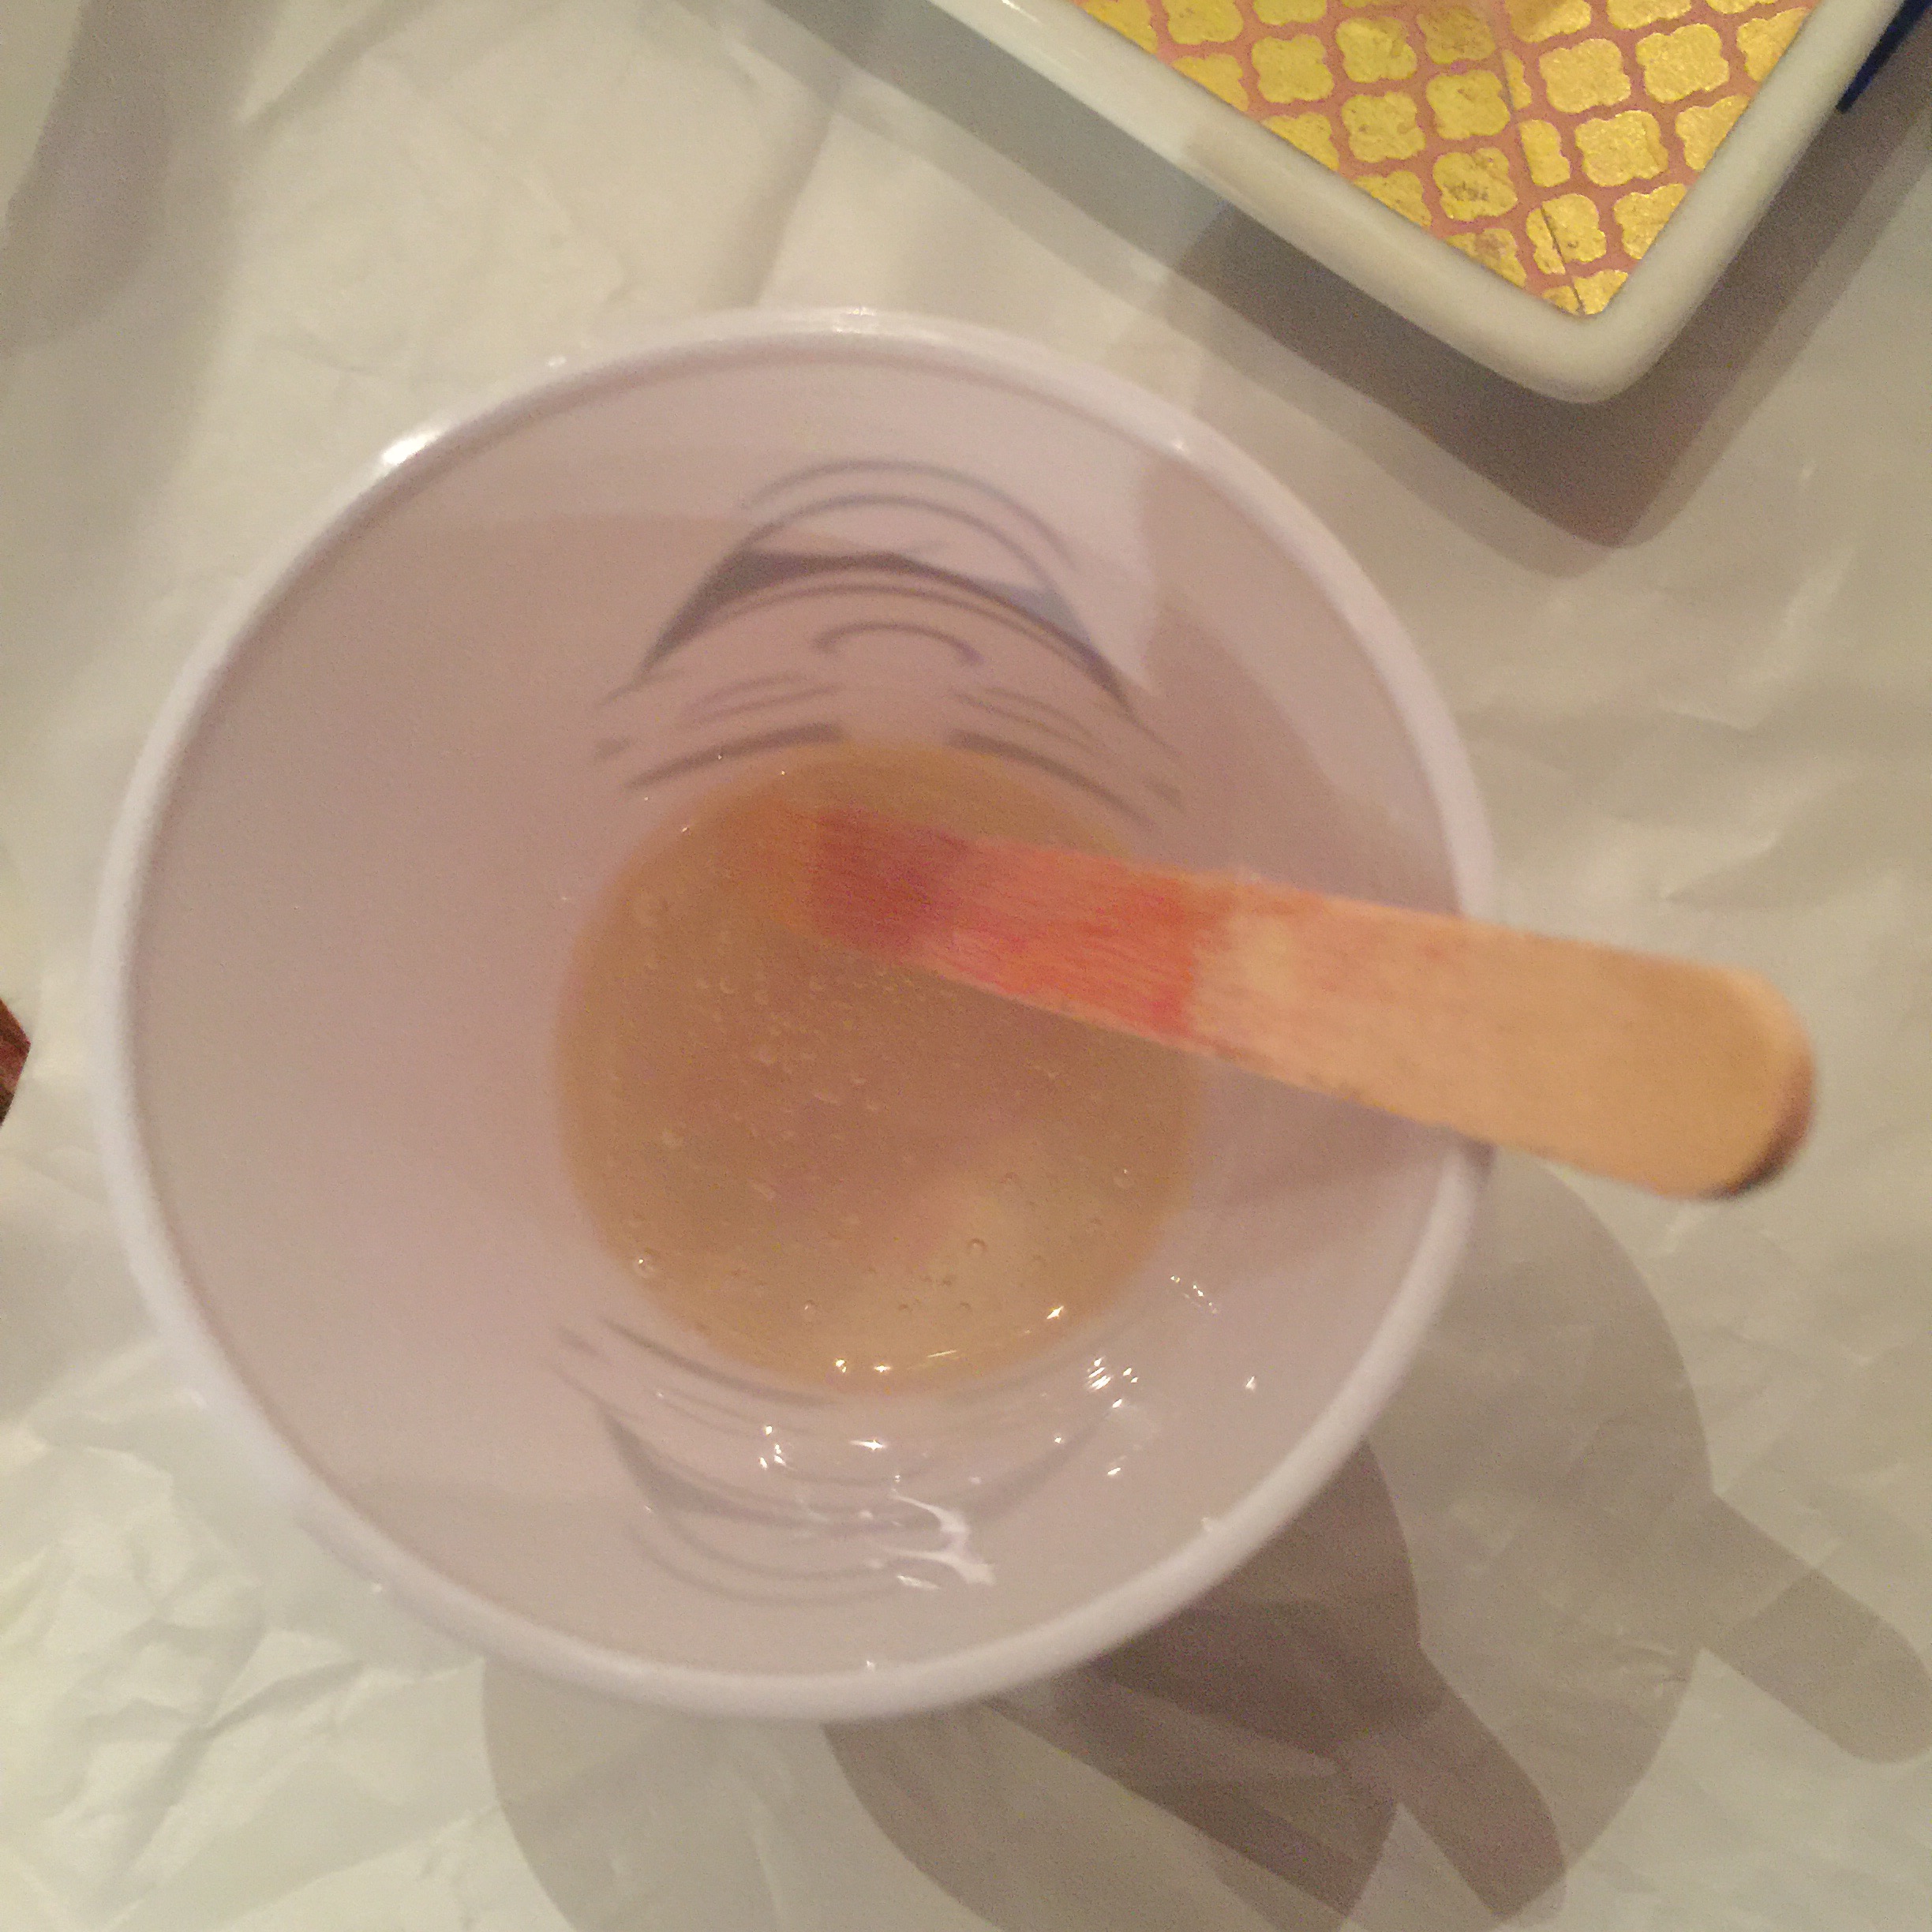
Basically, it’s two liquid parts. You combine equal amounts of each and mix it up really well and then pour it on stuff and it’s like sealed under “glass” forever.
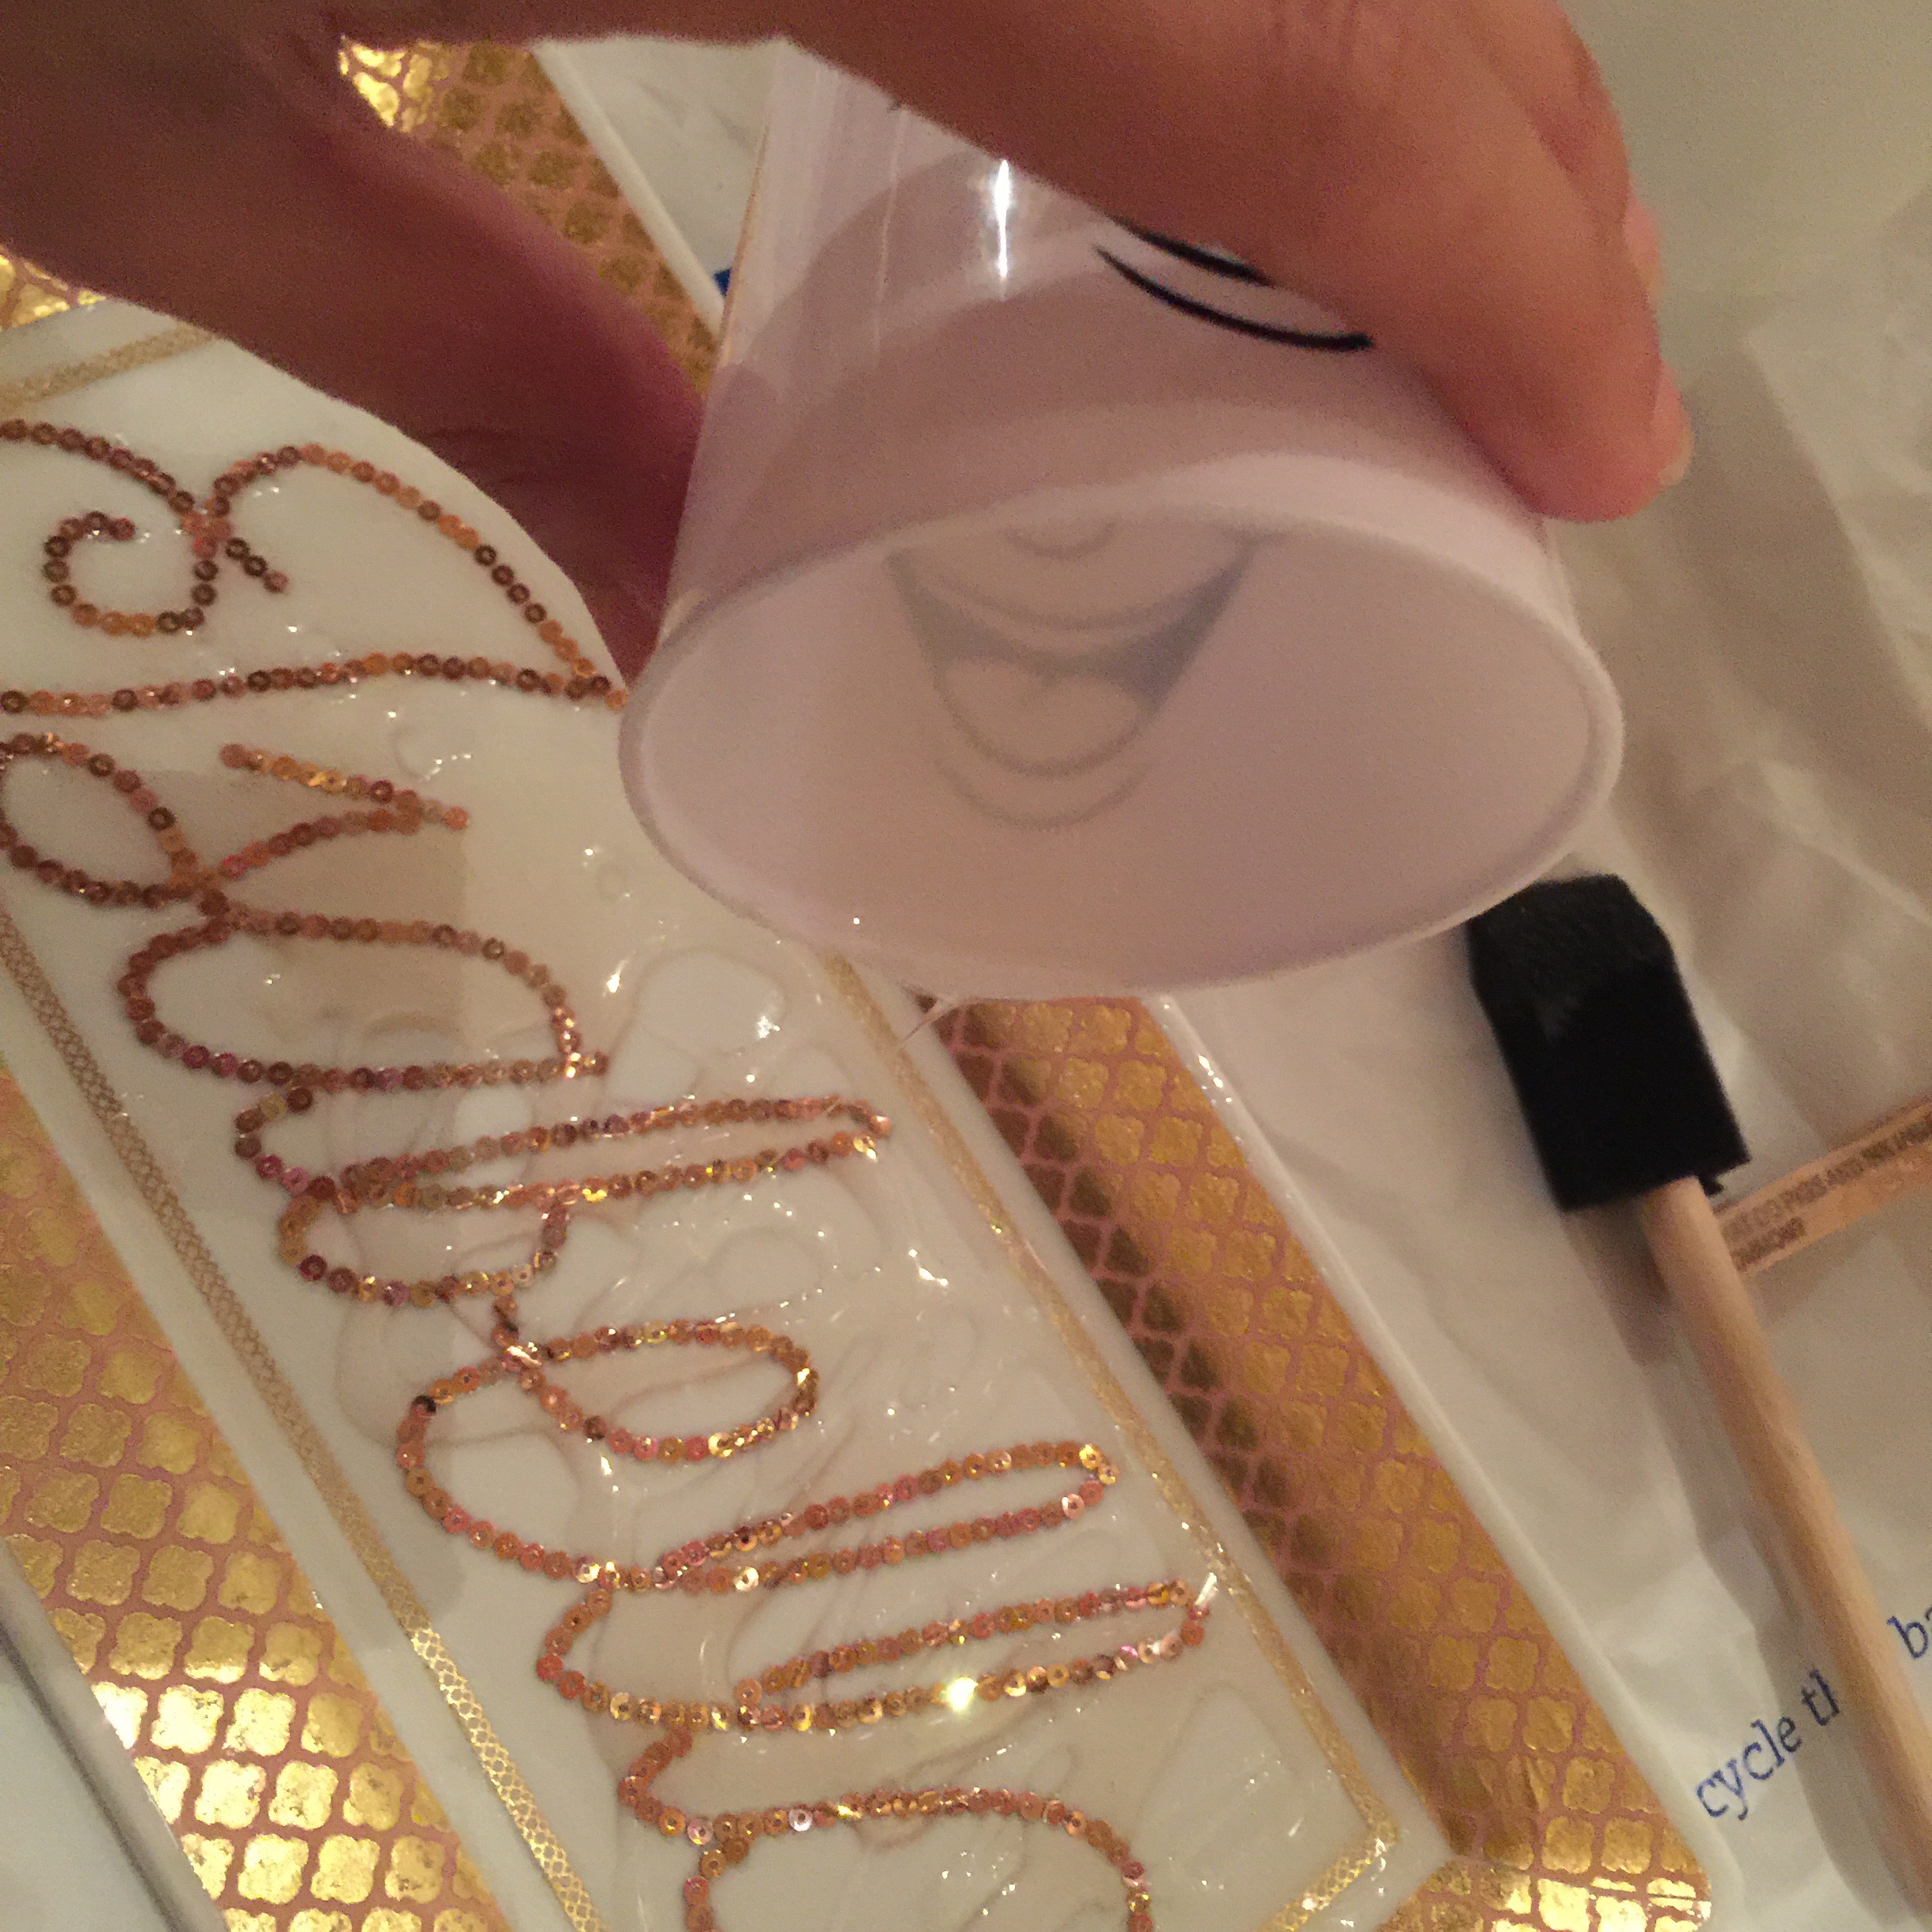
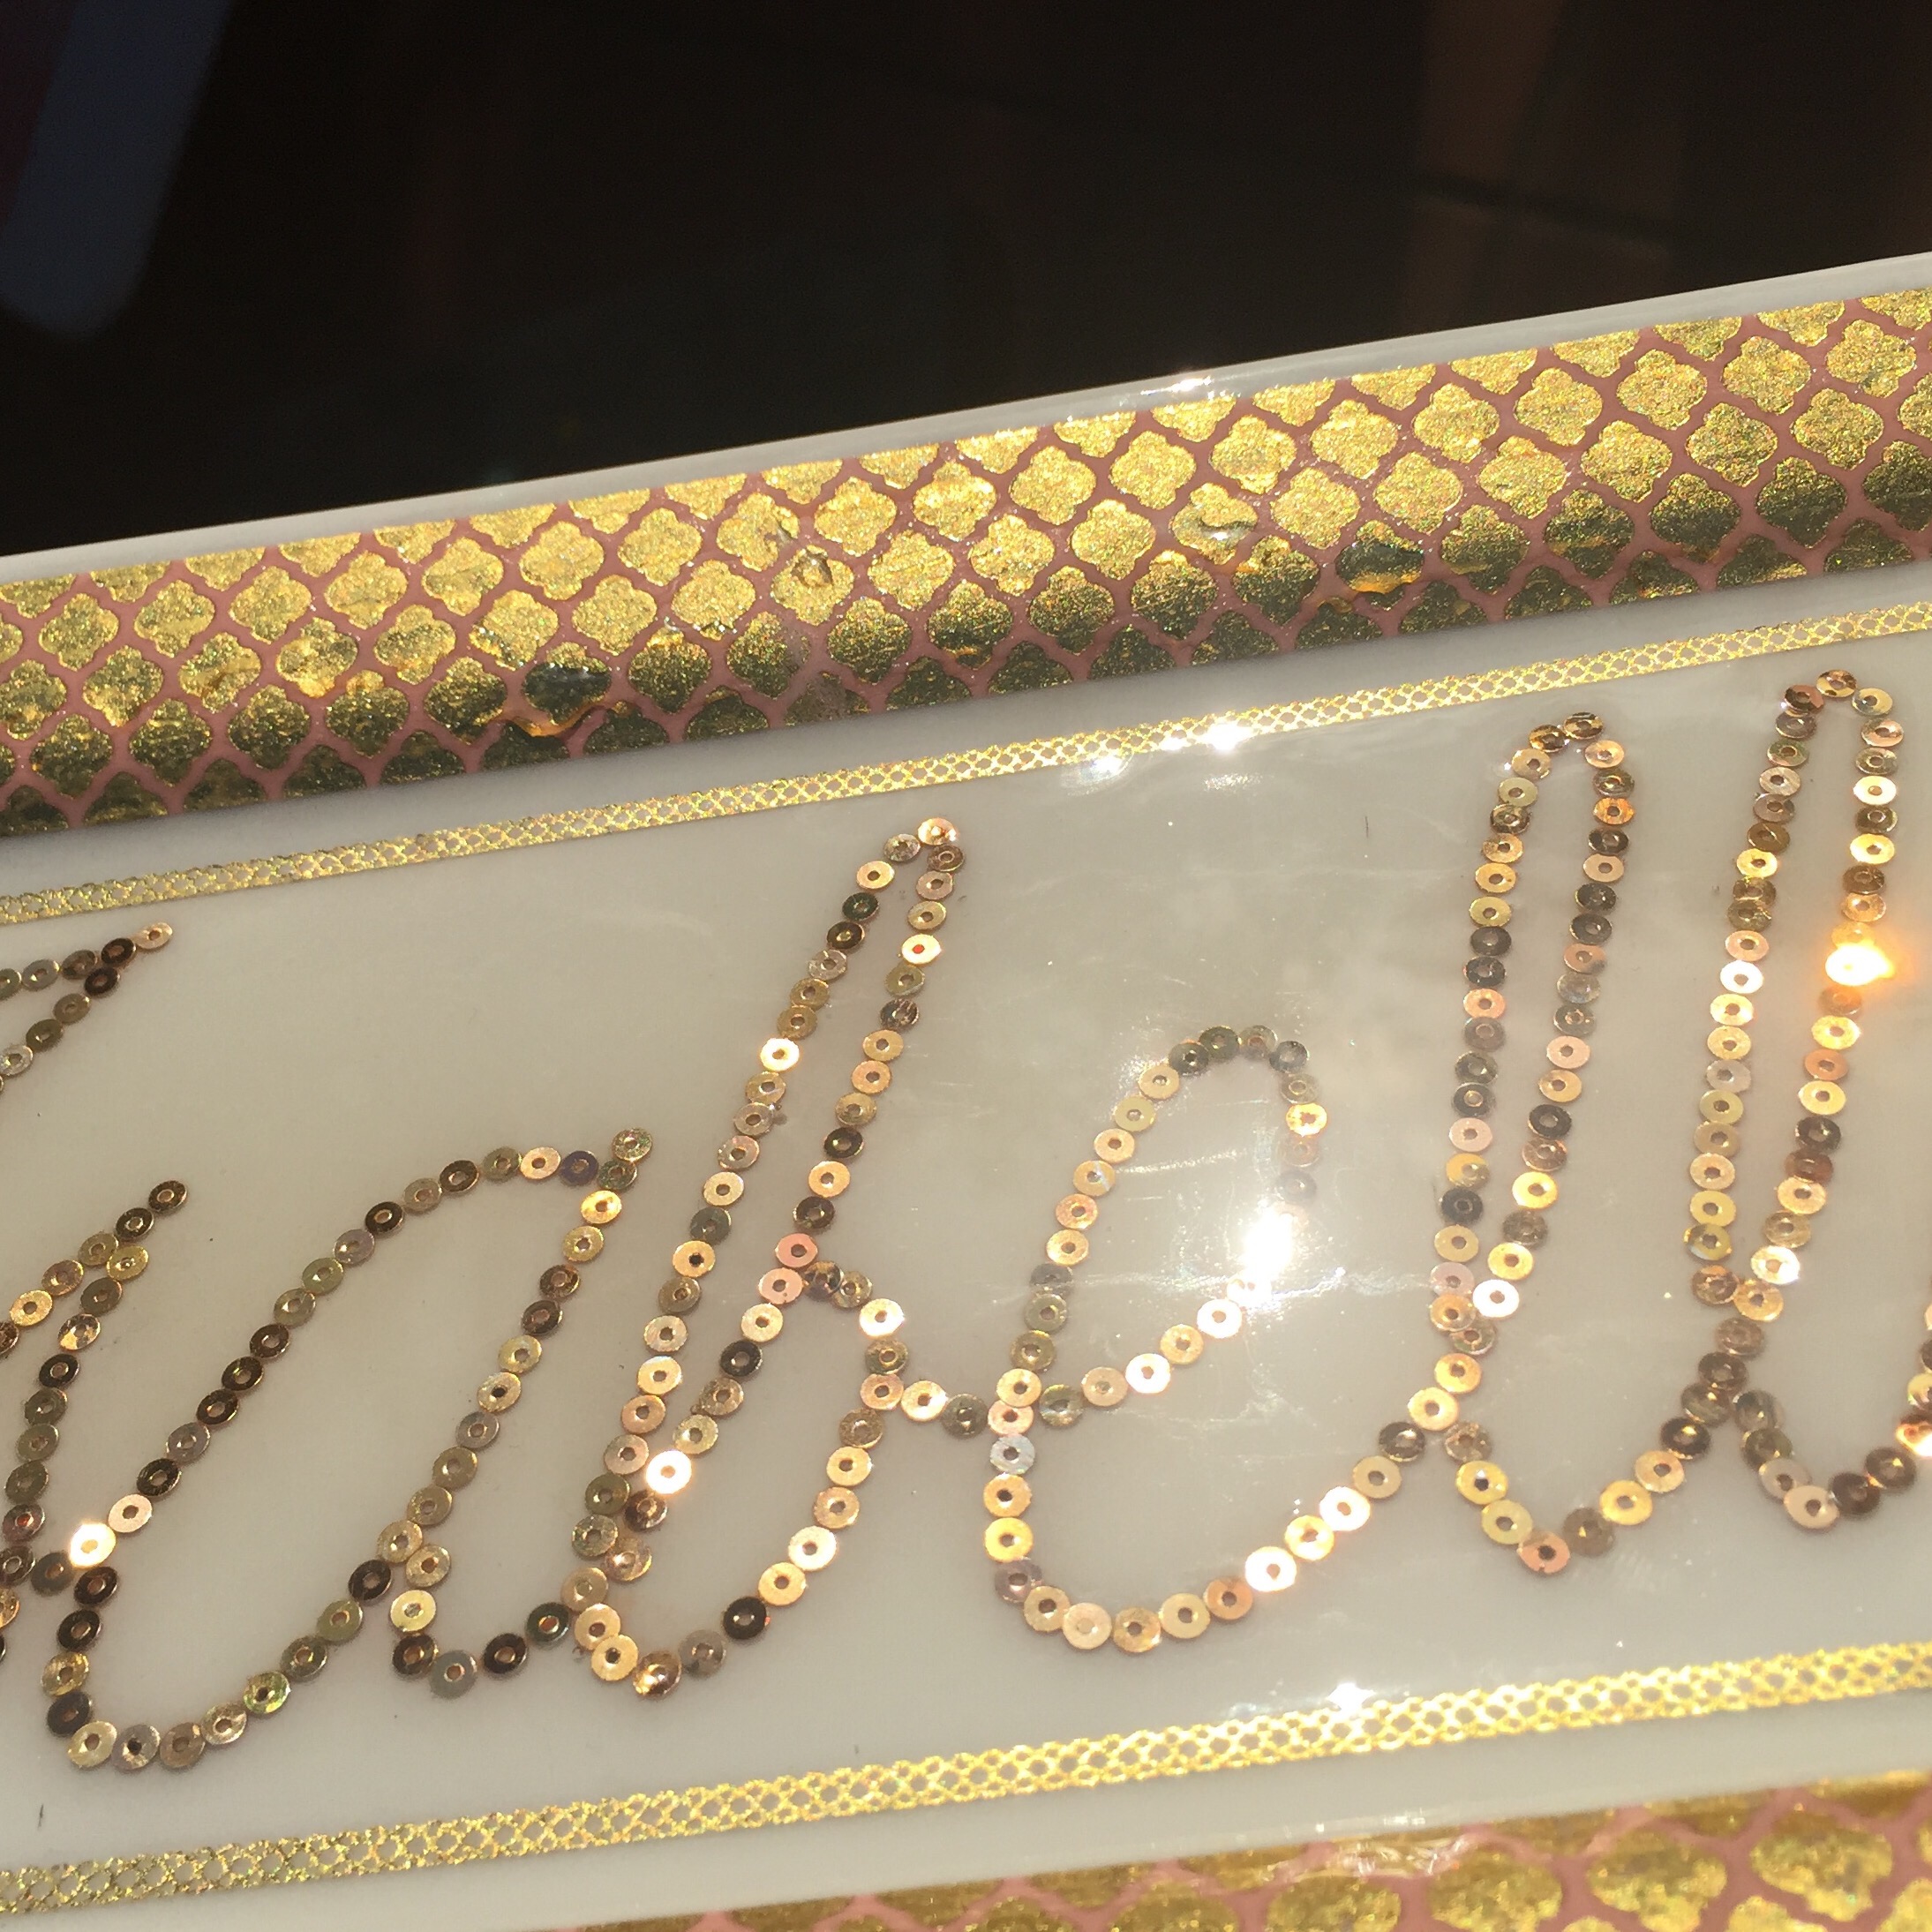
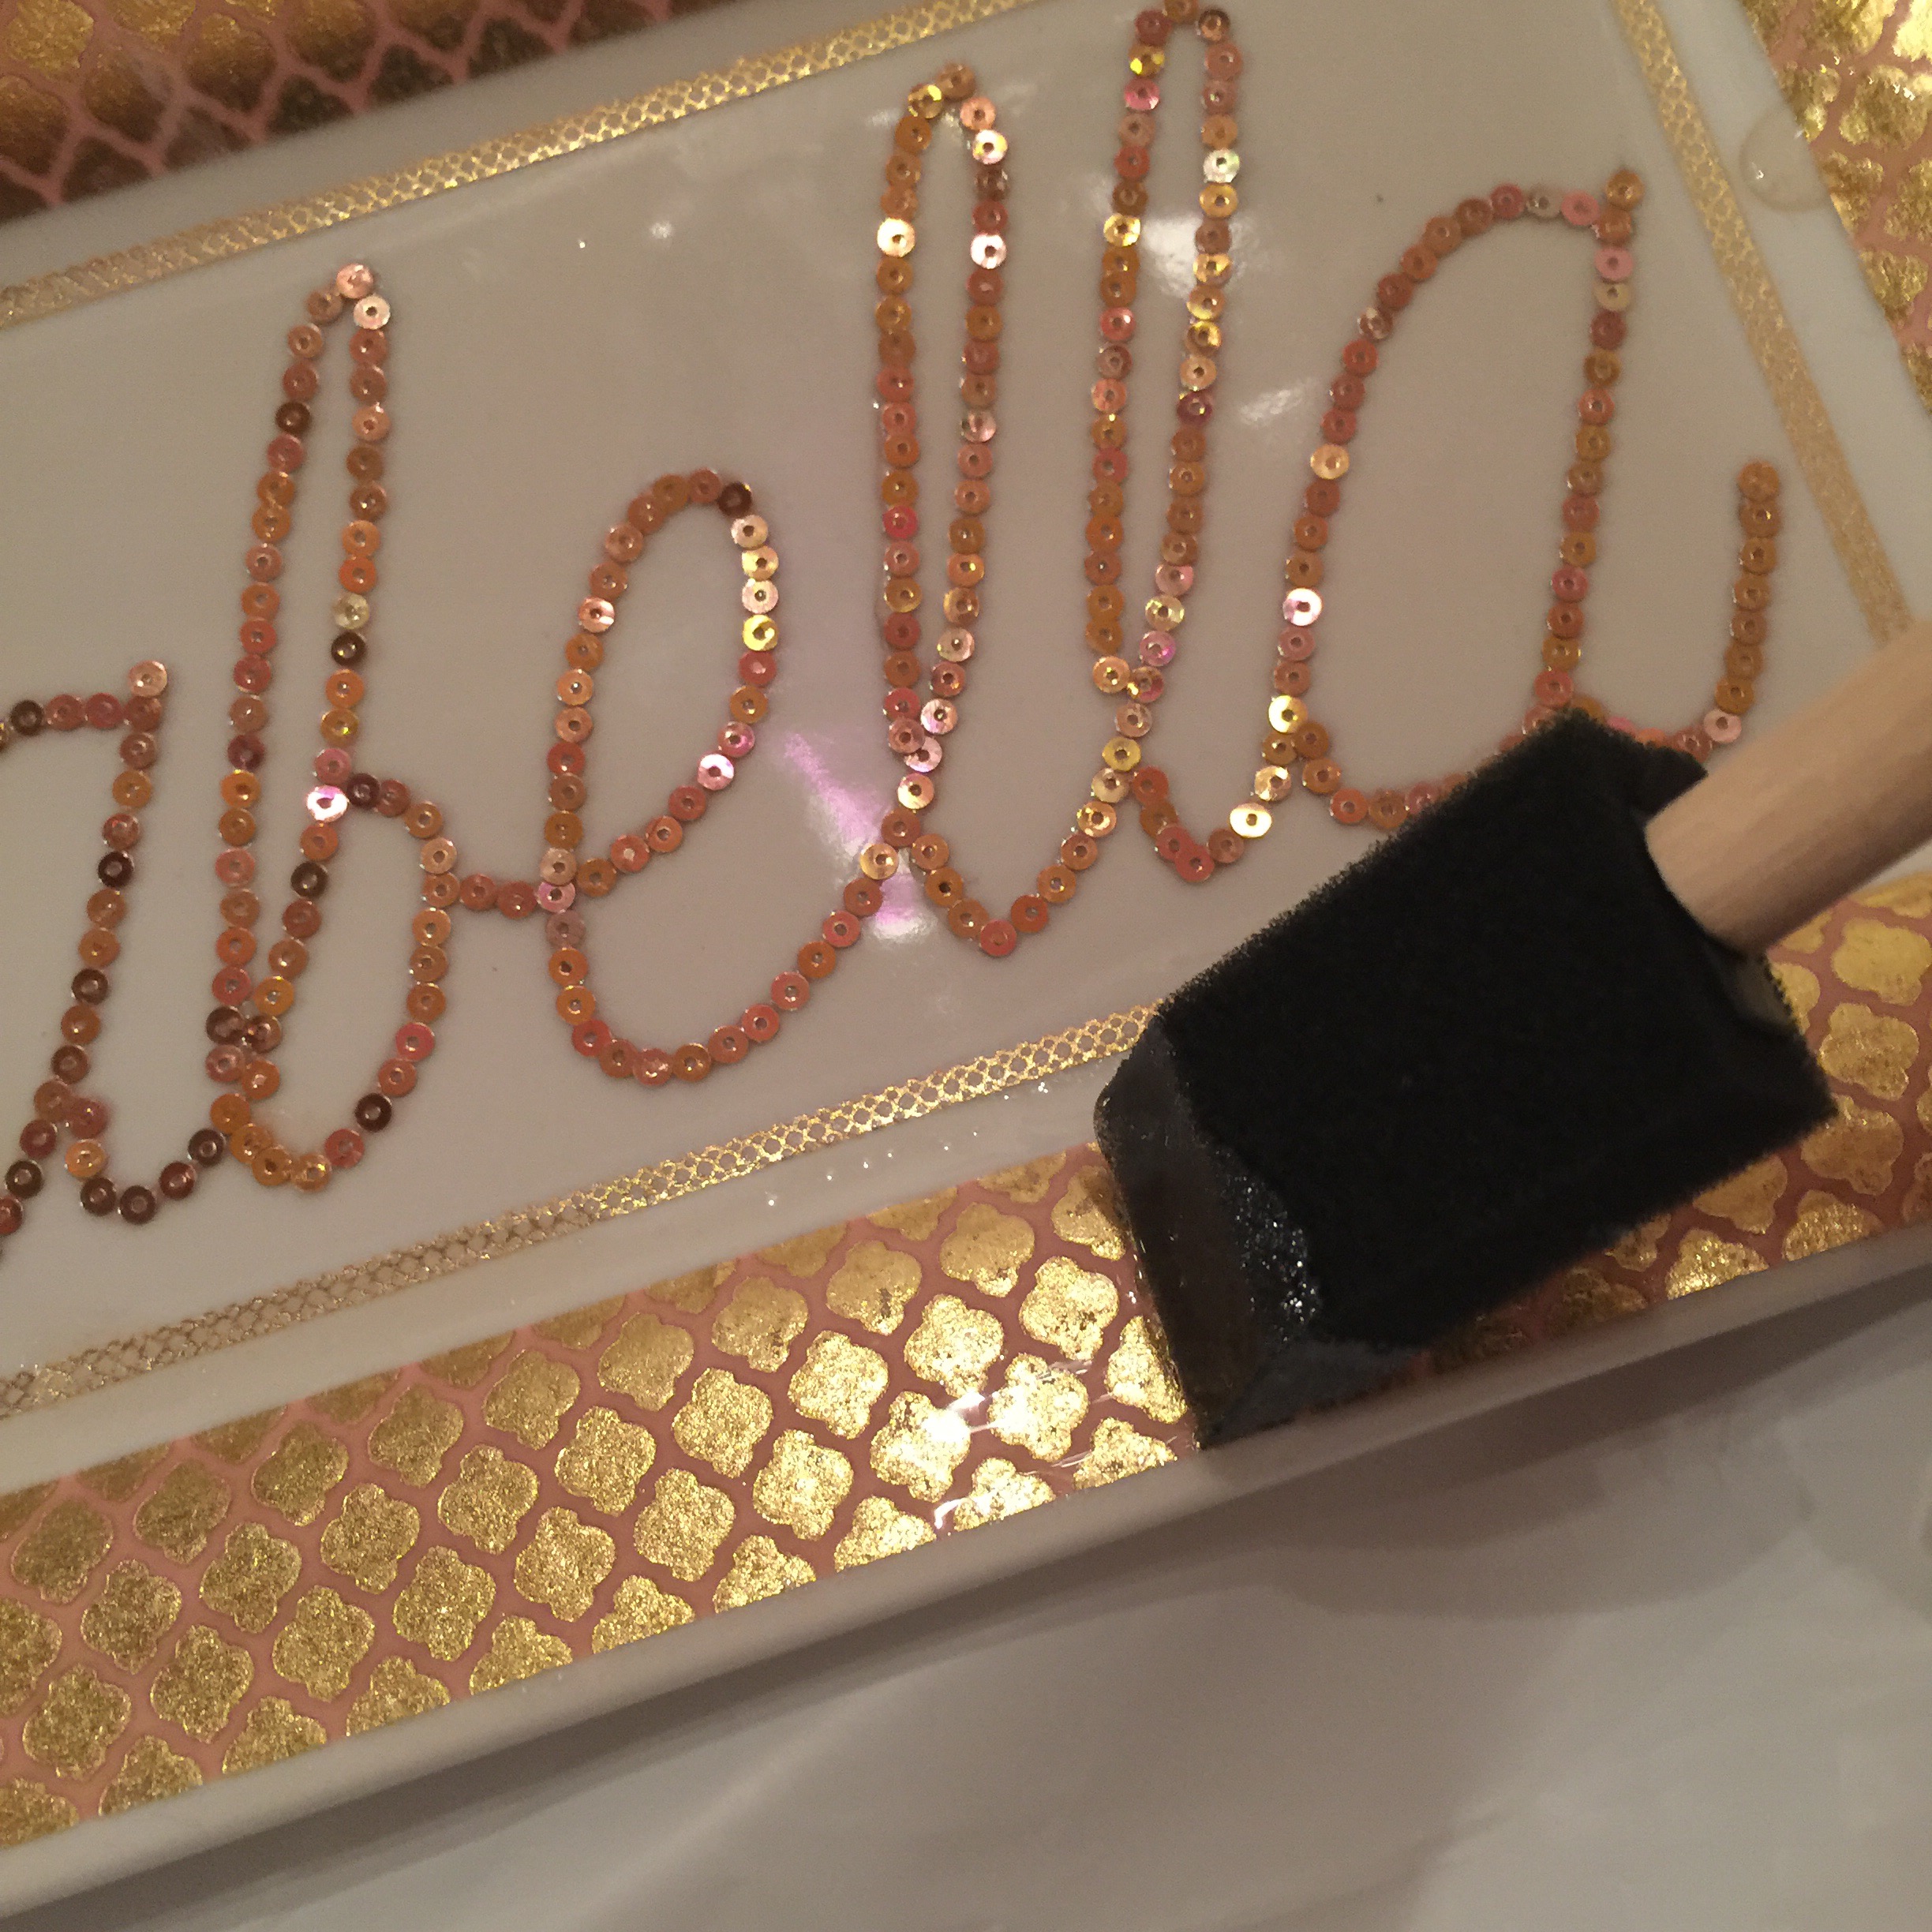 I used a sponge on the tape areas, I didn’t need or want it super thick there, just enough to seal it in place. This also let me control its placement along the perimeter of the plate without it dripping off in the wrong direction. I started w the perimeter so the epoxy would fall into the cavity of the plate. You can see it there in the top corner of the picture dripping onto the cavity.
I was a bit nervous to use it because when it’s poured over crystals the crystals just lose ALL their muchness, so I thought the sequins might too. But they didn’t. So then I just poured the rest over the sequins.
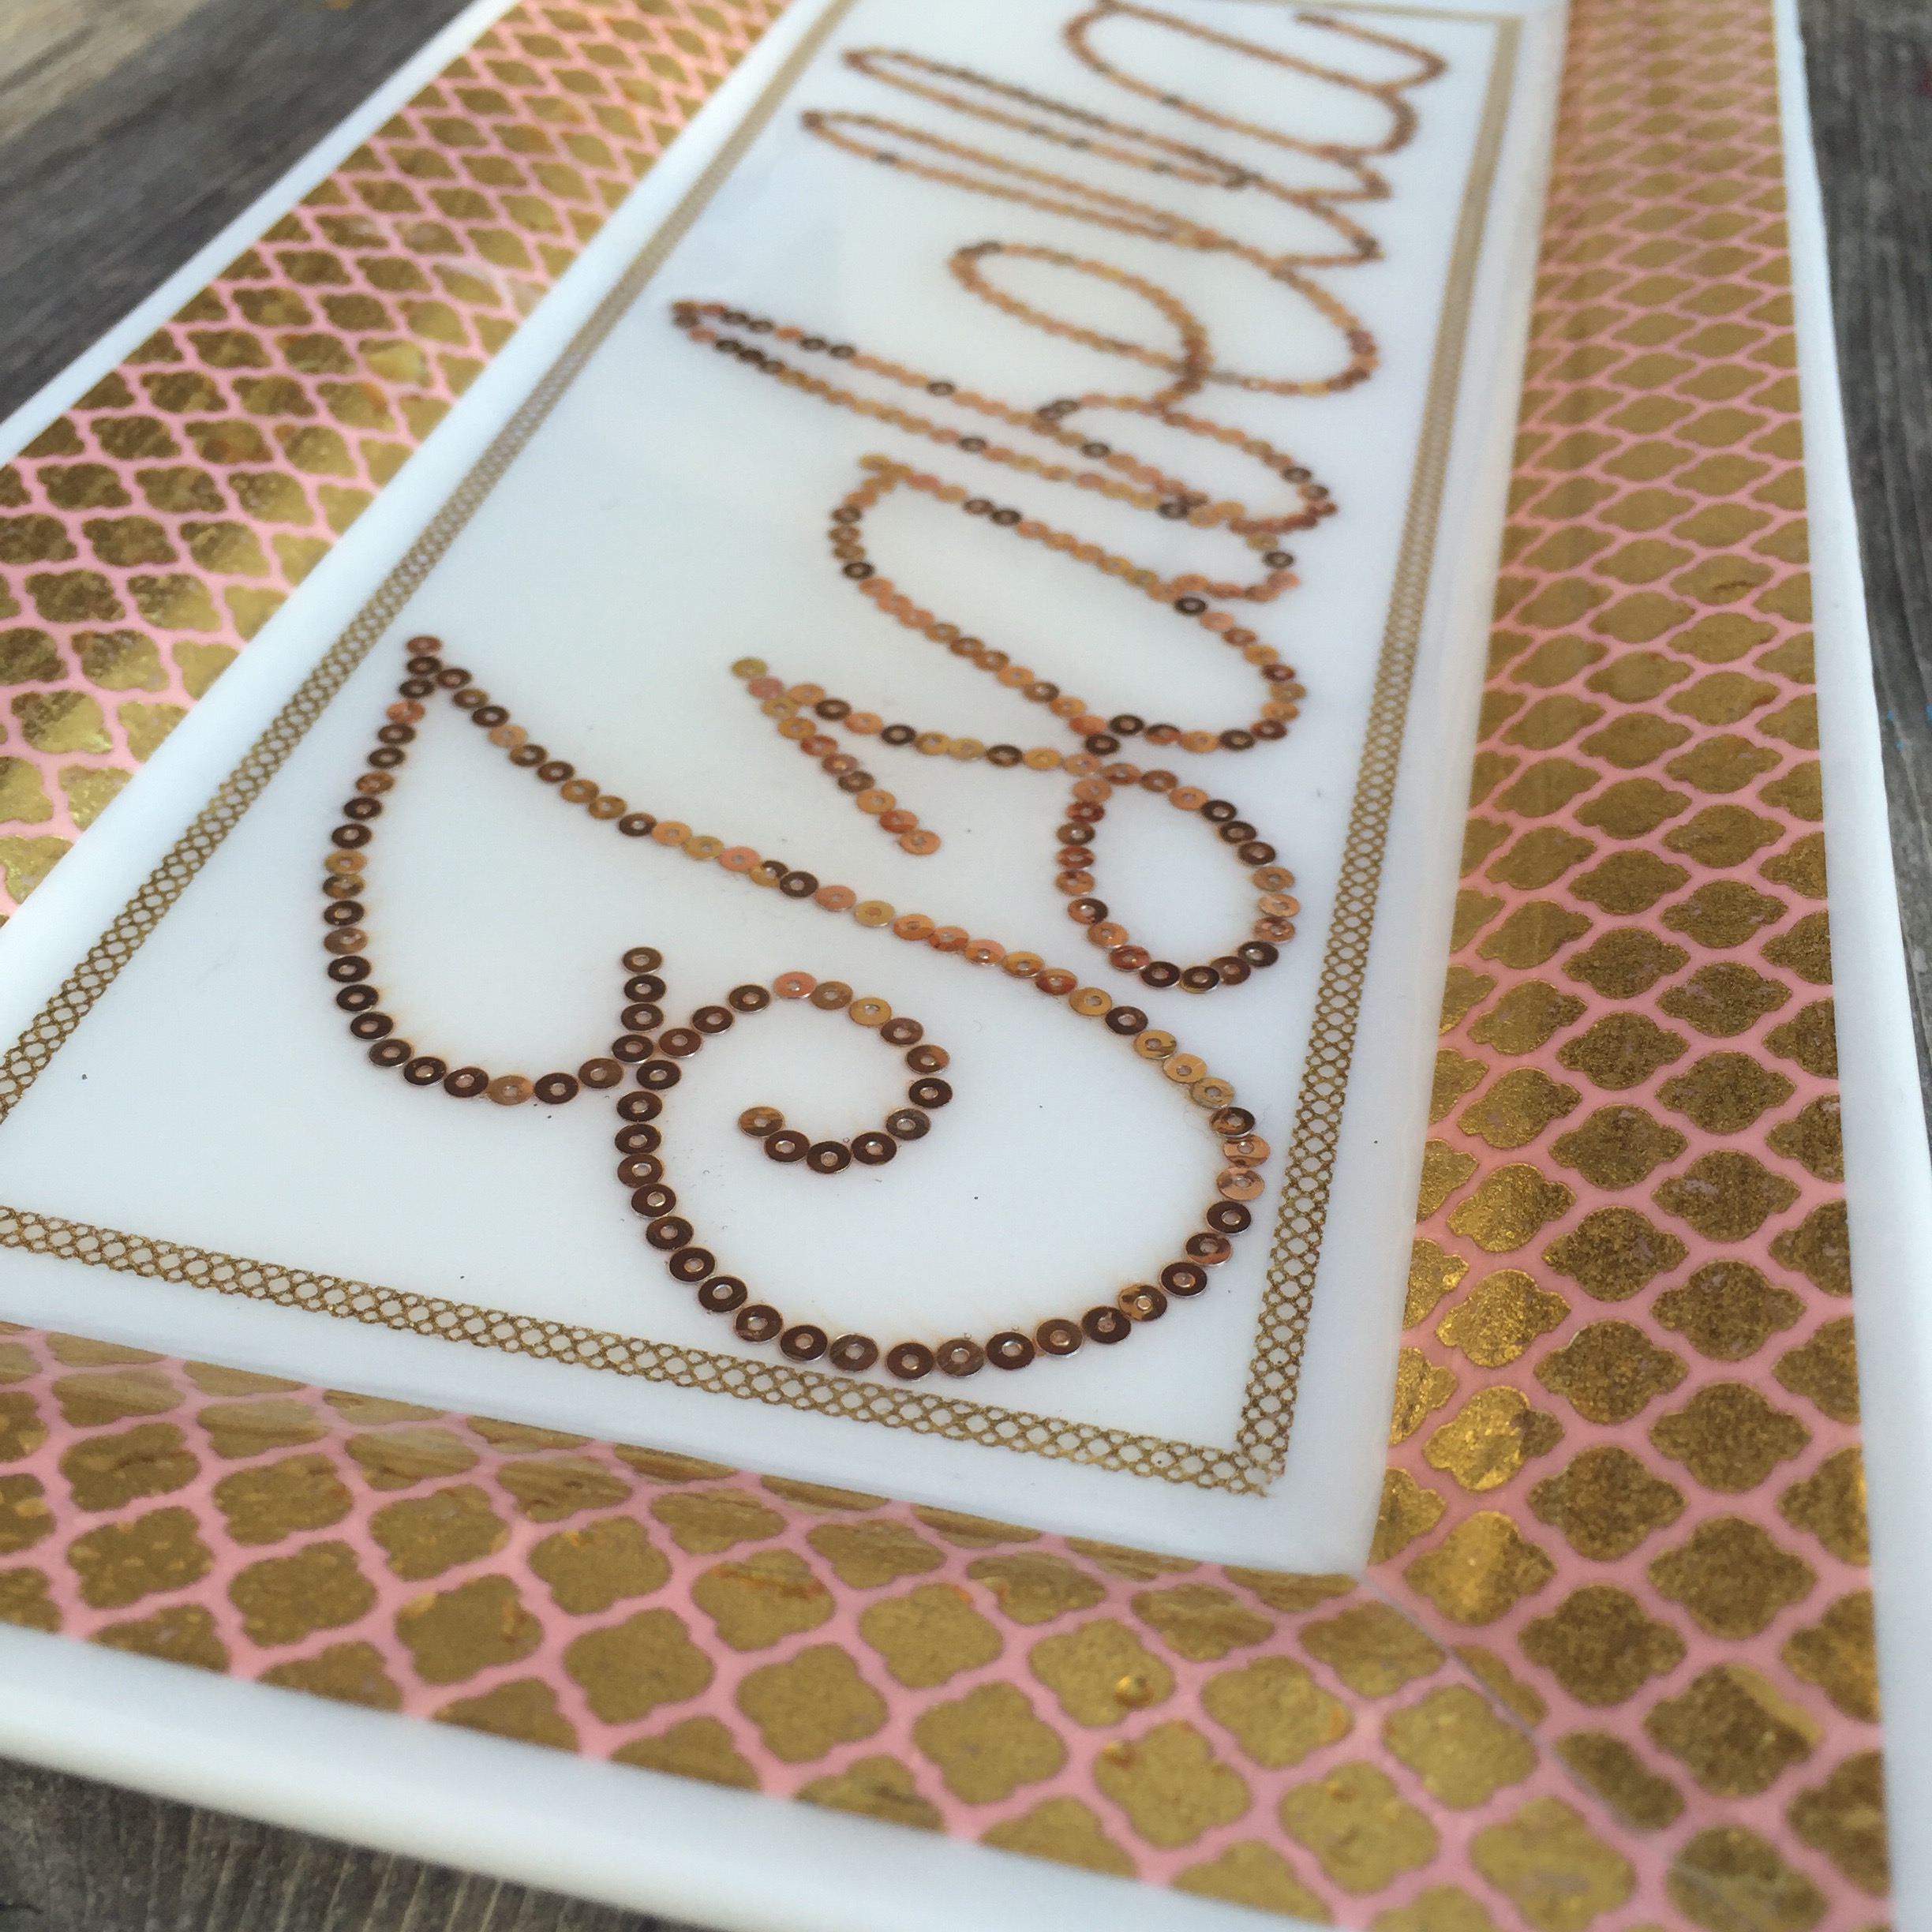
I spread and flattened it with the sponge. It was totally level and smooth, no sequins were protruding above the epoxy and the washi tape looks absolutely etched on there.
As the epoxy dried it did roll down the edges into the plate but enough stayed put to act as a sealer and protector. The sequins look embedded in there. It’s really quite gorgeous, if I do say so myself.
Here’s some more pics because they’re free.
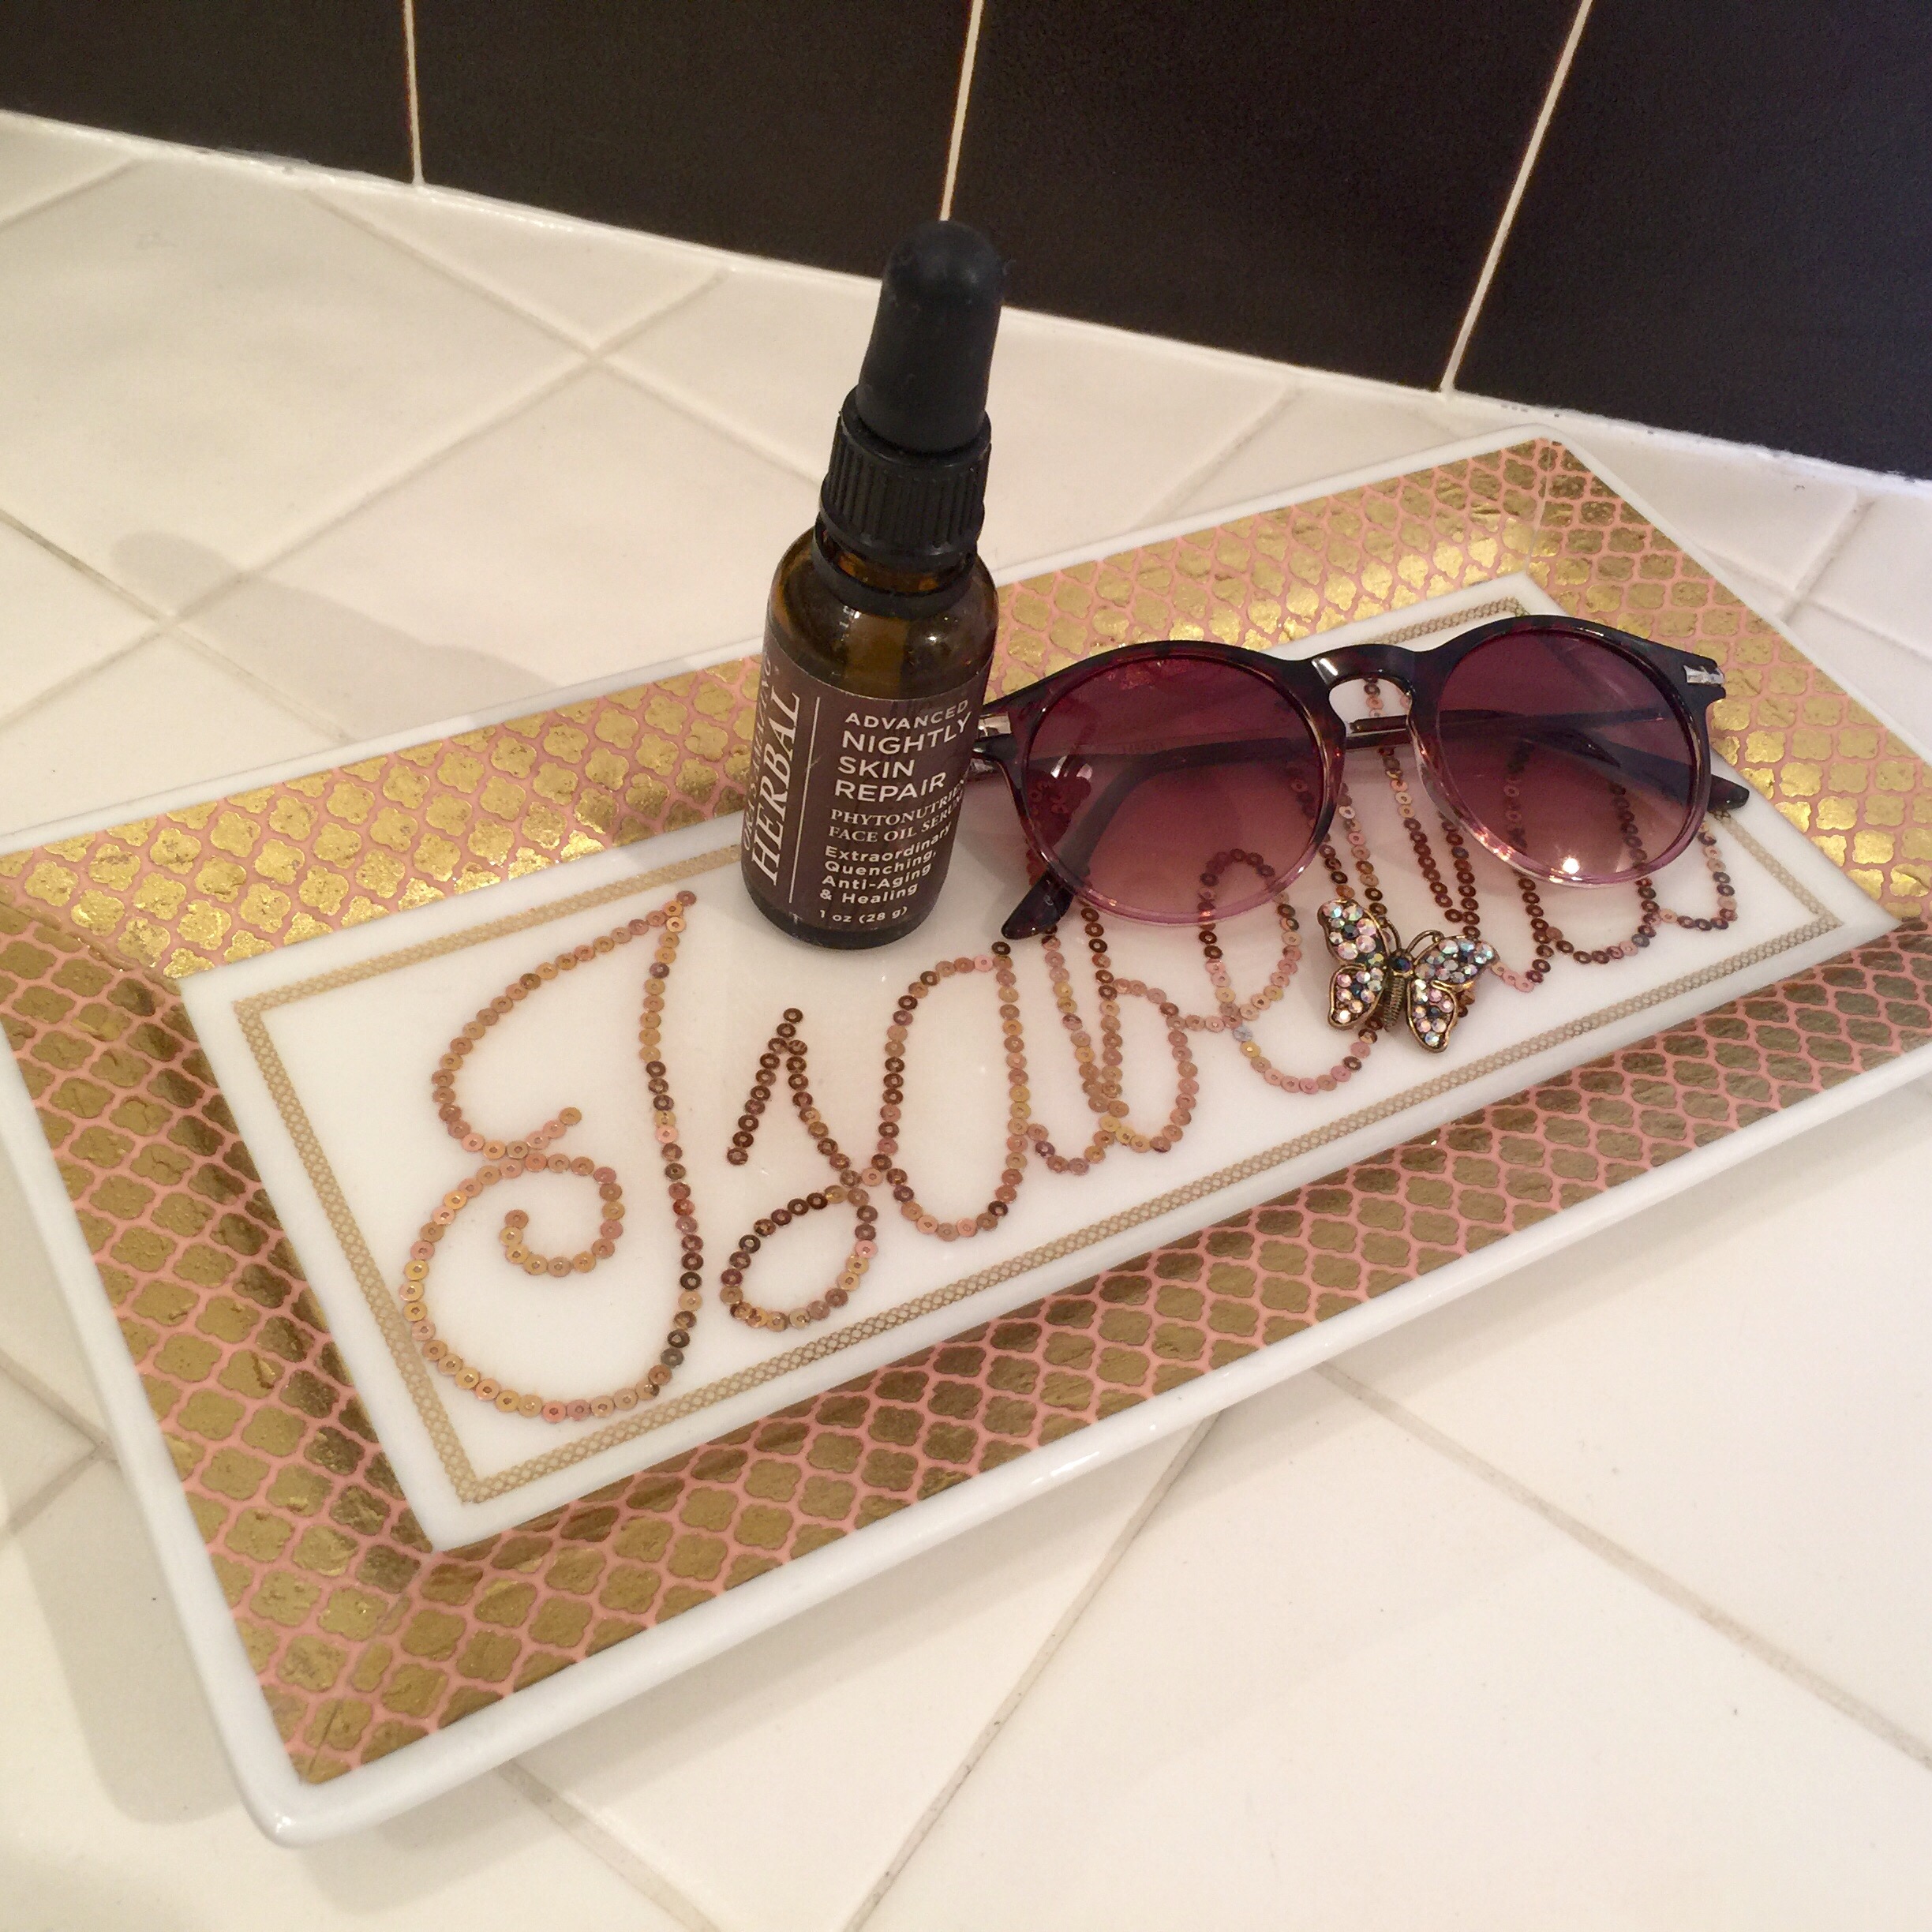
Reflecting the sunlight on the sequins and glass-coated finish.
 The tape as etching up close.


This plate is amazing!!! That’s such an incredible gift!!! Well done Tova!!